Watch it draw itself · tap to replay
How to Draw a Handshake
Draw a handshake in 10 easy steps, about 8 minutes. Free, with a printable worksheet.
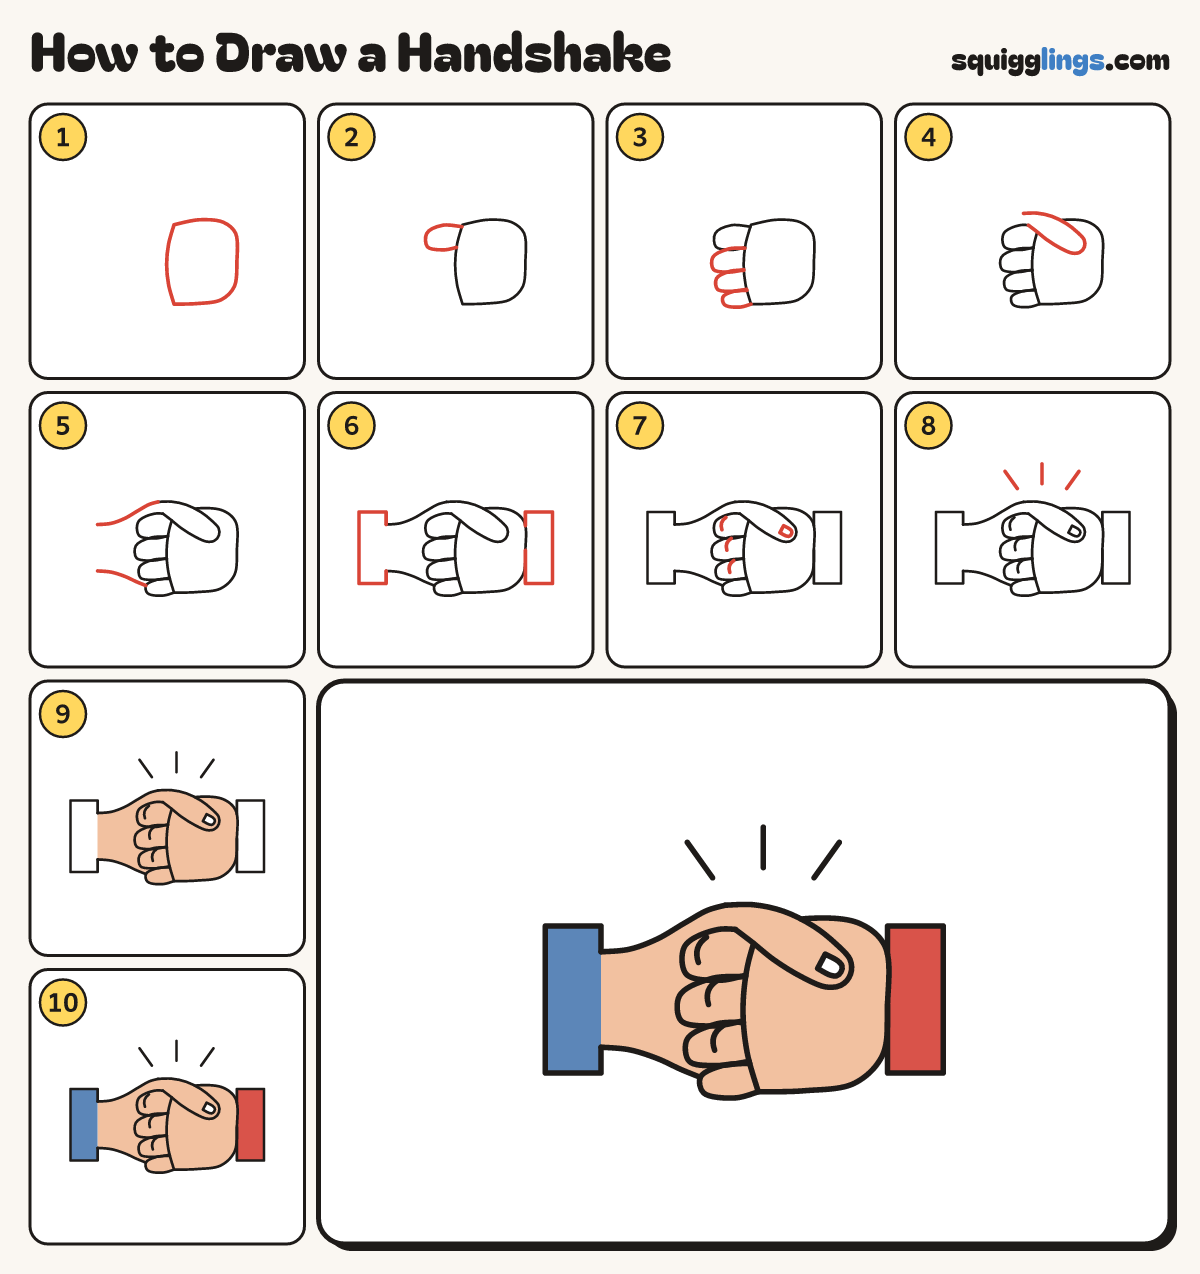
Each picture adds one red line. Draw that line, then scroll to the next picture. Rub out any dashed helper lines at the end. First up: back of a hand.
Step 1: Back of a hand
In the middle, a little right, draw a soft rounded block, taller than wide, its left side bulging a little.
Tip Leave room on the left for the fingers and the other hand.
Step 2: The top finger
Start at the block's top left corner. Draw a fat sideways U out left, ending on the block lower down.
Step 3: 3 more fingers
Start where the first finger stopped. Draw 3 more curled fingers underneath, ending at the bottom corner.
Tip They stack like fat sausages wrapping round the other hand.
Step 4: The other thumb
Start above the top finger. Draw a fat thumb over the hand to a round tip, back to the finger.
Step 5: The other hand
From the thumb's root curve a line left, ending one finger past the fingertips. Add one under the bottom finger.
Tip Bring the 2 lines closer together at the wrist.
Step 6: Sleeve cuffs
At the left end of the other hand draw a tall cuff box. Add one on the near hand's right.
Step 7: Nail and knuckles
Draw a small rounded nail near the thumb tip. Add a knuckle curve on each of the top 3 fingers.
Step 8: Shine lines
Above the hands draw 3 short straight lines fanning up, for a little shine.
Step 9: Peach hands
Colour both hands, the fingers and the thumb peach, leaving the nail white.
Step 10: Blue and red sleeves
Colour the left sleeve blue and the right sleeve red. Go over your lines and your handshake is done!
Your finished drawing
Follow the steps above and this is where you end up: a handshake, drawn by you.
Every step in one picture