Watch it draw itself · tap to replay
How to Draw a Hand Waving
Draw a hand waving in 10 easy steps, about 8 minutes. Free, with a printable worksheet.
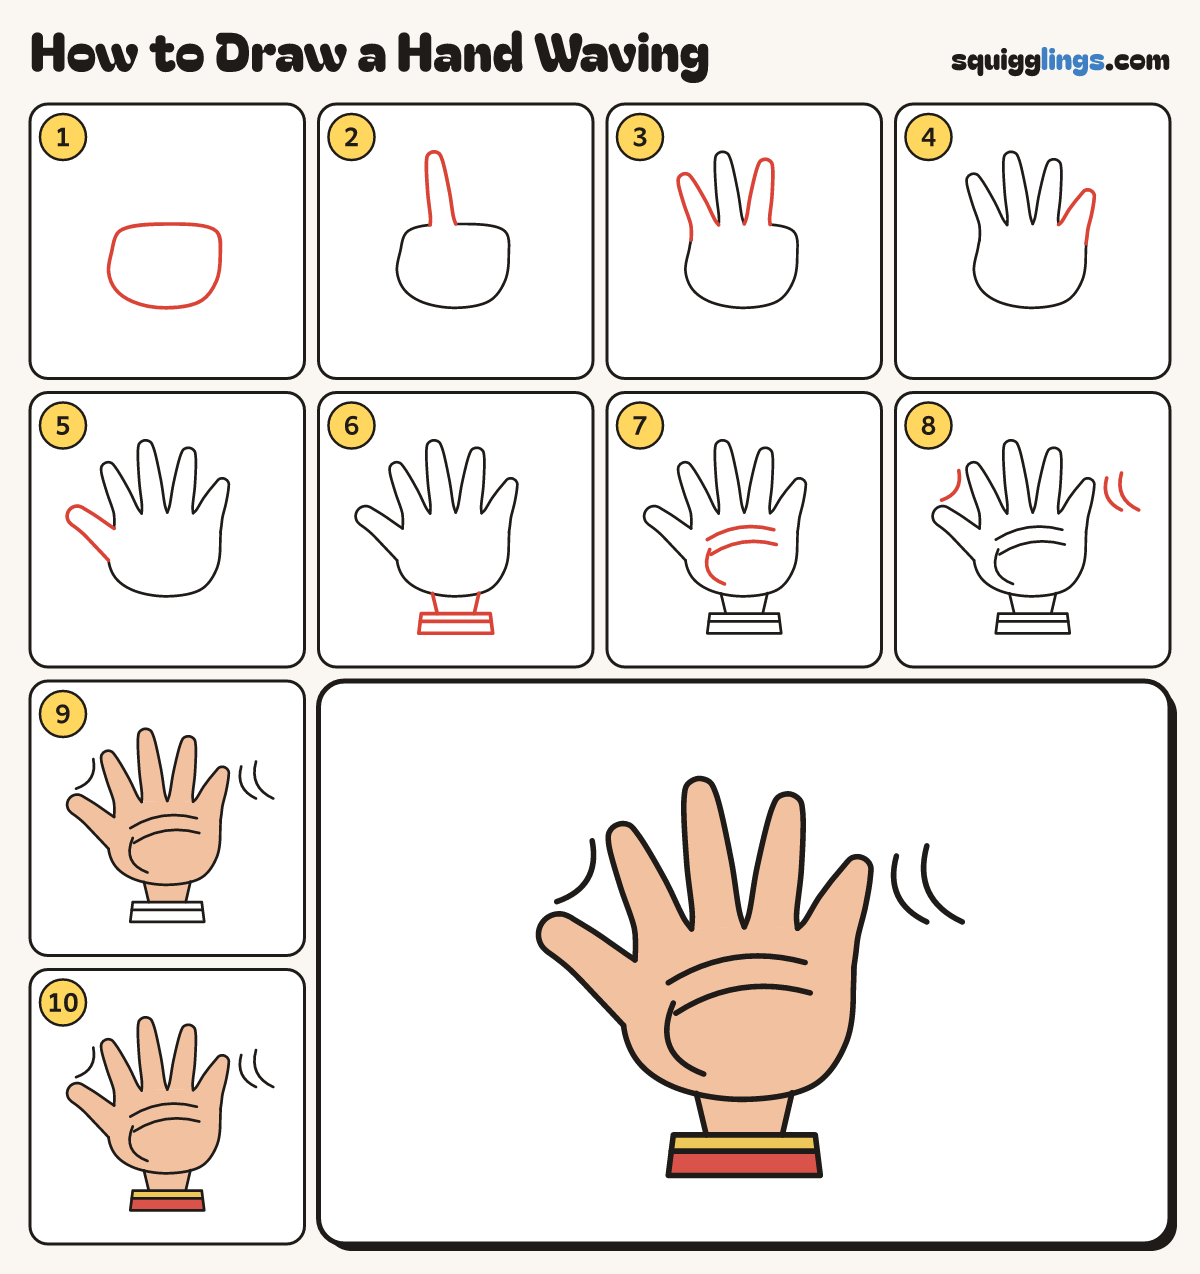
Each picture adds one red line. Draw that line, then scroll to the next picture. Rub out any dashed helper lines at the end. First up: the palm.
Step 1: The palm
In the middle, draw a big palm like a fat egg with a flat top, bulging out on the left.
Tip Leave lots of room above for the spread-out fingers.
Step 2: The middle finger
Start on the palm top, left of middle. Draw a tall finger, round the thin tip, back to the palm.
Step 3: Two more fingers
Start where the middle finger meets the palm. Draw a shorter finger each side, leaning out, back to the palm.
Tip The fingers fan out like rays of the sun, each narrower at the tip.
Step 4: The little finger
Start where the ring finger meets the palm. Draw the shortest finger leaning out, down to the palm's side.
Step 5: The thumb
Start on the palm's left bulge. Draw a fat thumb out left, round the tip, back to the palm.
Step 6: Wrist and sleeve
Start under the palm. Draw 2 wrist lines down to a wide sleeve. Add a line across near its top.
Step 7: Palm lines
Inside the palm, draw 2 curved lines across, one under the other, and 1 from the thumb toward the wrist.
Step 8: Waving lines
Beside the hand, draw 3 short curved lines, 2 on the right and 1 on the left, for waving.
Step 9: Peach skin
Colour the palm, fingers, thumb and wrist peach.
Step 10: Cuff and sleeve
Colour the cuff yellow and the sleeve red. Go over your lines and your waving hand is done.
Your finished drawing
Follow the steps above and this is where you end up: a hand waving, drawn by you.
Every step in one picture