Watch it draw itself · tap to replay
How to Draw a Halloween Candy Bucket
Draw a Halloween candy bucket in 11 easy steps, about 8 minutes. Free, with a printable worksheet.
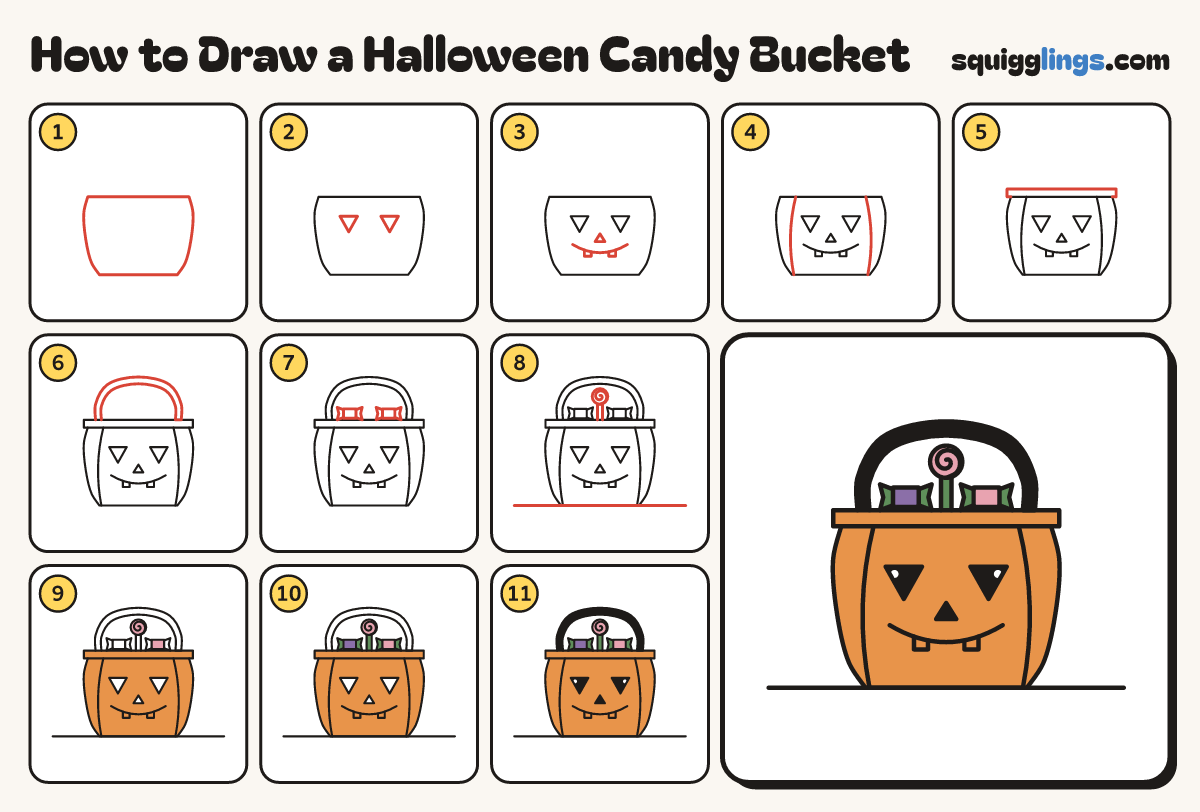
Each picture adds one red line. Draw that line, then scroll to the next picture. Rub out any dashed helper lines at the end. First up: the bucket.
Step 1: The bucket
Below the middle, draw a bucket as wide as your hand: flat top, sides bulging like a pumpkin, flat bottom.
Tip Leave room above the bucket for the handle and the candy.
Step 2: Triangle eyes
On the bucket, draw 2 triangle eyes pointing down, like a jack-o-lantern. Add a tiny white shine in each.
Step 3: Nose and toothy grin
Draw a small triangle nose. Start under the left eye and draw a big toothy smile to the right eye.
Step 4: Rib lines
Draw a curved rib line down each side of the bucket, outside the eyes, so it looks like a pumpkin.
Step 5: The rim
Across the top of the bucket, draw a thin flat band sticking out a little past both sides.
Step 6: The handle
Start on the left of the rim. Draw a thick arch over to the right end, back to the start.
Step 7: Wrapped candies
Inside the handle, draw 2 wrapped candies on the rim: a small box with a pointed twist at each end.
Step 8: Lollipop and ground
From the rim between the candies, draw a stick up to a round swirly lollipop. Add a ground line.
Step 9: Orange and pink
Colour the bucket and rim orange, around the eyes and nose. Colour one candy and the lollipop pink.
Tip Go over your lines first.
Step 10: Purple and green
Colour the other candy purple. Colour the candy twists and the lollipop stick green.
Step 11: Black eyes and handle
Colour the eyes, nose and handle black, leaving the shines white. Your bucket is ready for trick-or-treating!
Your finished drawing
Follow the steps above and this is where you end up: a Halloween candy bucket, drawn by you.
Every step in one picture