Watch it draw itself · tap to replay
How to Draw a Guineafowl
Draw a guineafowl in 12 easy steps, about 9 minutes. Free, with a printable worksheet.
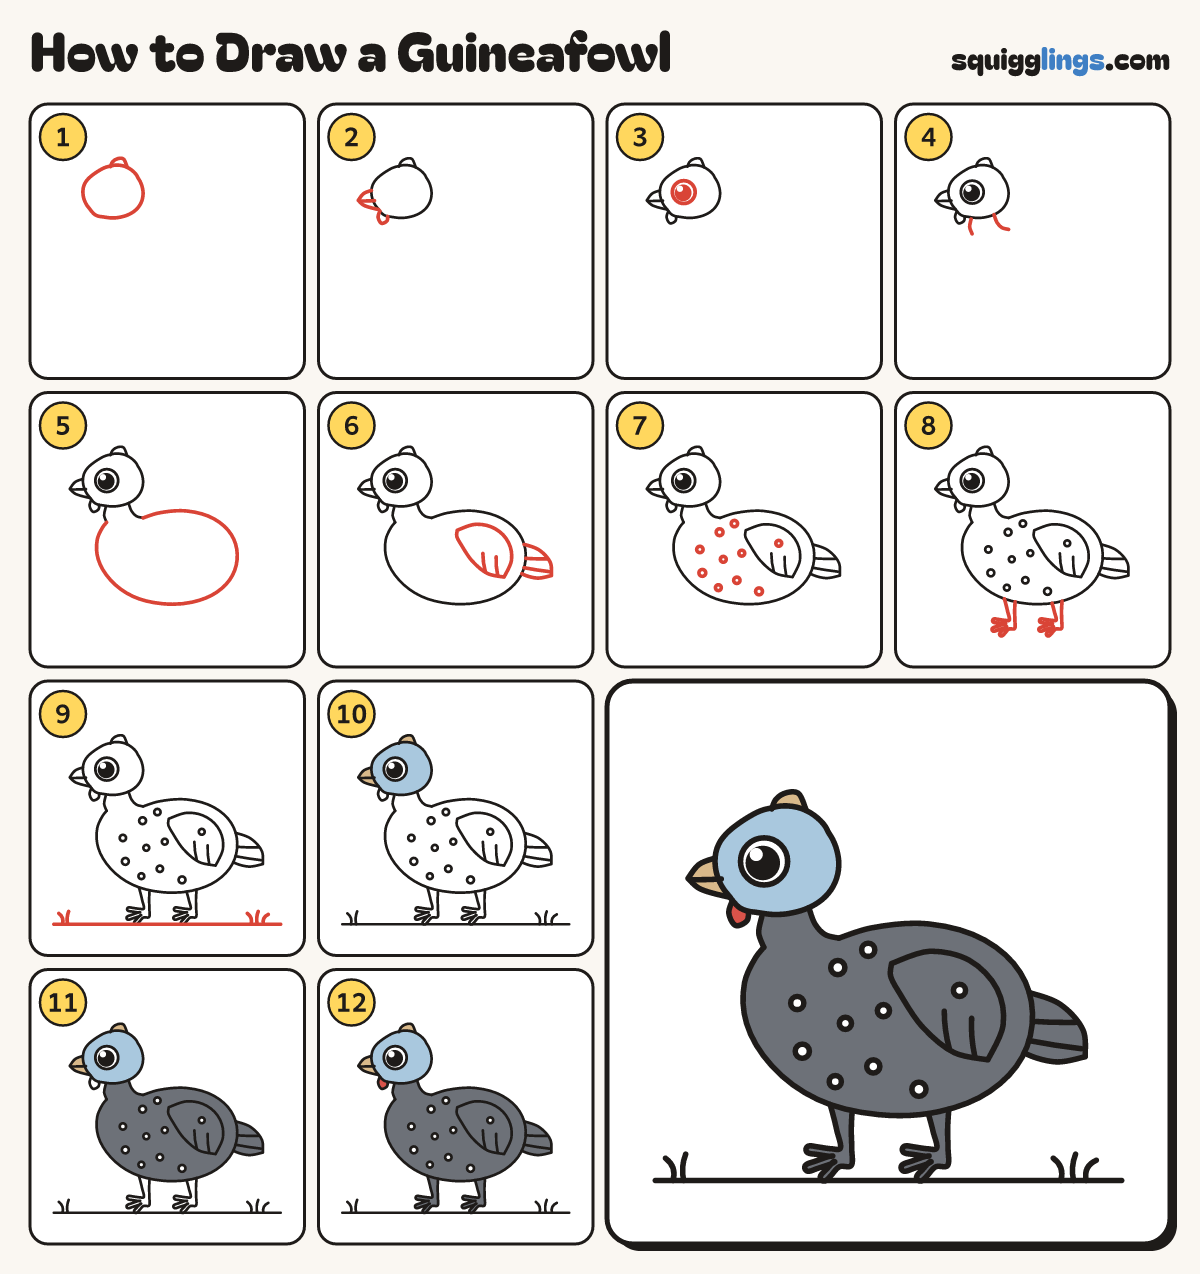
Each picture adds one red line. Draw that line, then scroll to the next picture. Rub out any dashed helper lines at the end. First up: head with a helmet.
Step 1: Head with a helmet
Left of the middle draw a small round head. On top, start and draw a low hump back to it.
Tip The head is tiny; the body will be huge.
Step 2: Beak and wattle
On the front of the head draw a short fat beak with a mouth line. Hang a teardrop below.
Step 3: One big eye
Behind the beak draw a big round eye. Colour a big black dot in it with a white speck.
Step 4: Neck
Start under the head and draw 2 short neck lines down, curving the back one out at the end.
Step 5: Big round body
Start at the back neck line. Draw one huge round body like a ball, stopping at the front neck line.
Step 6: Wing and tail
On the back half of the body draw a soft teardrop wing, point at the back. Add a fan tail.
Step 7: Speckles
All over the body and wing draw little round speckles, spread out, none touching.
Tip Scatter them like stars, never in neat lines.
Step 8: 2 legs
Start on the tummy. Draw a thin leg down to 3 spread toes and back up. Add another.
Step 9: Ground and grass
Start at the left edge and draw a ground line under the feet to the right edge. Add grass tufts.
Step 10: Blue head, tan beak
Colour the tiny head pale blue, leaving the eye white. Colour the beak and helmet bump tan.
Step 11: Dark grey body
Colour the neck, body, wing and tail dark grey, going round every speckle.
Step 12: Red wattle, grey legs
Colour the wattle red and the legs and toes dark grey. Go over your lines and your guineafowl is done!
Your finished drawing
Follow the steps above and this is where you end up: a guineafowl, drawn by you.
Every step in one picture