Watch it draw itself · tap to replay
How to Draw a Guide Dog
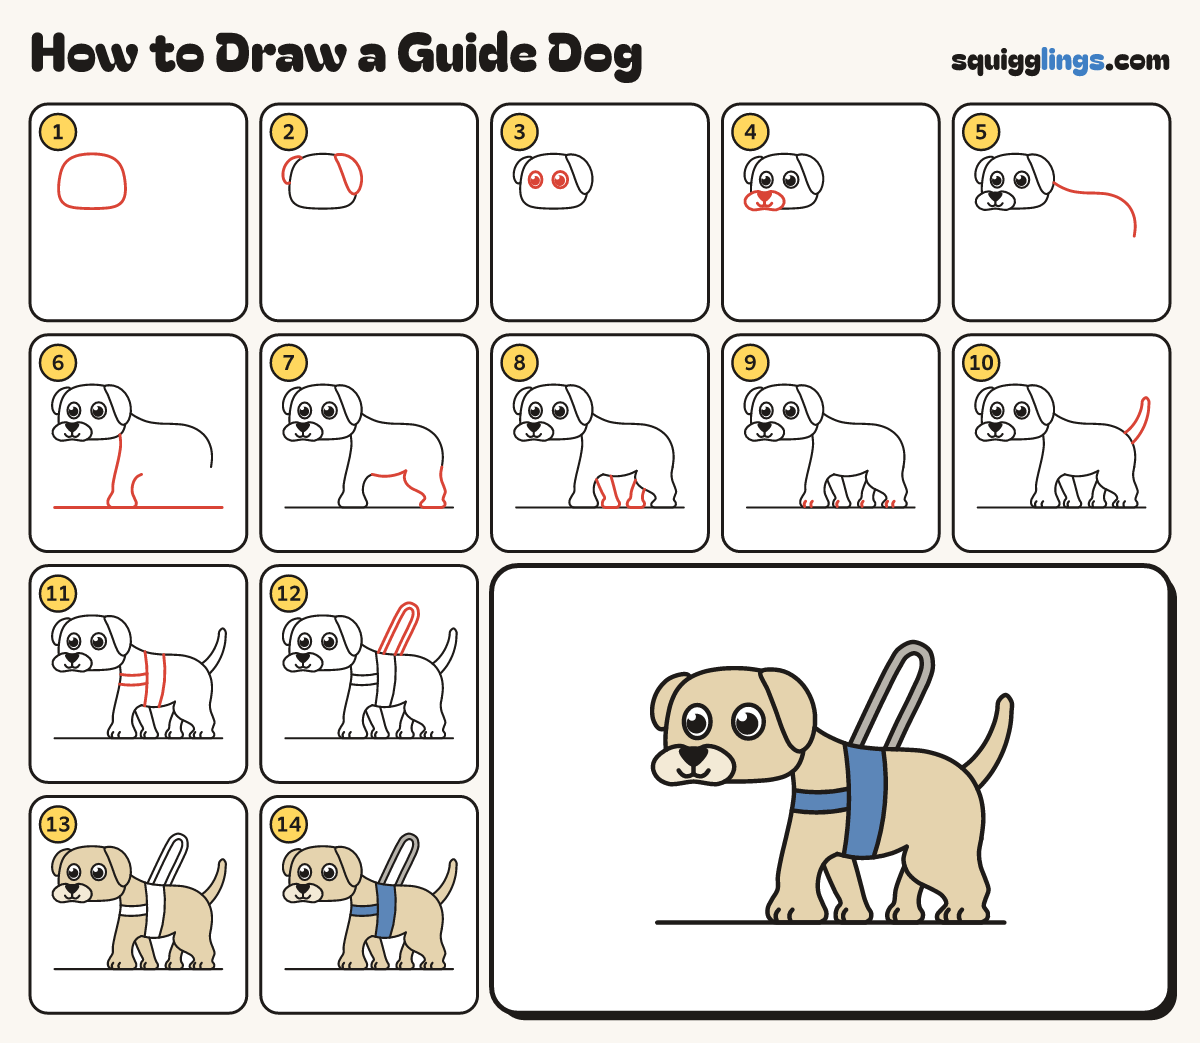
Draw a guide dog in 14 easy steps, about 11 minutes. Free, with a printable worksheet.
Each picture adds one red line. Draw that line, then scroll to the next picture. Rub out any dashed helper lines at the end. First up: big soft head.
Step 1: Big soft head
Near the top left draw a big soft head, wider than tall, with round cheeks and a flat top.
Tip The head is almost as long as the body. Leave room on the right.
Step 2: Soft flop ears
On the right corner draw a soft triangle ear hanging down. Draw a smaller ear peeking out on the left.
Tip The big ear hangs over the side of the head. Rub out the head line inside it.
Step 3: Big eyes
On the middle of the head, a little to the left, draw 2 big oval eyes with black dots.
Tip Leave a tiny white shine in each eye.
Step 4: Snout and smile
Under the left eye draw a snout poking past the head. From its black nose, draw down into a w.
Tip Rub out the head line inside the snout.
Step 5: Long back
Start behind the big ear. Draw a long back, curl round the bottom, stop below chin level.
Tip The line dips down the neck, then runs almost flat.
Step 6: Front leg
Draw a ground line. From under the chin, draw a leg down to a plump paw, then back up.
Tip The leg leans forward and gets thinner near the paw.
Step 7: Tummy and back leg
From the front leg draw the tummy. Then a round thigh down to a paw and up to the bottom.
Tip The back leg bends just above the paw.
Step 8: Far legs
Under the tummy draw 2 more legs peeking out: one leaning back, one leaning forward.
Tip Only part of each far leg shows. All 4 paws sit on the ground.
Step 9: Toes
On each big paw draw 2 short curved toe lines. Draw 1 on each small paw.
Step 10: Thick tail
Start on top of the bottom. Draw a thick tail pointing up to a round tip, and back down.
Step 11: The harness
Behind the front leg draw 2 lines from back to tummy. Add 2 lines across to the chest.
Step 12: The handle
Start on the harness, on the back. Draw a long thin loop leaning backwards and stop on the harness.
Tip This is the handle a person holds so the dog can guide them.
Step 13: Sandy yellow fur
Colour the snout cream. Colour the fur sandy yellow, around the harness. Leave the eyes white.
Step 14: Blue harness
Colour the harness blue and the handle grey.
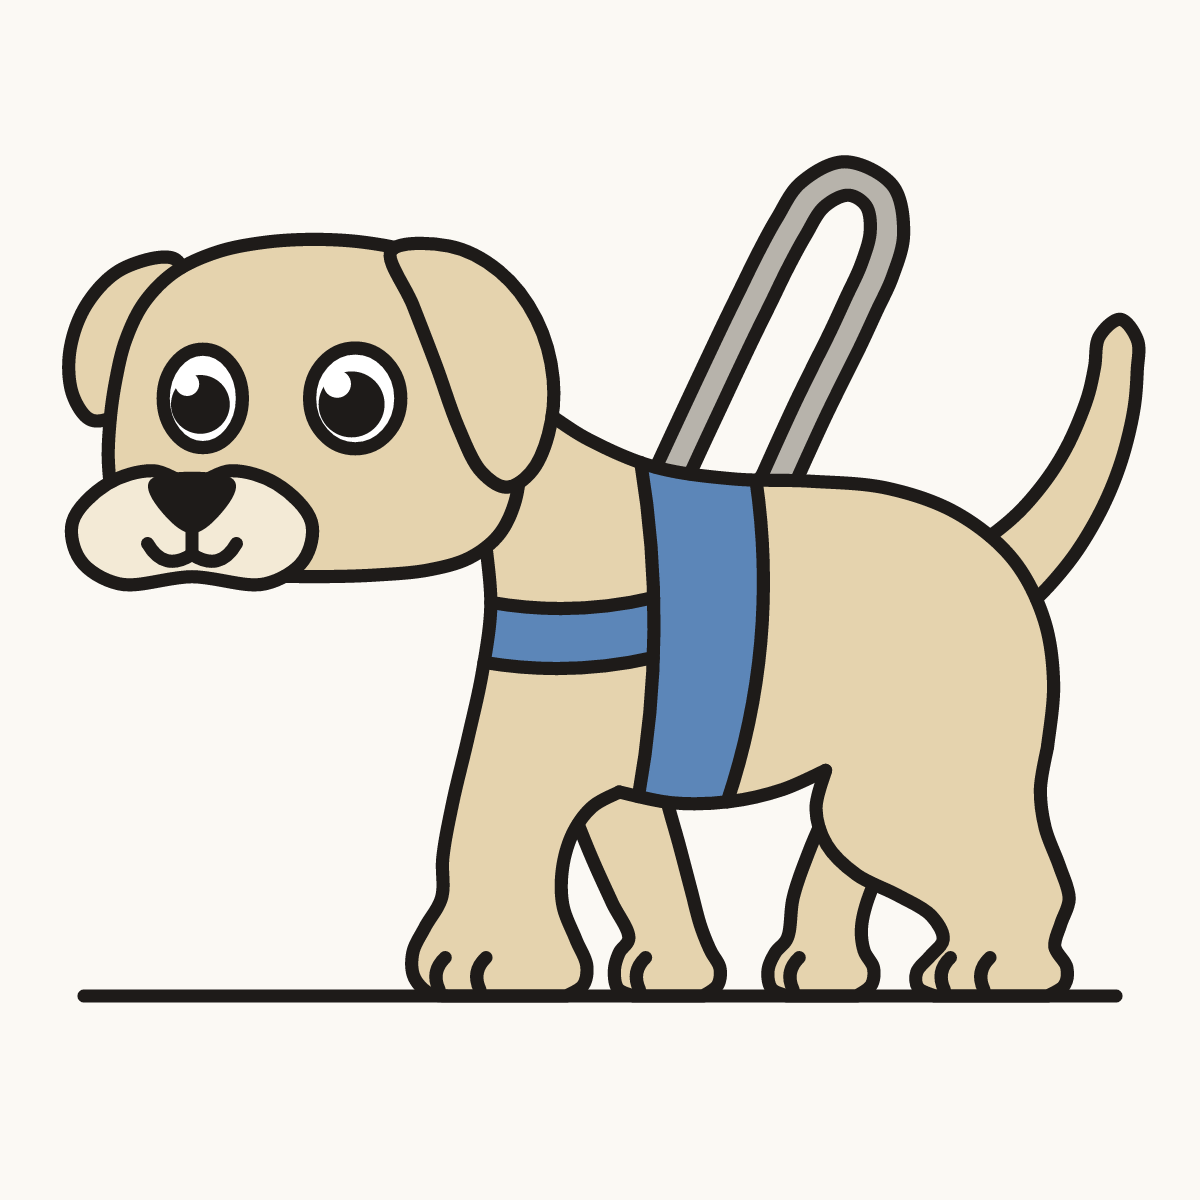
Your finished drawing
Follow the steps above and this is where you end up: a guide dog, drawn by you.
Every step in one picture