Watch it draw itself · tap to replay
How to Draw a Garden Hose
Draw a garden hose in 10 easy steps, about 8 minutes. Free, with a printable worksheet.
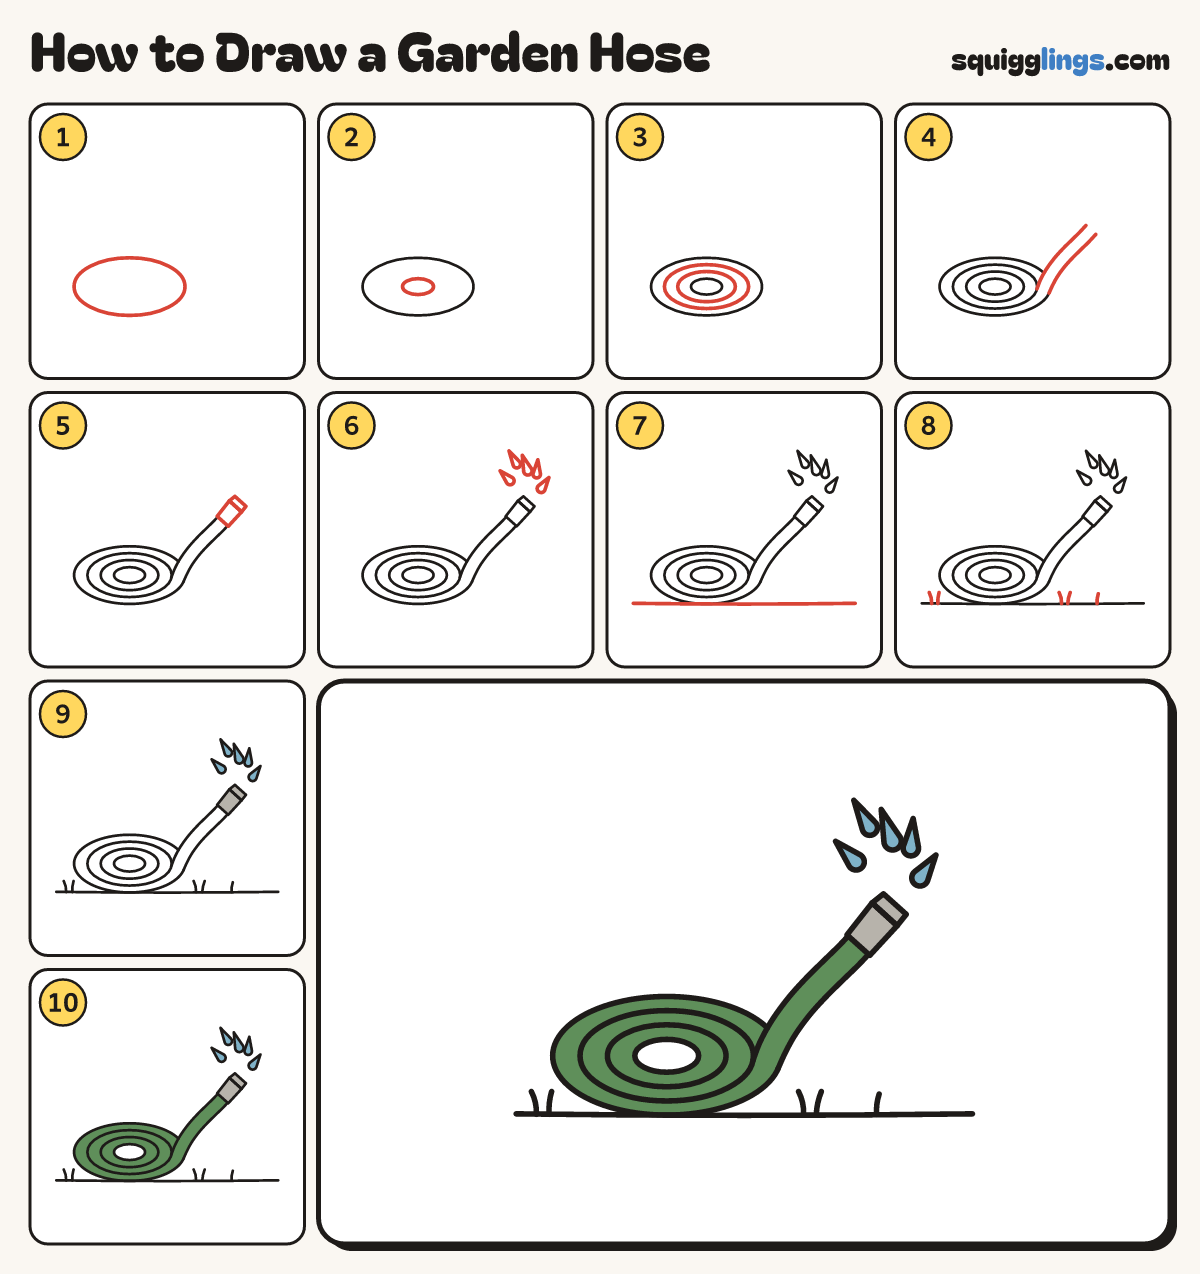
Each picture adds one red line. Draw that line, then scroll to the next picture. Rub out any dashed helper lines at the end. First up: the coil.
Step 1: The coil
On the left draw a big wide egg lying down, as wide as your hand, for the coil of hose.
Step 2: The hole
Right in the middle draw a small wide egg for the hole in the coil.
Step 3: Loop lines
Between the big egg and the hole draw 2 more wide eggs, one inside the other, like rings of hose.
Step 4: Hose end
From the outer ring's right side, snake 2 close lines up and right, and stop for the nozzle.
Tip Rub out the big egg's line between the 2 lines, so the hose runs out of the coil.
Step 5: The nozzle
On the hose end draw a slanted box nozzle, wider than the hose, with a smaller box on its tip.
Step 6: Spray
Above the nozzle draw 5 water drops flying out in a fan, each a small teardrop pointing away.
Step 7: The ground
Draw a long ground line touching the coil's bottom, from near the left edge to near the right.
Step 8: Grass
Start on the ground and flick up 5 short grass blades, 2 left of the coil and 3 right.
Step 9: Grey nozzle, blue water
Go over your lines. Colour the nozzle grey and every water drop blue.
Step 10: Green hose
Colour the coil and hose end green, leaving the hole uncoloured. Your garden hose is done!
Your finished drawing
Follow the steps above and this is where you end up: a garden hose, drawn by you.
Every step in one picture