Watch it draw itself · tap to replay
How to Draw a Fountain
Draw a fountain in 11 easy steps, about 8 minutes. Free, with a printable worksheet.
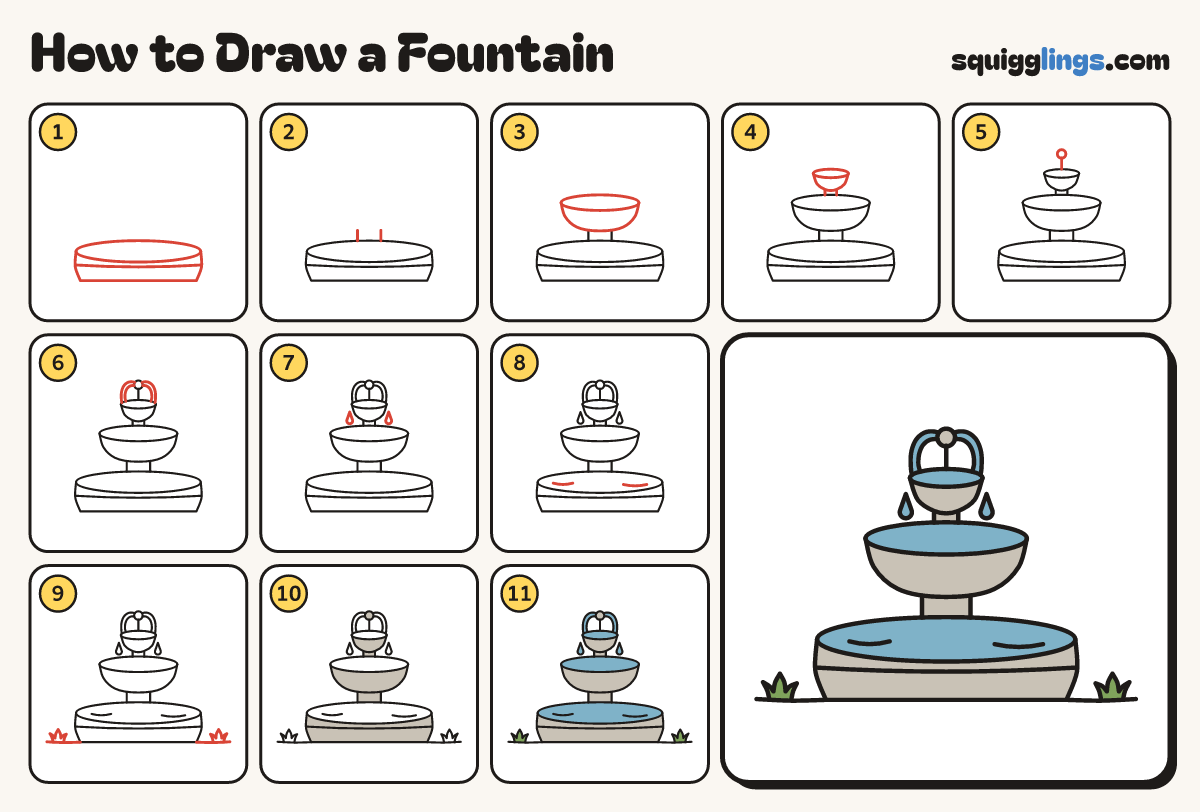
Each picture adds one red line. Draw that line, then scroll to the next picture. Rub out any dashed helper lines at the end. First up: the big basin.
Step 1: The big basin
Draw a wide oval low down. From its ends, curve sides down to a flat bottom. Add a band across.
Step 2: The stand
From the back edge of the oval, draw 2 short stand lines up, and stop a finger high.
Step 3: The middle bowl
Above the stand, draw a smaller oval. Curve a cup from its ends down to sit on the stand.
Step 4: The top bowl
From the middle oval, draw a tiny neck. On it, draw a small cup that ends in an oval rim.
Step 5: The spout
From the back of the top oval, draw a short stick up to a little ball.
Step 6: Water arcs
From the ball, curve a water arc down into the top bowl on each side.
Step 7: Falling drops
Under each end of the top bowl, draw a little drop falling into the middle bowl.
Step 8: Ripples
On the basin water, draw a short smile ripple on each side of the stand.
Step 9: The ground
Draw a ground line from the basin out to each side. Add a little 3-blade grass tuft near each end.
Step 10: Stone fountain
Colour the basin, the stand, the neck, both bowls and the ball grey, but not the water in the ovals.
Step 11: Blue water, green grass
Colour the ovals, arcs and drops blue and the grass tufts green. Your fountain is done!
Your finished drawing
Follow the steps above and this is where you end up: a fountain, drawn by you.
Every step in one picture