Watch it draw itself · tap to replay
How to Draw a Flying Carpet
Draw a flying carpet in 10 easy steps, about 8 minutes. Free, with a printable worksheet.
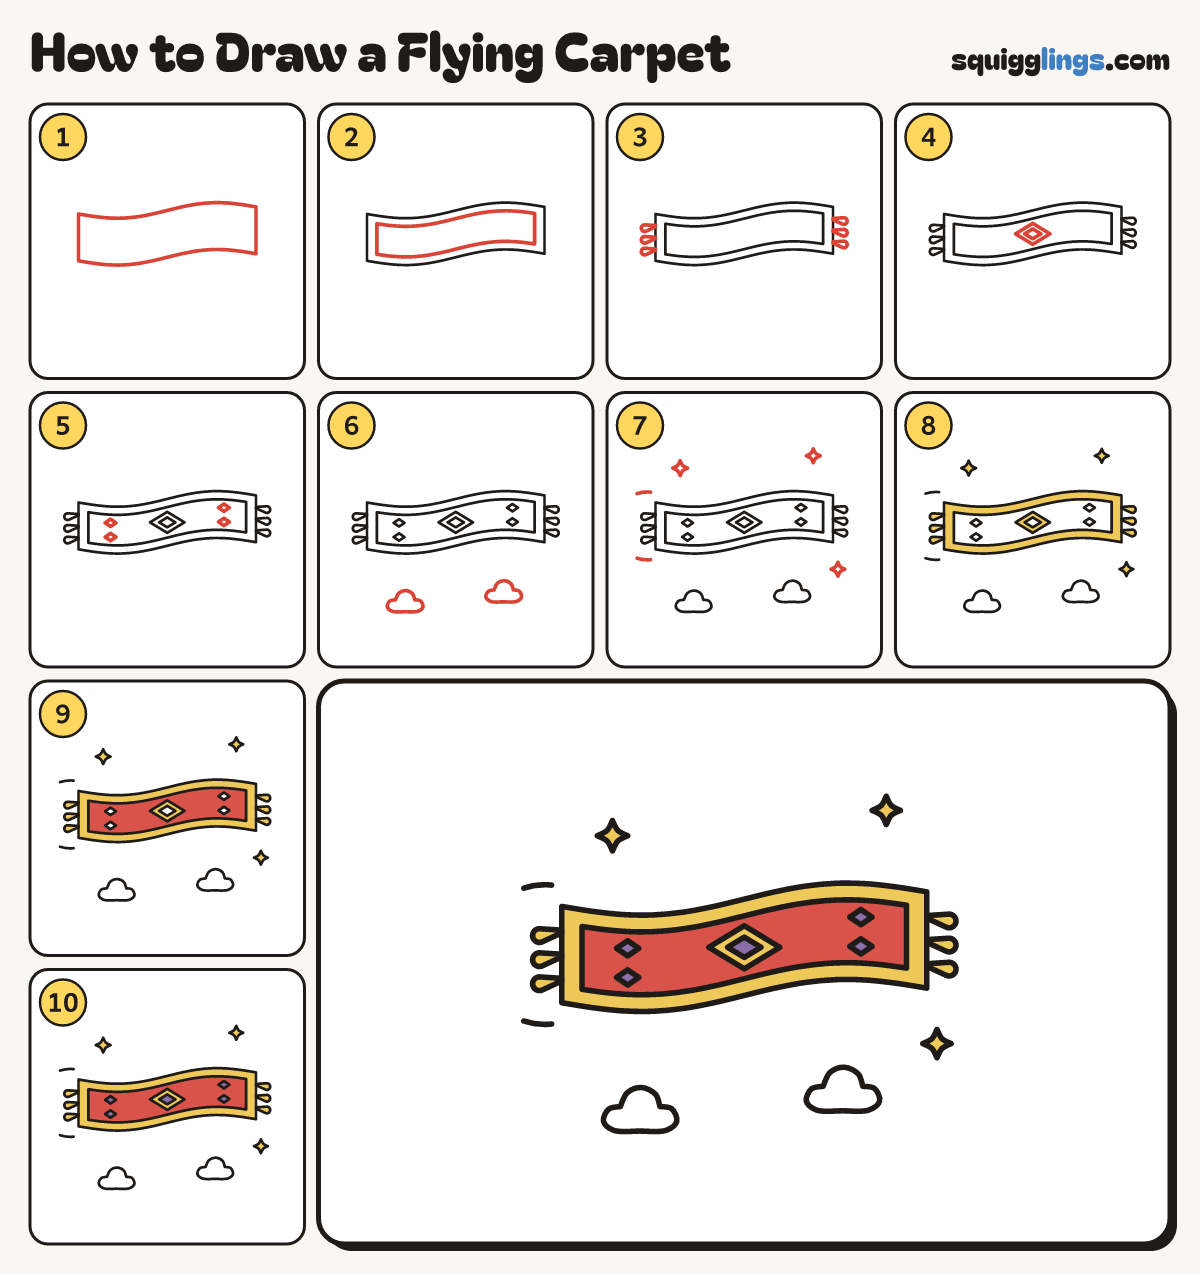
Each picture adds one red line. Draw that line, then scroll to the next picture. Rub out any dashed helper lines at the end. First up: rippling carpet.
Step 1: Rippling carpet
In the middle, draw a long carpet with gently wavy long sides and short straight ends.
Tip About 4 times as long as it is tall, with gentle waves.
Step 2: Border band
Inside the carpet, draw a second smaller carpet shape, a finger in from every edge.
Step 3: Tassels
On each end, draw 3 little tassels, like drops swelling out from the end line.
Step 4: Diamond medallion
In the middle of the carpet, draw a big wide diamond with a smaller diamond inside it.
Step 5: Corner diamonds
Inside the border band, draw a small diamond near each corner of the carpet.
Step 6: Clouds below
Under the carpet, draw 2 small puffy clouds with 3 bumps and a flat bottom, not touching it.
Tip Clouds underneath show the carpet is flying.
Step 7: Sparkles and wind
Draw 3 sparkle stars around the carpet. Add a short wind line above and below the left tassels.
Step 8: Yellow parts
Colour the border band, the tassels, the sparkles and the big diamond around the small one yellow.
Step 9: Red middle
Colour the middle of the carpet red, around all the diamonds.
Step 10: Purple diamonds
Colour the 5 small diamonds purple and leave the clouds white. Go over your lines, your carpet is flying!
Your finished drawing
Follow the steps above and this is where you end up: a flying carpet, drawn by you.
Every step in one picture