Watch it draw itself · tap to replay
How to Draw a Flute
Draw a flute in 11 easy steps, about 8 minutes. Free, with a printable worksheet.
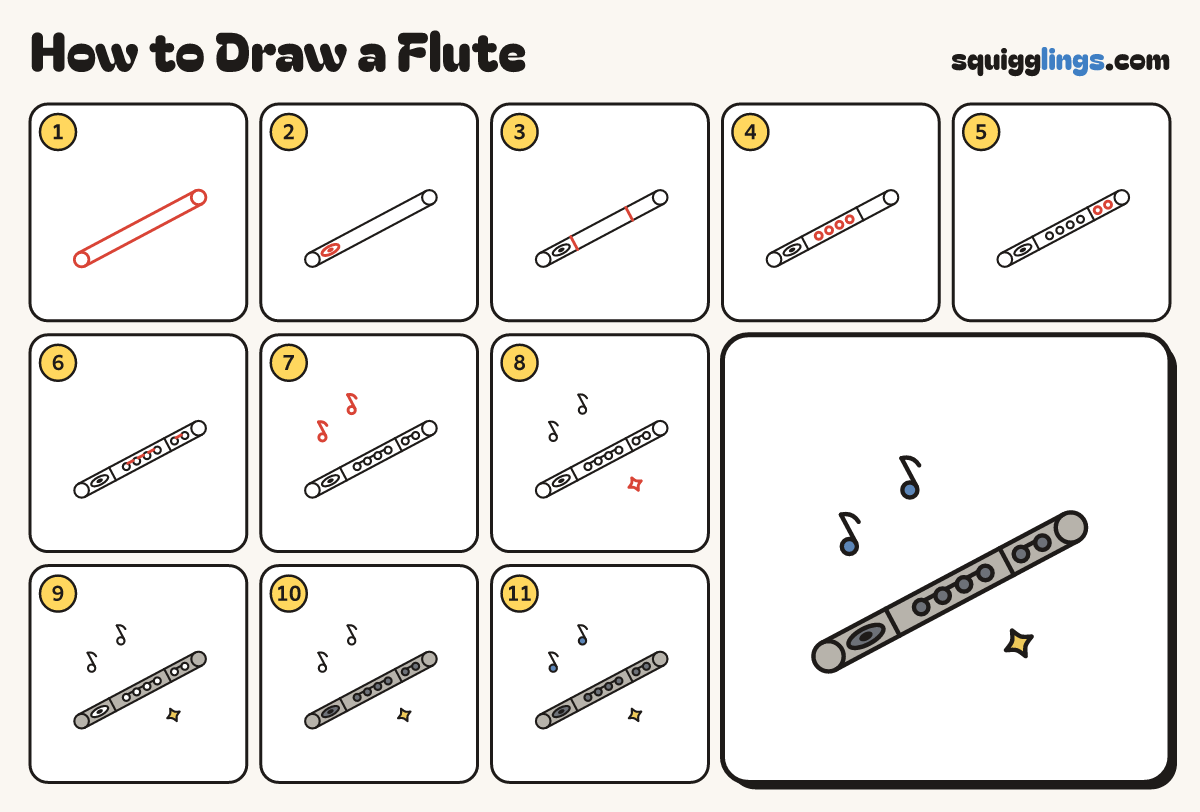
Each picture adds one red line. Draw that line, then scroll to the next picture. Rub out any dashed helper lines at the end. First up: the tube.
Step 1: The tube
Across your paper draw a long thin tube tilted up to the right, with a round cap on each end.
Tip Long and thin like a straw.
Step 2: The lip plate
Near the left end draw a small oval sitting on the tube, with a tiny dark hole in the middle.
Step 3: Joints
Draw a short line across the tube right of the lip plate, and another near the right end.
Step 4: 4 keys
Along the middle of the tube draw 4 little round keys in a row.
Step 5: 2 more keys
Further along, past the second joint line, draw 2 more round keys.
Step 6: The rods
Join the tops of the first 4 keys with a thin rod, and the last 2 keys with another.
Step 7: Music notes
Draw 2 small music notes above the flute: a round dot with a stem up and a little flag.
Step 8: A sparkle
Draw 1 small sparkle star below the right half of the flute.
Step 9: Yellow sparkle, grey tube
Go over your lines. Colour the sparkle yellow, then the tube and caps grey, around the keys and lip plate.
Step 10: Slate keys and plate
Colour the keys and the lip plate slate grey.
Step 11: Blue notes
Colour the notes blue, and your flute is ready to play!
Your finished drawing
Follow the steps above and this is where you end up: a flute, drawn by you.
Every step in one picture