Watch it draw itself · tap to replay
How to Draw a Floral Pattern
Draw a floral pattern in 10 easy steps, about 8 minutes. Free, with a printable worksheet.
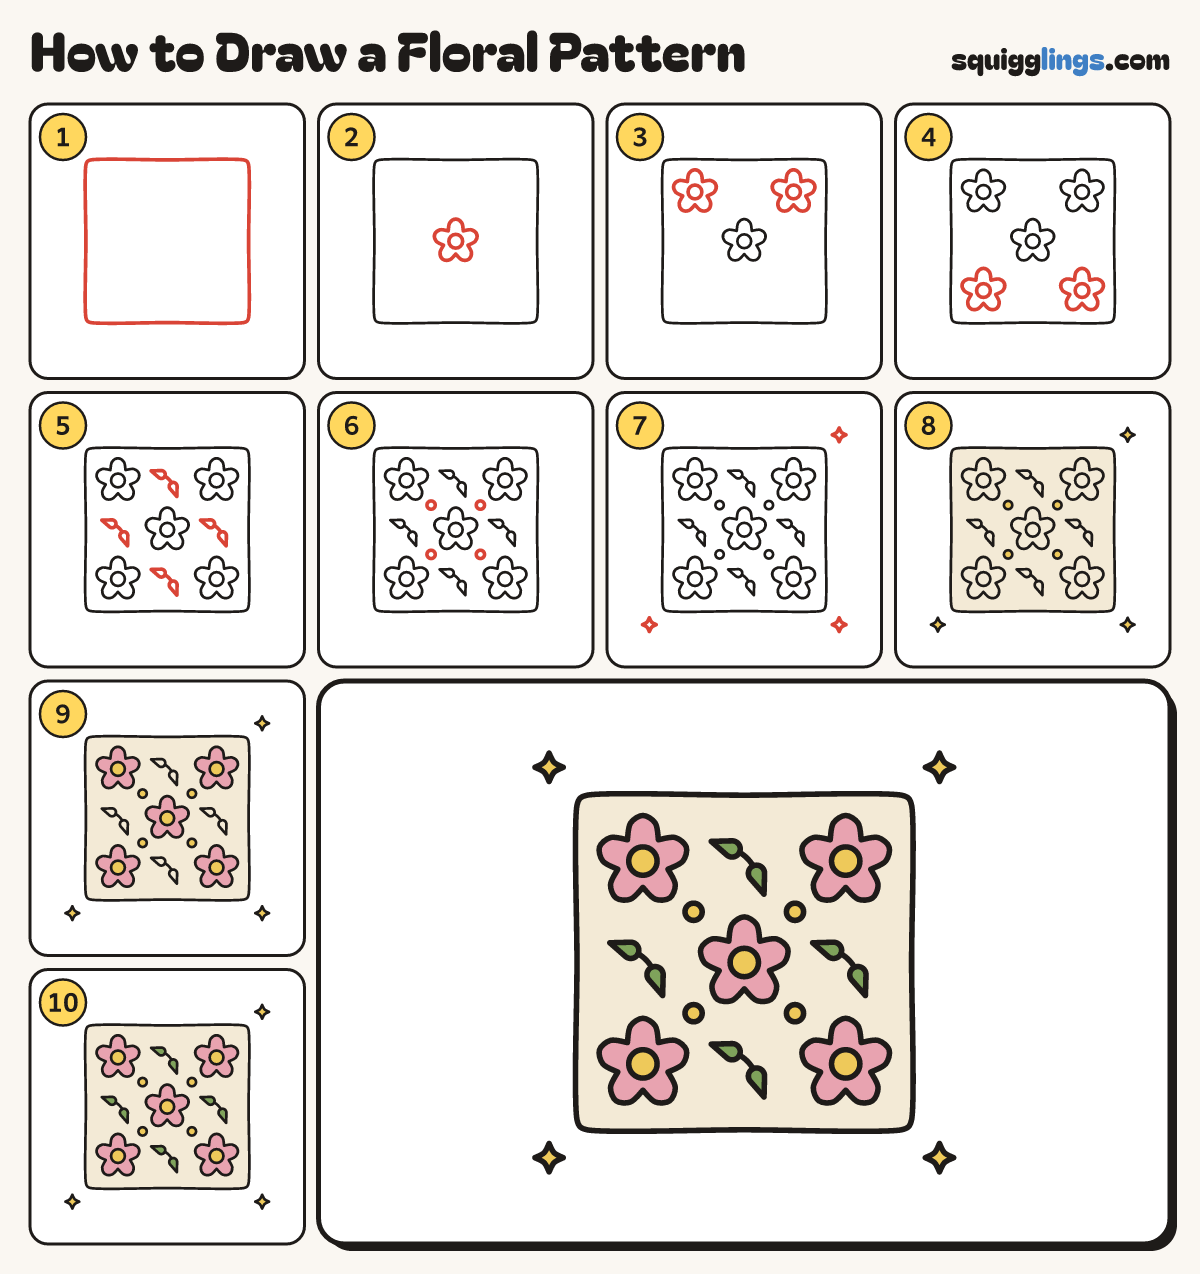
Each picture adds one red line. Draw that line, then scroll to the next picture. Rub out any dashed helper lines at the end. First up: the square.
Step 1: The square
In the middle of your paper draw a big square with softly rounded corners, nearly as big as the page.
Tip A pattern is the same little picture repeated over and over.
Step 2: The middle flower
In the very middle draw a small circle, then go round it with 5 fat round petals, bump after bump.
Step 3: Two flowers on top
Draw the same flower again in the top-left and top-right of the square, the same size.
Step 4: Two flowers below
Draw 2 more flowers at the bottom, left and right, so the 5 flowers make an X shape.
Step 5: Leaves
In each gap between 2 flowers draw 2 pointed leaves. Start a curved stem on one, stop on the other.
Step 6: Little dots
In the 4 spaces between the middle flower and the corner flowers draw 1 small dot.
Step 7: Sparkles
Draw 4 small sparkle stars just off the corners of the square.
Step 8: Cream square, yellow dots
Go over your lines. Colour the square cream around the flowers and leaves, and the dots and sparkles yellow.
Step 9: Yellow middles, pink petals
Colour the little circles in the flowers yellow, then the petals pink around them.
Step 10: Green leaves
Colour the leaves green. Your floral pattern is done!
Your finished drawing
Follow the steps above and this is where you end up: a floral pattern, drawn by you.
Every step in one picture