Watch it draw itself · tap to replay
How to Draw a Fleur de Lis
Draw a fleur de lis in 11 easy steps, about 8 minutes. Free, with a printable worksheet.
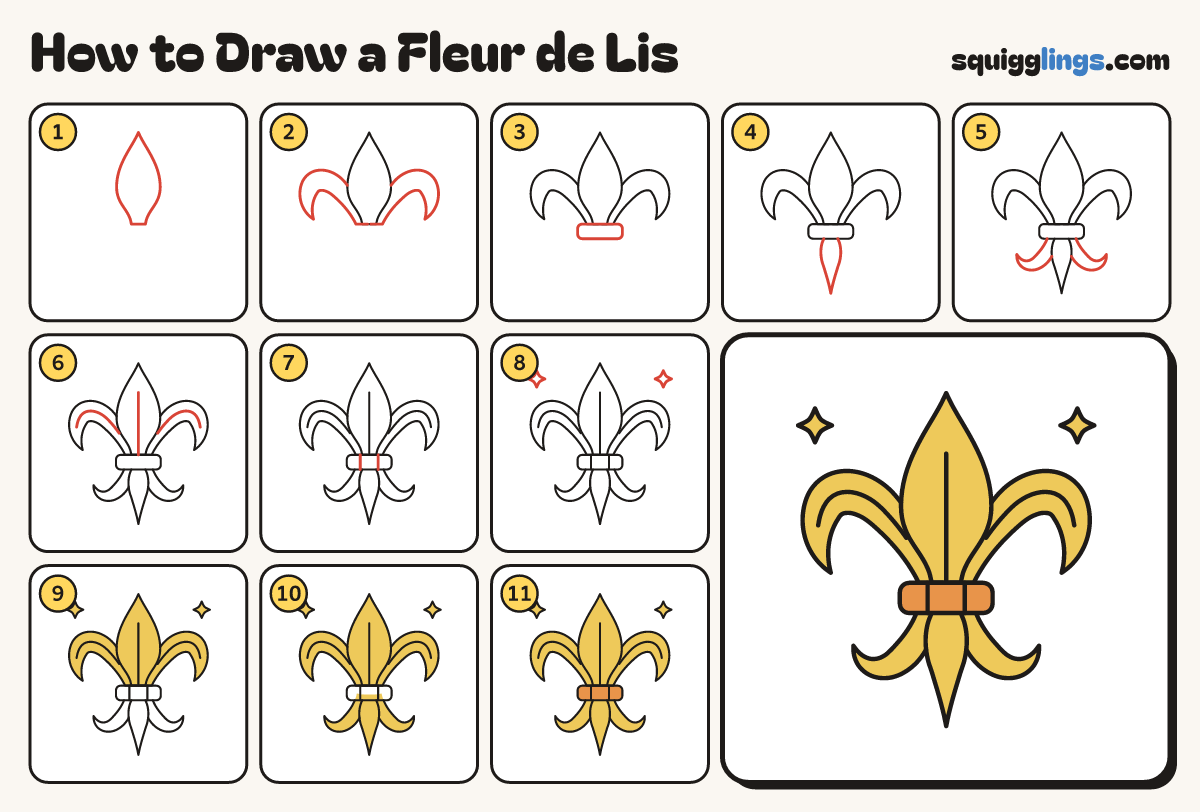
Each picture adds one red line. Draw that line, then scroll to the next picture. Rub out any dashed helper lines at the end. First up: the middle petal.
Step 1: The middle petal
In the top half of your paper draw a tall leaf shape with a pointed top and a flat bottom.
Tip Make it fattest in the middle and narrow at the bottom.
Step 2: Two curled petals
From each bottom corner draw a fat petal that sweeps up, curls out and droops to a point.
Tip Make both sides match, like a mirror.
Step 3: The band
Under the 3 petals draw a short flat band with round ends, like a belt holding them together.
Tip Its top edge runs along the flat bottoms of the petals.
Step 4: The bottom point
Under the middle of the band draw a small leaf shape that points down to a sharp tip.
Tip It is like the tall petal turned upside down, but smaller.
Step 5: Two small curls
On each side of the point draw a small curl from the band: down, out and up to a tip.
Step 6: Petal lines
From the band draw a line up the tall petal. Then draw a curved line along each curled petal.
Step 7: Band lines
Draw 2 short lines down the band, one on each side of the middle.
Step 8: Sparkles
Draw a sparkle star in each top corner.
Tip A sparkle star has 4 points: up, down, left and right.
Step 9: Yellow petals
Colour the 3 top petals and the 2 sparkles yellow.
Step 10: Yellow point and curls
Colour the bottom point and the 2 small curls yellow too.
Step 11: Orange band
Colour the band orange. Go over your lines, and your fleur-de-lis is done!
Your finished drawing
Follow the steps above and this is where you end up: a fleur de lis, drawn by you.
Every step in one picture