Watch it draw itself · tap to replay
How to Draw a Fern
Draw a fern in 11 easy steps, about 8 minutes. Free, with a printable worksheet.
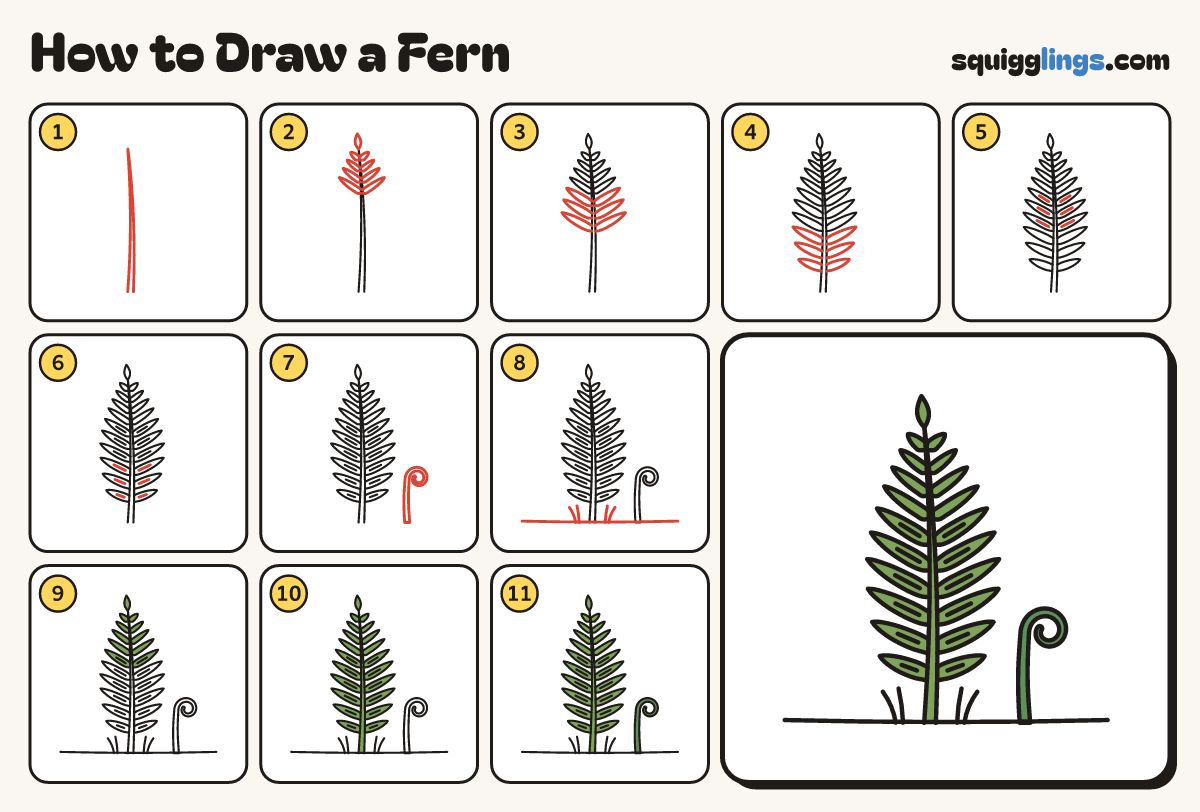
Each picture adds one red line. Draw that line, then scroll to the next picture. Rub out any dashed helper lines at the end. First up: the stem.
Step 1: The stem
Start near the bottom, left of the middle. Draw 2 lines close together up to a point near the top.
Tip Start the 2 lines a finger apart at the ground and let them bow gently right as they meet.
Step 2: Leaflets at the top
At the top draw one tiny pointed leaf. Below it add 4 pairs of thin pointed leaflets, getting longer.
Step 3: Leaflets in the middle
Keep going down with 3 more pairs of thin leaflets, each a bit longer than the pair above.
Step 4: Leaflets at the bottom
Draw 3 more pairs lower down, getting shorter again, the last pair a hand above the ground.
Step 5: Veins in the middle
In the next 3 pairs, draw a vein down the middle of each leaflet, from near the stem to halfway.
Tip Leave the 4 small top pairs plain.
Step 6: Veins at the bottom
Do the same in the 3 bottom pairs, one vein down the middle of each leaflet.
Step 7: A fiddlehead
Right of the fern, start on the ground and draw a thick stem up that rolls into a snail curl.
Tip A fiddlehead is a baby fern not yet unrolled, like a snail shell.
Step 8: Ground and grass
Start near the left edge. Draw a soft ground line across the bottom, stop near the right edge. Add grass.
Step 9: Green top half
Colour the tip leaf and the top 5 pairs of leaflets leaf green.
Step 10: Green bottom half
Colour the bottom 5 pairs of leaflets and the stem leaf green too.
Step 11: Green fiddlehead
Colour the whole fiddlehead, stem and curl, a darker green. Go over your lines and your fern is done!
Your finished drawing
Follow the steps above and this is where you end up: a fern, drawn by you.
Every step in one picture