Watch it draw itself · tap to replay
How to Draw a Farm Gate
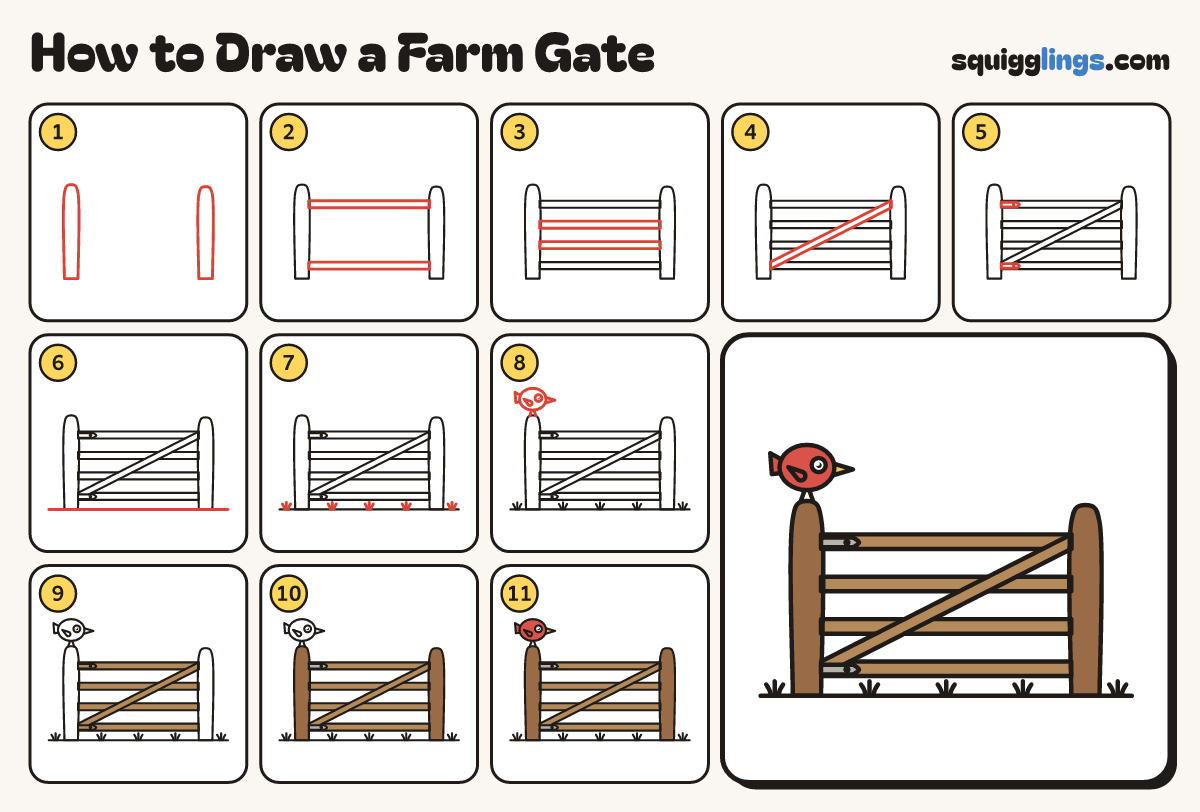
Draw a farm gate in 11 easy steps, about 8 minutes. Free, with a printable worksheet.
Each picture adds one red line. Draw that line, then scroll to the next picture. Rub out any dashed helper lines at the end. First up: 2 posts.
Step 1: 2 posts
Draw a tall round-topped post on the left and another far over on the right, both standing on the ground.
Tip Make the posts thick, about 2 fingers wide, and the same height.
Step 2: Top and bottom bars
Between the posts draw a thin flat bar near the top and another a hand up from the bottom.
Step 3: 2 more bars
Draw 2 more flat bars between the top and bottom bars, evenly spaced, so 4 bars cross the gap.
Step 4: Slanted brace
From the bottom left corner draw a flat slanted bar up to the top right corner of the gate.
Tip That slant is what stops a real gate from sagging.
Step 5: 2 hinges
By the left post, on the top and bottom bars, draw a short pointed hinge strap with a bolt dot.
Step 6: The ground
Draw a long ground line under the posts from the left edge of the paper to the right edge.
Step 7: Grass
Along the ground draw 5 grass tufts, each 3 short blades from one spot, the middle one tallest.
Step 8: Little bird
Draw a little egg bird with an eye, beak, tail, wing, and legs from its tummy down to the post.
Tip Perch it on the left post, with the wing lying back towards the tail, away from the eye.
Step 9: Wooden bars
Colour the 4 bars and the slanted brace wood brown, around the hinges.
Step 10: Grey hinges, brown posts
Colour the 2 hinges grey, then the 2 posts a darker brown, like old fence posts.
Step 11: Red bird
Colour the beak yellow, the bird and tail red. Leave the eye white. Go over your lines and you're done!
Your finished drawing
Follow the steps above and this is where you end up: a farm gate, drawn by you.
Every step in one picture