Watch it draw itself · tap to replay
How to Draw Eyes in the Dark
Draw eyes in the dark in 12 easy steps, about 9 minutes. Free, with a printable worksheet.
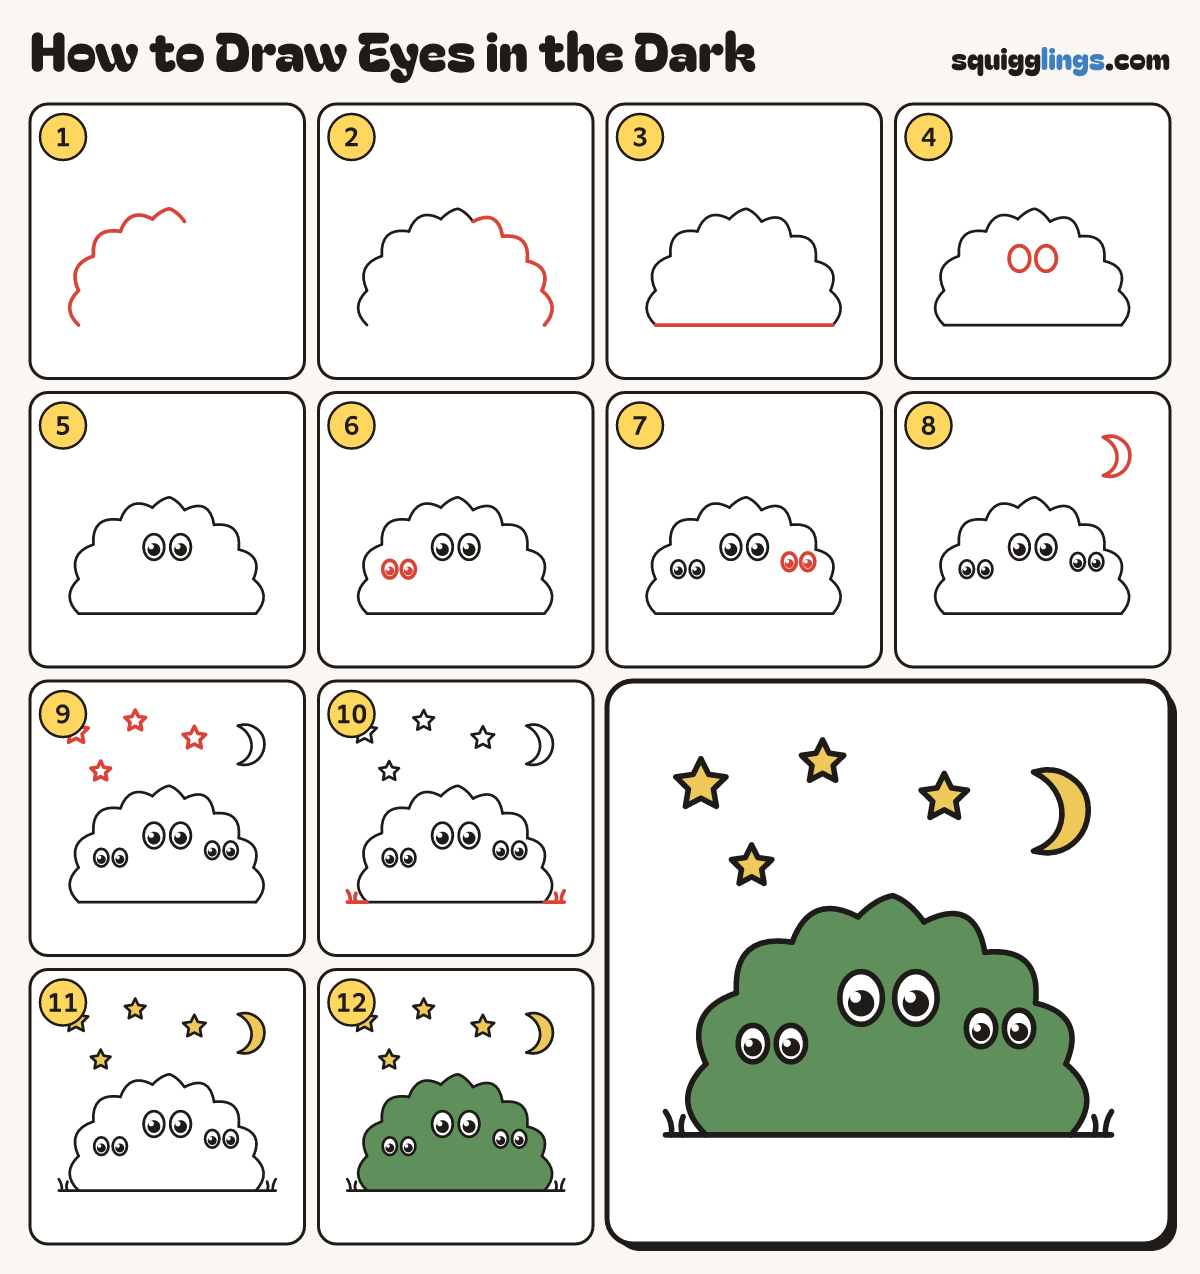
Each picture adds one red line. Draw that line, then scroll to the next picture. Rub out any dashed helper lines at the end. First up: the left side.
Step 1: The left side
Start low on the left. Draw 5 bumps up to the top middle, the last one with a leaf point.
Tip At night a bush is just a dark lumpy shape. Who is hiding inside?
Step 2: The right side
Start where the top bump ended. Draw 4 bumps down to the ground.
Step 3: The bottom
Start at the bottom left bump. Draw a straight line along the ground, stopping at the bottom right bump.
Step 4: Two big eyes
In the middle of the bush, draw 2 big oval eyes side by side.
Step 5: Big black dots
In each big eye, draw a big black dot with a tiny white shine at the top.
Step 6: Eyes on the left
Lower on the left of the bush, draw a smaller pair of oval eyes with black dots.
Step 7: Eyes on the right
On the right of the bush, draw one more small pair of oval eyes with black dots.
Step 8: The moon
High on the right, draw a crescent moon with its horns pointing left, like a banana.
Step 9: Stars
Around the sky, draw 4 five-point stars of different sizes.
Step 10: Ground and grass
From each bottom corner, draw a short ground line out. Flick up 2 grass blades each side.
Step 11: Yellow moon and stars
Go over your lines. Colour the moon and all 4 stars yellow.
Step 12: Dark green bush
Colour the bush dark green around the 6 eyes, leaving the eyes white. Your eyes in the dark are done!
Your finished drawing
Follow the steps above and this is where you end up: eyes in the dark, drawn by you.
Every step in one picture