Watch it draw itself · tap to replay
How to Draw a Golem
Draw a golem in 11 easy steps, about 8 minutes. Free, with a printable worksheet.
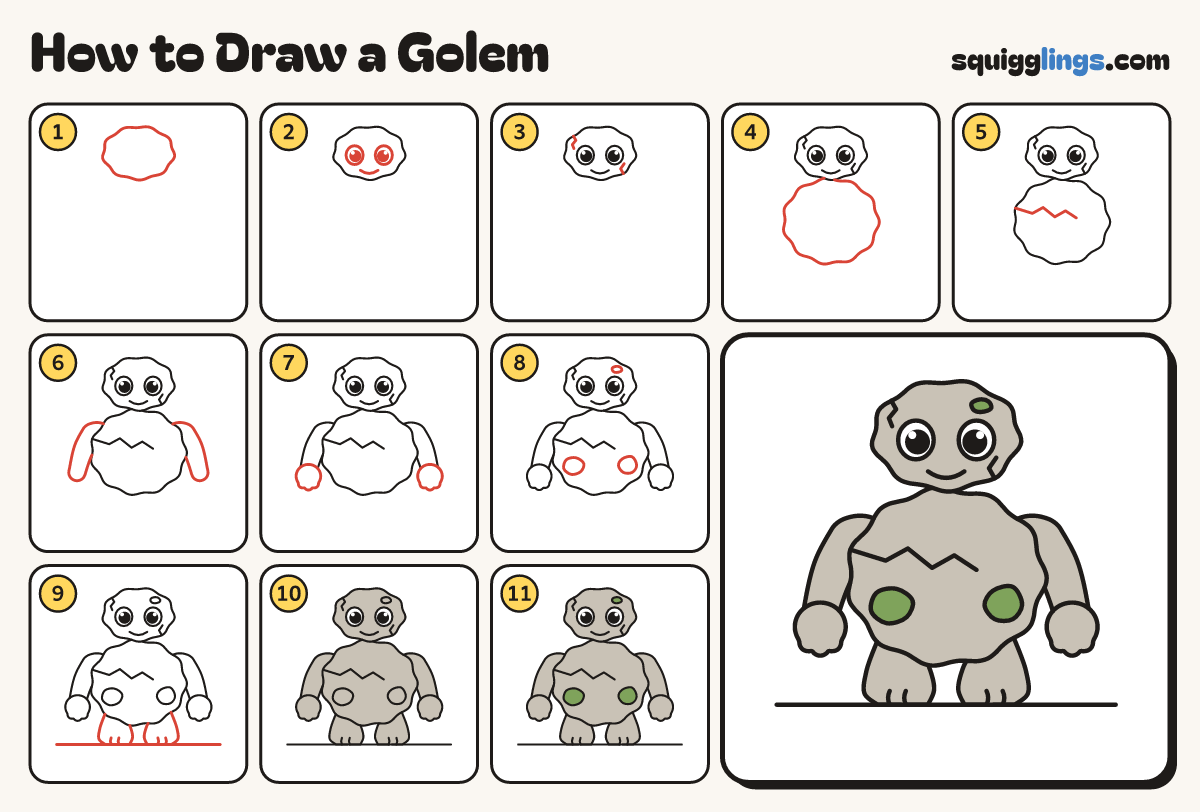
Each picture adds one red line. Draw that line, then scroll to the next picture. Rub out any dashed helper lines at the end. First up: boulder head.
Step 1: Boulder head
Near the top of your paper, draw a big lumpy boulder, wider than tall, with soft bumps like a potato.
Step 2: Big eyes and smile
In the head, draw 2 big round eyes and colour them black, leaving white shines. Add a short mouth curve.
Step 3: Head cracks
Draw 2 short zigzag cracks on the head: one from the top edge and one from the bottom edge.
Tip Cracks make the stone look old. Keep them away from the eyes.
Step 4: Boulder body
Start under the left of the head. Draw a bigger lumpy boulder down and round, back up to the head.
Step 5: Big crack
Start on the left edge of the body. Zigzag a crack across like lightning, stopping past the middle.
Step 6: Thick stone arms
Start high on each side of the body. Draw a thick arm out and down, stopping above the ground.
Tip Arms get narrower toward the fist.
Step 7: Knobbly fists
On the end of each arm, draw a round stone fist with 3 knobbly bumps along the bottom.
Step 8: Moss patches
Draw 3 soft round moss blobs, one low on each side of the body and one on the head.
Step 9: Feet and ground
Start under the body. Draw 2 stubby feet down and back up to the body. Add toes and the ground.
Step 10: Stone grey
Go over your lines, then colour the head, body, arms, fists and feet stone grey, leaving the moss and eyes.
Step 11: Green moss
Colour the 3 moss patches leaf green, and your golem is done.
Your finished drawing
Follow the steps above and this is where you end up: a golem, drawn by you.
Every step in one picture