Watch it draw itself · tap to replay
How to Draw a Bean Teepee
Draw a bean teepee in 10 steps, about 8 minutes. Free, with a printable worksheet.
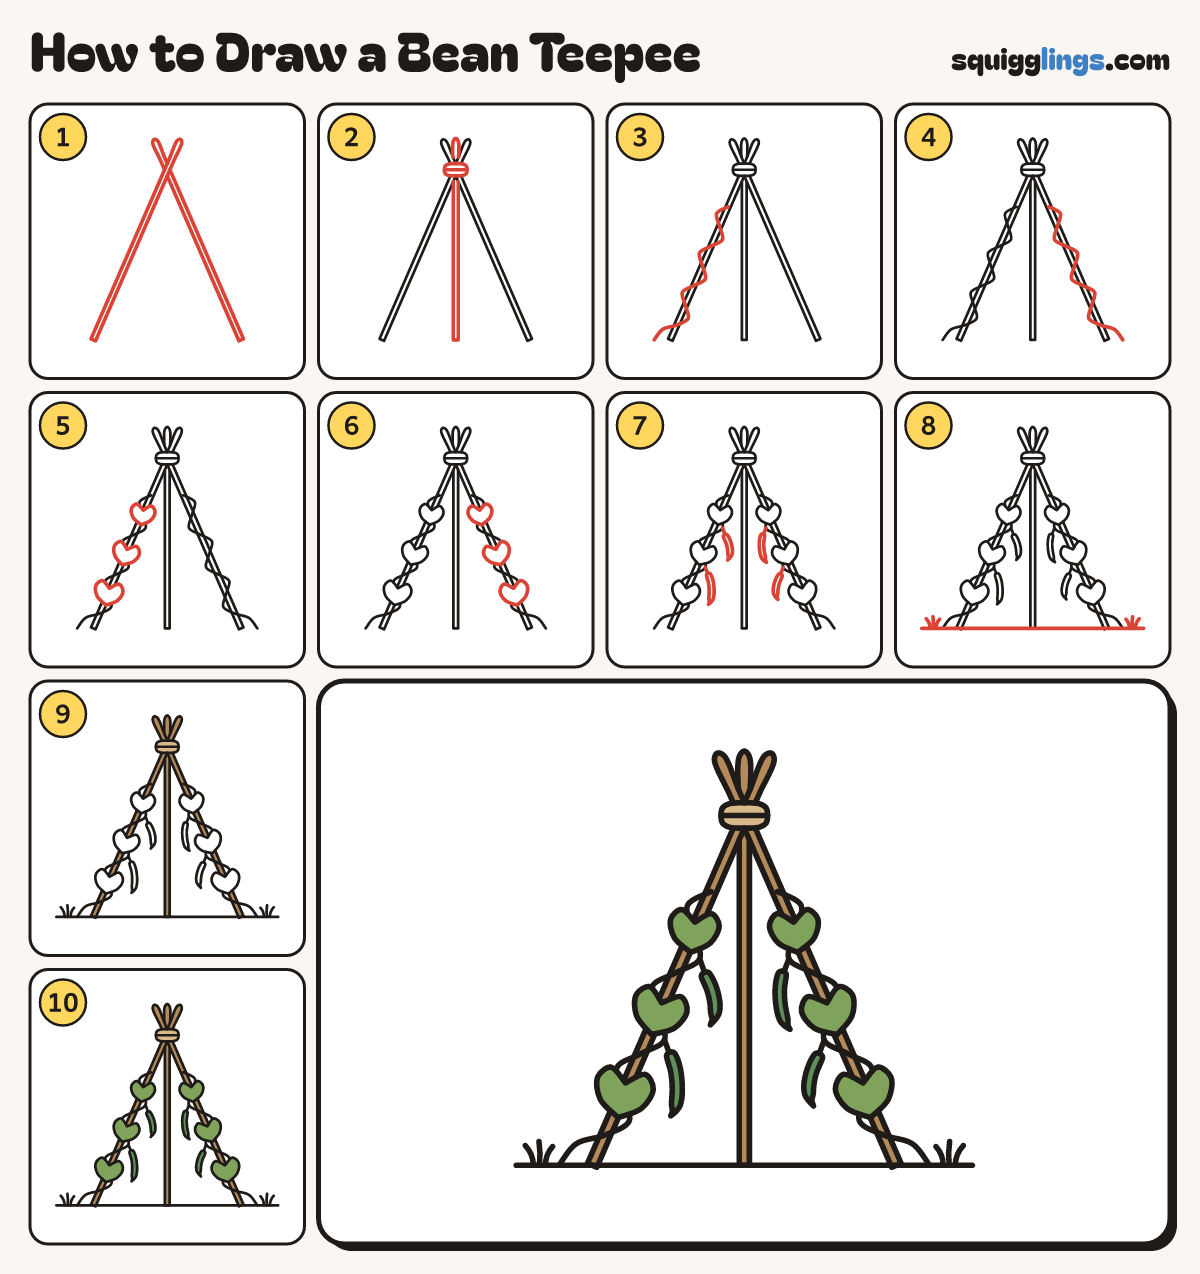
Each picture adds one red line. Draw that line, then scroll to the next picture. Rub out any dashed helper lines at the end. First up: 2 poles.
Step 1: 2 poles
Draw 2 long thin poles leaning in like a tent. Cross them near the top so the tips poke out.
Tip A bean teepee is a tent of poles for bean plants to climb.
Step 2: Middle pole and tie
Draw a third pole up the middle, behind the others. Where they cross, wrap a string tie round twice.
Step 3: The left vine
Start on the ground just outside the left pole. Draw a thin vine winding round it, stopping past halfway up.
Step 4: The right vine
Draw another vine winding round the right pole the same way, from the ground to past halfway up.
Step 5: Heart leaves
Draw 3 heart leaves, point down, on the left pole over every other place the vine crosses it.
Step 6: More leaves
Draw 3 heart leaves on the right pole the same way.
Step 7: Bean pods
Inside the teepee, hang 2 long curved bean pods from each vine on short stalks.
Step 8: Ground and grass
Draw a ground line across under the pole bottoms. Add 3 grass blades outside each vine.
Step 9: Wooden poles
Go over your lines, then colour the tie tan and the 3 poles wood brown, stopping at the leaves.
Step 10: Green leaves and pods
Colour the leaves light green and the pods dark green, and your bean teepee is done!
Your finished drawing
Follow the steps above and this is where you end up: a bean teepee, drawn by you.
Every step in one picture