Watch it draw itself · tap to replay
How to Draw an Easter Egg Tree
Draw an Easter egg tree in 10 easy steps, about 8 minutes. Free, with a printable worksheet.
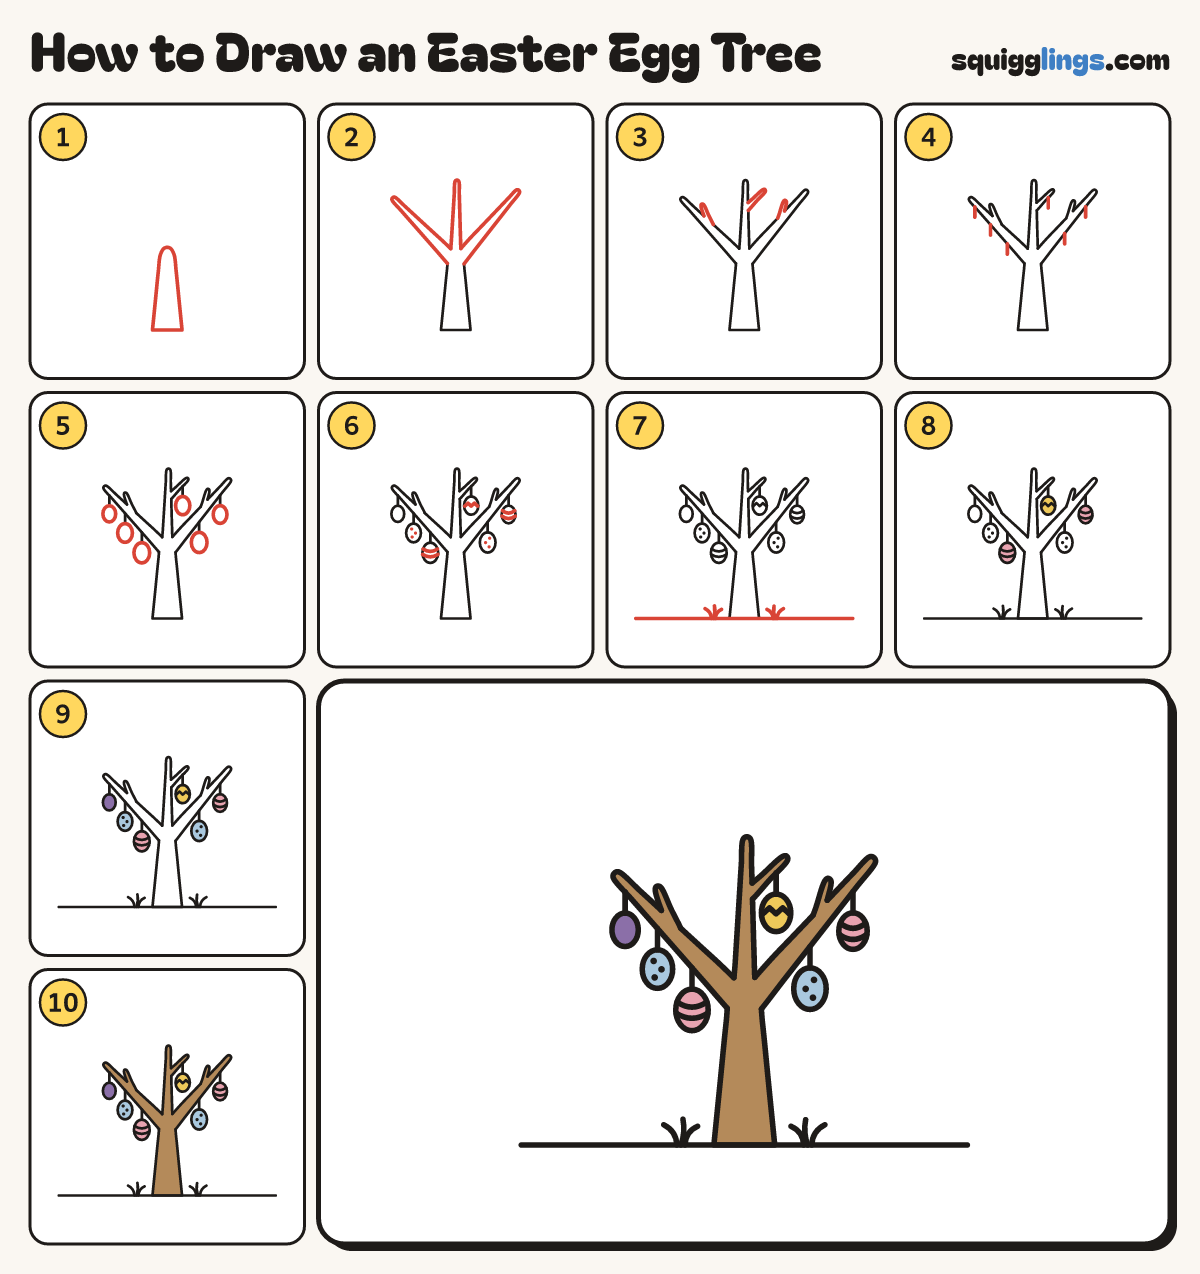
Each picture adds one red line. Draw that line, then scroll to the next picture. Rub out any dashed helper lines at the end. First up: the trunk.
Step 1: The trunk
Start on the ground on the left. Draw a trunk up, round the top, and back down to the ground.
Tip An Easter egg tree is a bare tree hung with painted eggs.
Step 2: 3 branches
From the top of the trunk draw 3 bare branches forking out: left, up and right. Thin at the tips.
Step 3: Twigs
Off the branches draw 3 thinner twigs: up from the left, up from the right, out from the middle.
Step 4: Hanging strings
Start under the branches. Draw 6 short strings hanging straight down and stop in the air, clear of other branches.
Step 5: The eggs
At the bottom of each string draw a small oval egg, not touching any branch.
Step 6: Painted patterns
Give 2 eggs curved stripes, 2 eggs 3 little dots each, and 1 egg a zigzag. Leave one plain.
Step 7: Ground and grass
Draw a ground line under the trunk from left to right. Add 2 little grass tufts of 3 curved blades.
Step 8: Yellow and pink eggs
Go over your lines. Colour the zigzag egg yellow and the 2 striped eggs pink, going round the patterns.
Step 9: Sky and purple eggs
Colour the 2 dotted eggs sky blue, going round the dots, and the plain egg purple.
Step 10: Wood tree
Colour the trunk, branches and twigs wood brown. Your Easter egg tree is done!
Your finished drawing
Follow the steps above and this is where you end up: an Easter egg tree, drawn by you.
Every step in one picture