Watch it draw itself · tap to replay
How to Draw a Duck Flying
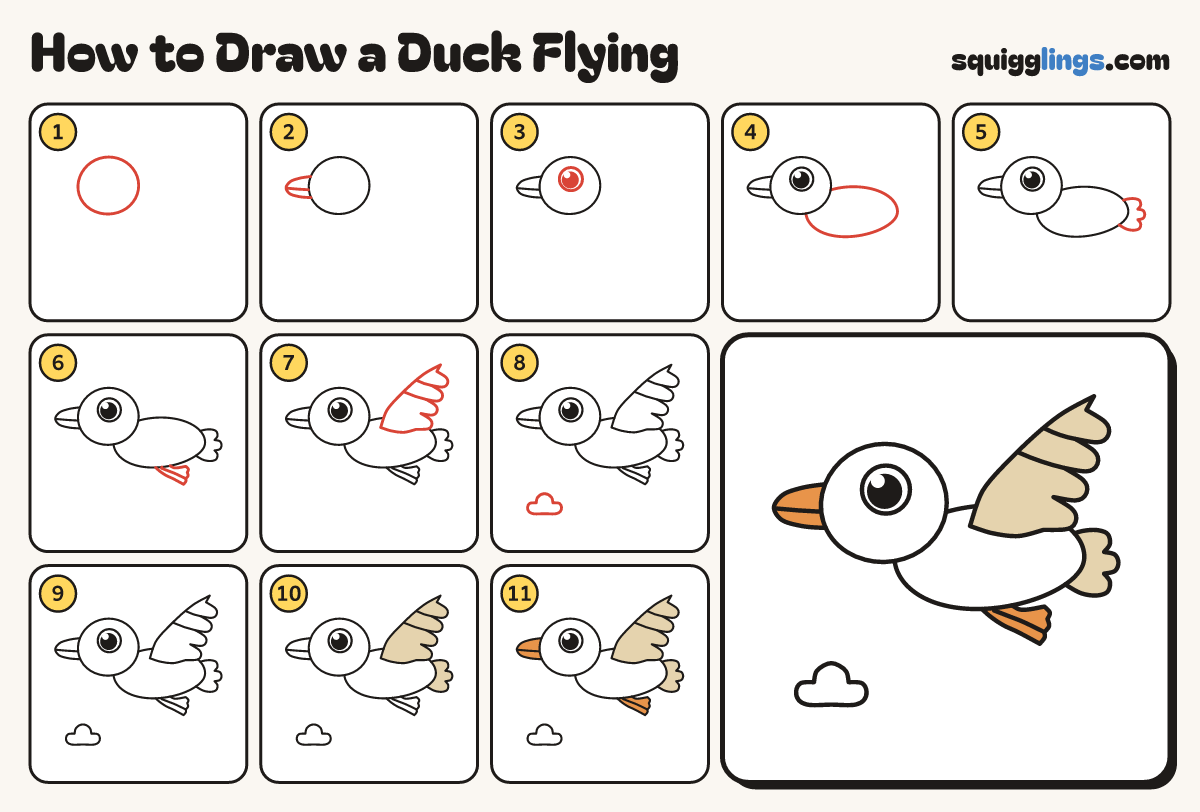
Draw a duck flying in 11 easy steps, about 8 minutes. Free, with a printable worksheet.
Each picture adds one red line. Draw that line, then scroll to the next picture. Rub out any dashed helper lines at the end. First up: round head.
Step 1: Round head
Near the top left of your paper draw a big round head, a little wider than tall.
Tip Leave room on the right and below for the body and wing.
Step 2: Flat wide bill
Start on the head's front. Draw a long flat bill out to the left, stop at the chin.
Tip Flat like a spoon, nearly half a head long.
Step 3: One big eye
Behind the bill draw a big round eye. Fill it with a black dot, leaving a shine.
Step 4: Plump flying body
Start under the chin. Draw a long sideways egg body to the right. Stop on the back of the head.
Tip Make it much longer than the head is wide, because the duck is flying forward.
Step 5: Fan tail
Start on top of the rump. Draw a short fan with 3 round feather bumps. Stop under the rump.
Step 6: Two tucked feet
Under the back of the tummy draw 2 little webbed feet pointing back: a short leg and a flat paddle.
Tip Flying ducks tuck their feet back like little flippers.
Step 7: Big open wing
From the back behind the head, sweep up to a point, then 4 round feather fingers down to the back.
Tip Add 2 short feather lines between the top fingers.
Step 8: Puffy cloud
Below the duck on the left, draw a little cloud: 3 round puffs on top and a flat bottom.
Step 9: White duck
Leave the head and the whole body white like the paper. Keep the eye white too.
Step 10: Sand wing and tail
Colour the big wing and the fan tail a soft sand colour. Leave the cloud white.
Step 11: Orange bill and feet
Colour the flat bill and both little webbed feet orange. Your duck is flying!
Your finished drawing
Follow the steps above and this is where you end up: a duck flying, drawn by you.
Every step in one picture