Watch it draw itself · tap to replay
How to Draw a Dryad
Draw a dryad in 12 steps, about 9 minutes. Free, with a printable worksheet.
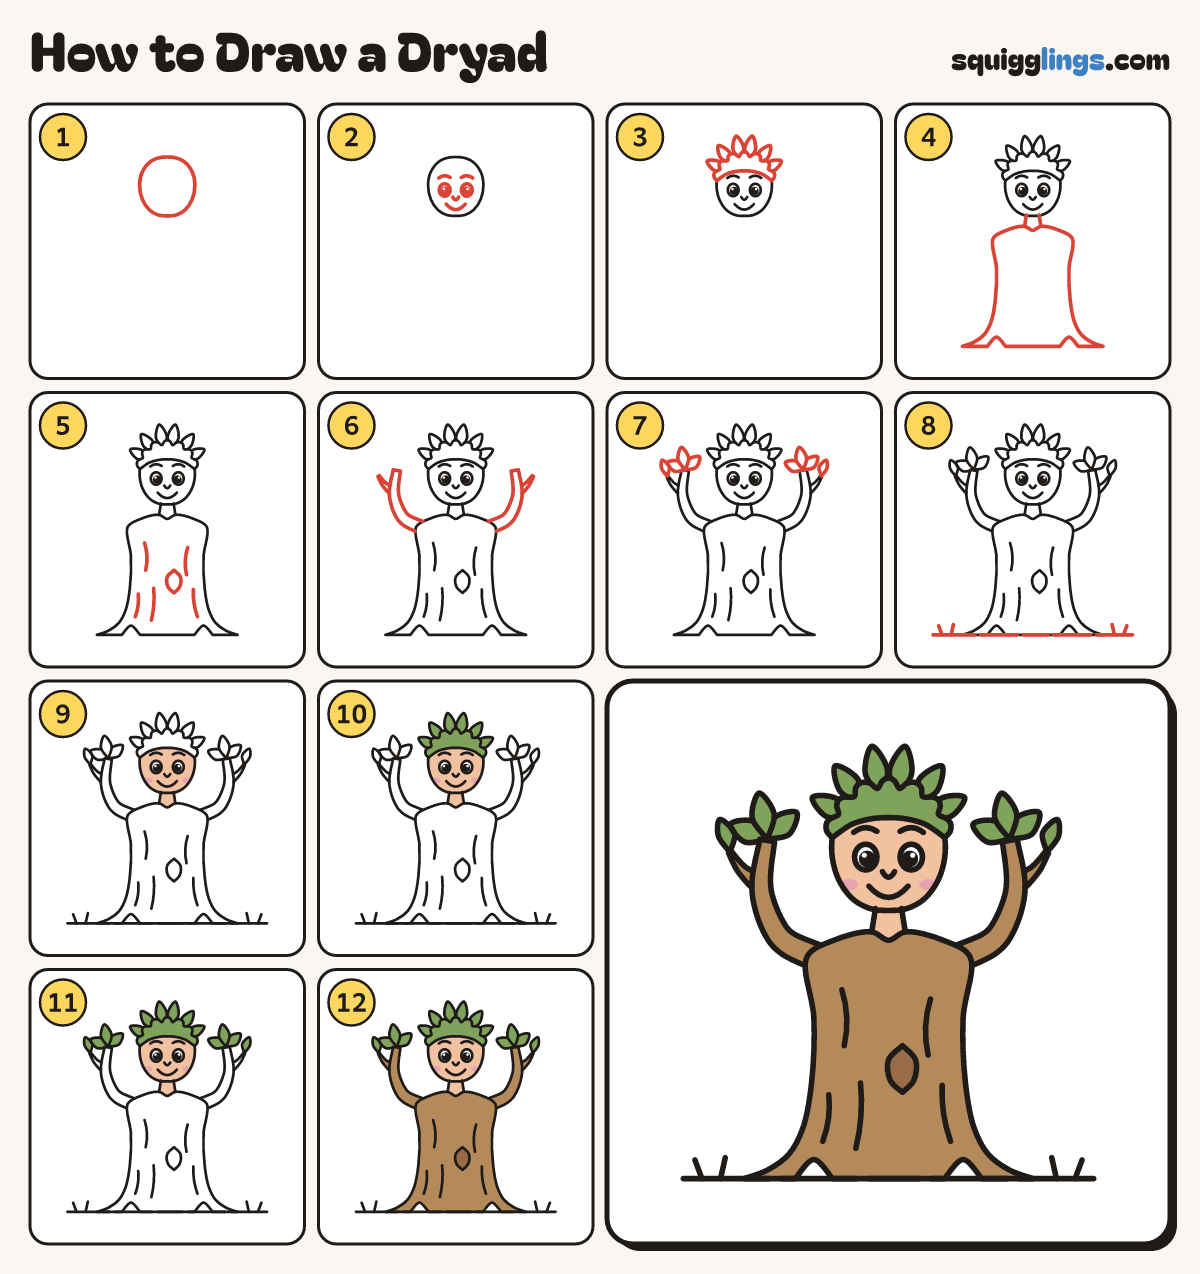
Each picture adds one red line. Draw that line, then scroll to the next picture. Rub out any dashed helper lines at the end. First up: the head.
Step 1: The head
Near the top of your paper, in the middle, draw an egg head, a little narrower at the chin.
Tip The dryad grows out of a tree: the trunk is her body.
Step 2: The face
Just below the middle of the head, draw 2 big round eyes. Add a nose, a smile and eyebrows.
Step 3: Leafy hair
Draw a hairline from temple to temple, then bumpy tufts over the top between its ends. Add 6 crown leaves.
Step 4: Neck and trunk
Draw 2 short neck lines under the chin. From their ends, draw a wide trunk ending in 3 roots.
Step 5: Bark and knot-hole
Down the trunk draw 5 long gentle curved bark lines. Low on the trunk, add a pointed oval knot-hole.
Step 6: Branch arms
From each shoulder draw a branch arm out and up beside the head. Add a small pointed twig on each.
Step 7: Leaves on the branches
On each arm end, draw 3 pointed leaves fanning out from the wrist. Add a small leaf on each twig.
Step 8: Ground and grass
Draw a ground line under the roots, from far left to far right. Add 2 grass blades at each end.
Step 9: Pink cheeks, peach skin
Go over your lines. Colour 2 pink cheeks, then the face and neck peach around them. Leave the eyes white.
Step 10: Green hair and crown
Colour the leafy hair and the 6 crown leaves leaf green.
Step 11: Green branch leaves
Colour all the leaves on the branches leaf green.
Step 12: Wood trunk and branches
Colour the trunk, arms and twigs wood brown around the knot-hole, and the knot-hole dark brown. Your dryad is done!
Your finished drawing
Follow the steps above and this is where you end up: a dryad, drawn by you.
Every step in one picture