Watch it draw itself · tap to replay
How to Draw DNA
Draw DNA in 11 easy steps, about 8 minutes. Free, with a printable worksheet.
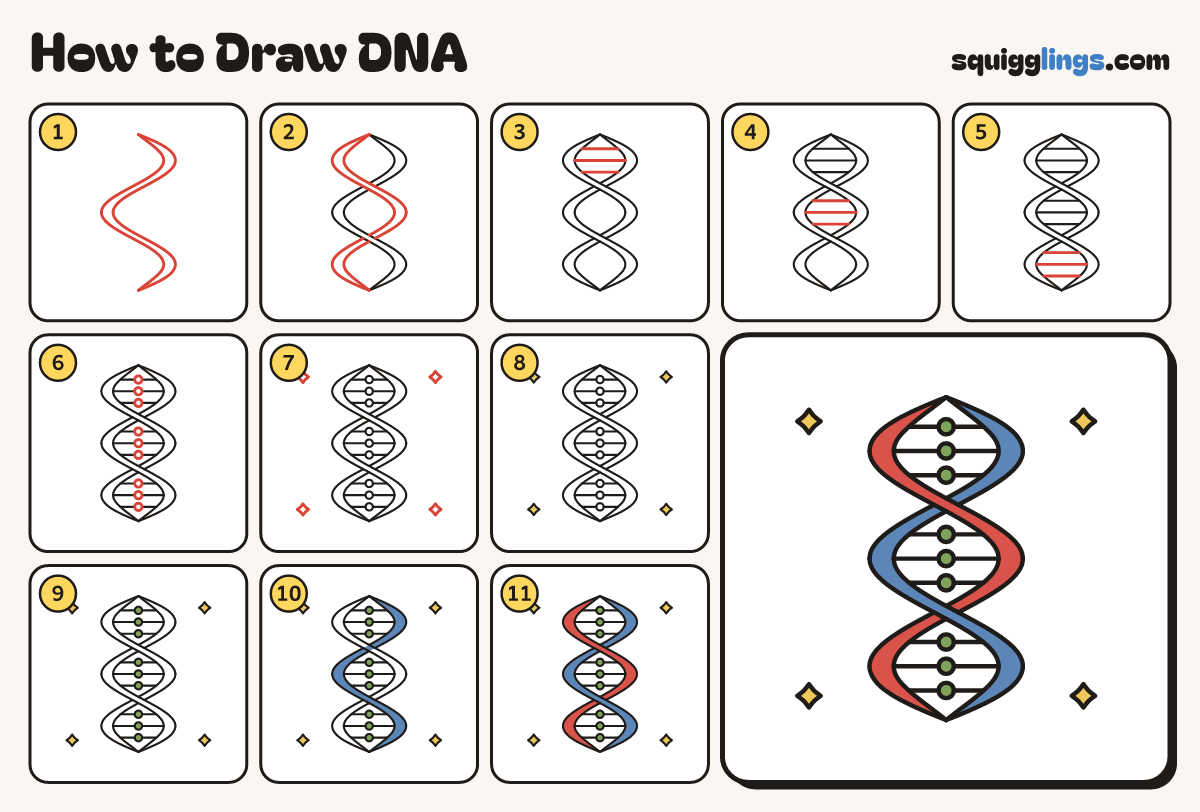
Each picture adds one red line. Draw that line, then scroll to the next picture. Rub out any dashed helper lines at the end. First up: the first ribbon.
Step 1: The first ribbon
Draw a long wavy line from the top to the bottom. Add a line beside it, meeting at both ends.
Tip Big slow waves, like a ribbon falling.
Step 2: The second ribbon
Draw a ribbon swinging the other way, from the top point down to the bottom. It crosses over, then under.
Tip Where it crosses over, rub out the first ribbon's lines.
Step 3: Top rungs
In the top gap draw 3 short straight rungs across. Each starts on one ribbon and stops on the other.
Step 4: Middle rungs
Do the same in the middle gap: 3 short rungs from ribbon to ribbon.
Step 5: Bottom rungs
And 3 more in the bottom gap, so every loop of the ladder has its rungs.
Step 6: Little beads
On each rung draw a tiny round bead in the middle, like a pearl on a string.
Tip Rub out the rung line inside each bead.
Step 7: Sparkles
Draw 4 small sparkle stars round the DNA, one near each corner.
Step 8: Yellow sparkles
Go over your lines. Colour the 4 sparkles yellow.
Step 9: Green beads
Colour the little beads green.
Step 10: Blue ribbon
Colour the first ribbon blue. Leave the spot where the other ribbon crosses over it.
Step 11: Red ribbon
Colour the second ribbon red, going around the blue where it crosses over. Your DNA is done!
Your finished drawing
Follow the steps above and this is where you end up: DNA, drawn by you.
Every step in one picture