Watch it draw itself · tap to replay
How to Draw a Claw Mark
Draw a claw mark in 10 easy steps, about 8 minutes. Free, with a printable worksheet.
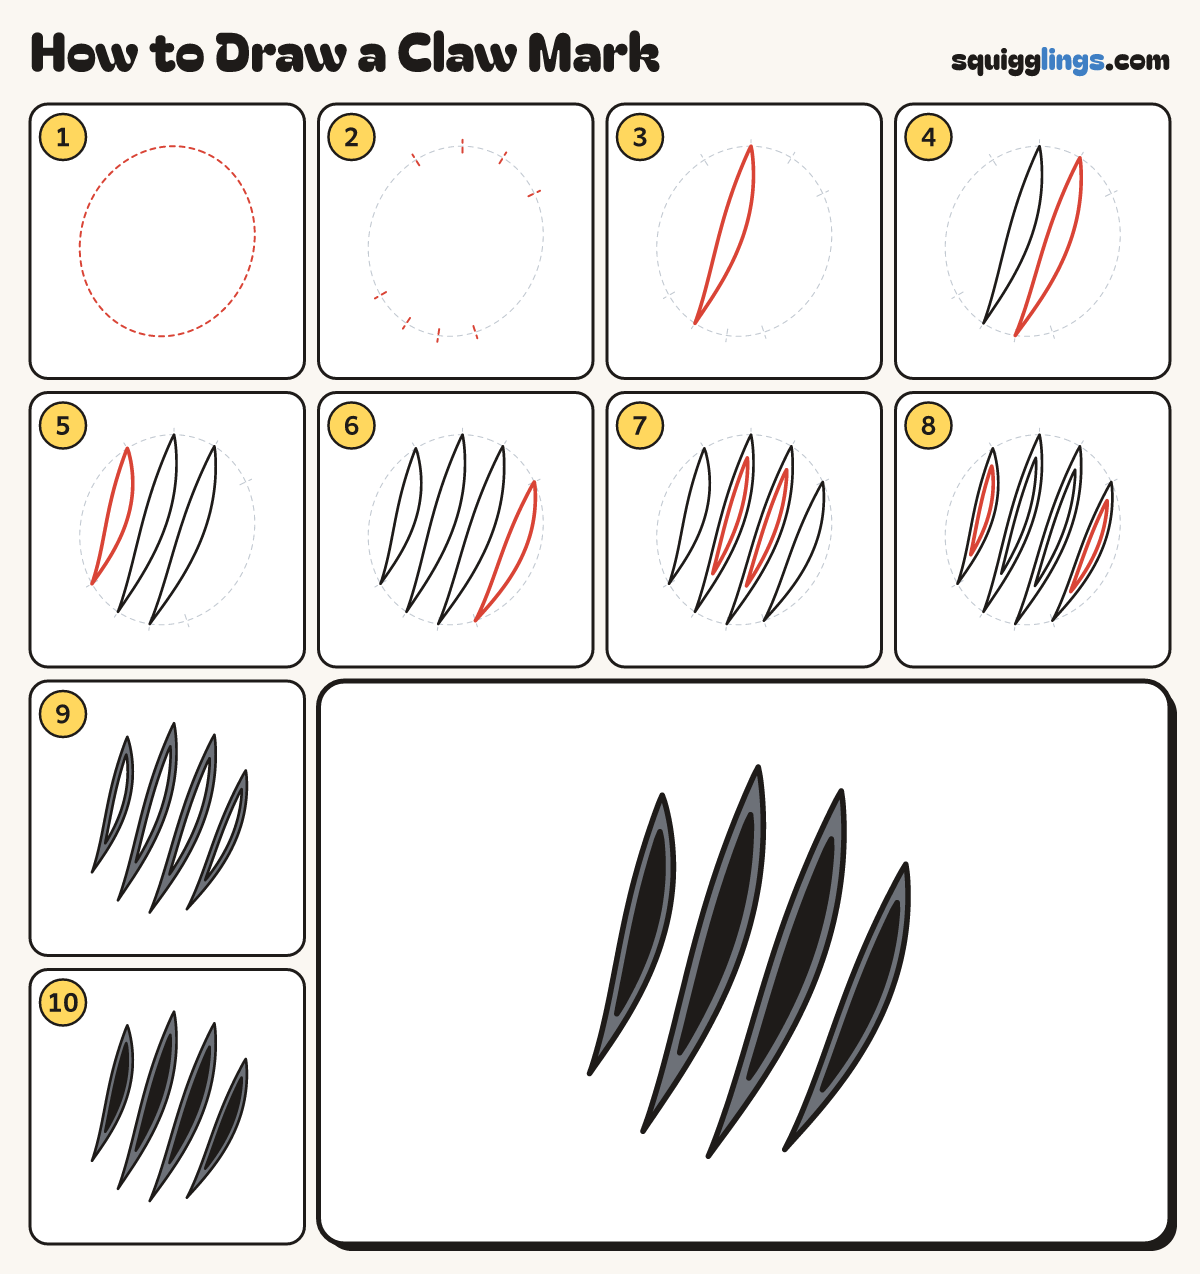
Each picture adds one red line. Draw that line, then scroll to the next picture. Rub out any dashed helper lines at the end. First up: a guide egg.
Step 1: A guide egg
Lightly draw a big egg, nearly a circle. All 4 claw marks will fit inside it.
Tip Press softly. You will rub the egg out later.
Step 2: Eight small marks
Make 4 small marks along the top of the egg and 4 along the bottom, evenly spaced.
Tip Each slash will run from a top mark down to a bottom mark.
Step 3: The first slash
Join the second top mark to the second bottom mark with a long thin slash, pointed at both ends.
Tip Fattest near the top, then a long thin point, like a scratch.
Step 4: The second slash
Beside it, join the third marks with another long slash, curving the same way.
Tip Leave a gap between the slashes so they never touch.
Step 5: The left slash
Join the first marks, on the left, with a shorter slash.
Step 6: The right slash
Join the last marks, on the right, with a shorter slash. Now you have 4 claw marks.
Step 7: Deep middle cuts
Inside each long slash draw a thinner slash, not touching the sides.
Tip This is the deepest part of the scratch.
Step 8: Deep side cuts
Do the same inside the 2 short slashes.
Step 9: Grey edges
Rub out the egg and the marks. Go over your lines, then colour the edge of each slash grey.
Tip Colour around the thin middles and leave them white for now.
Step 10: Black cuts
Colour the 4 deep cuts in the middle black. Your claw mark is done!
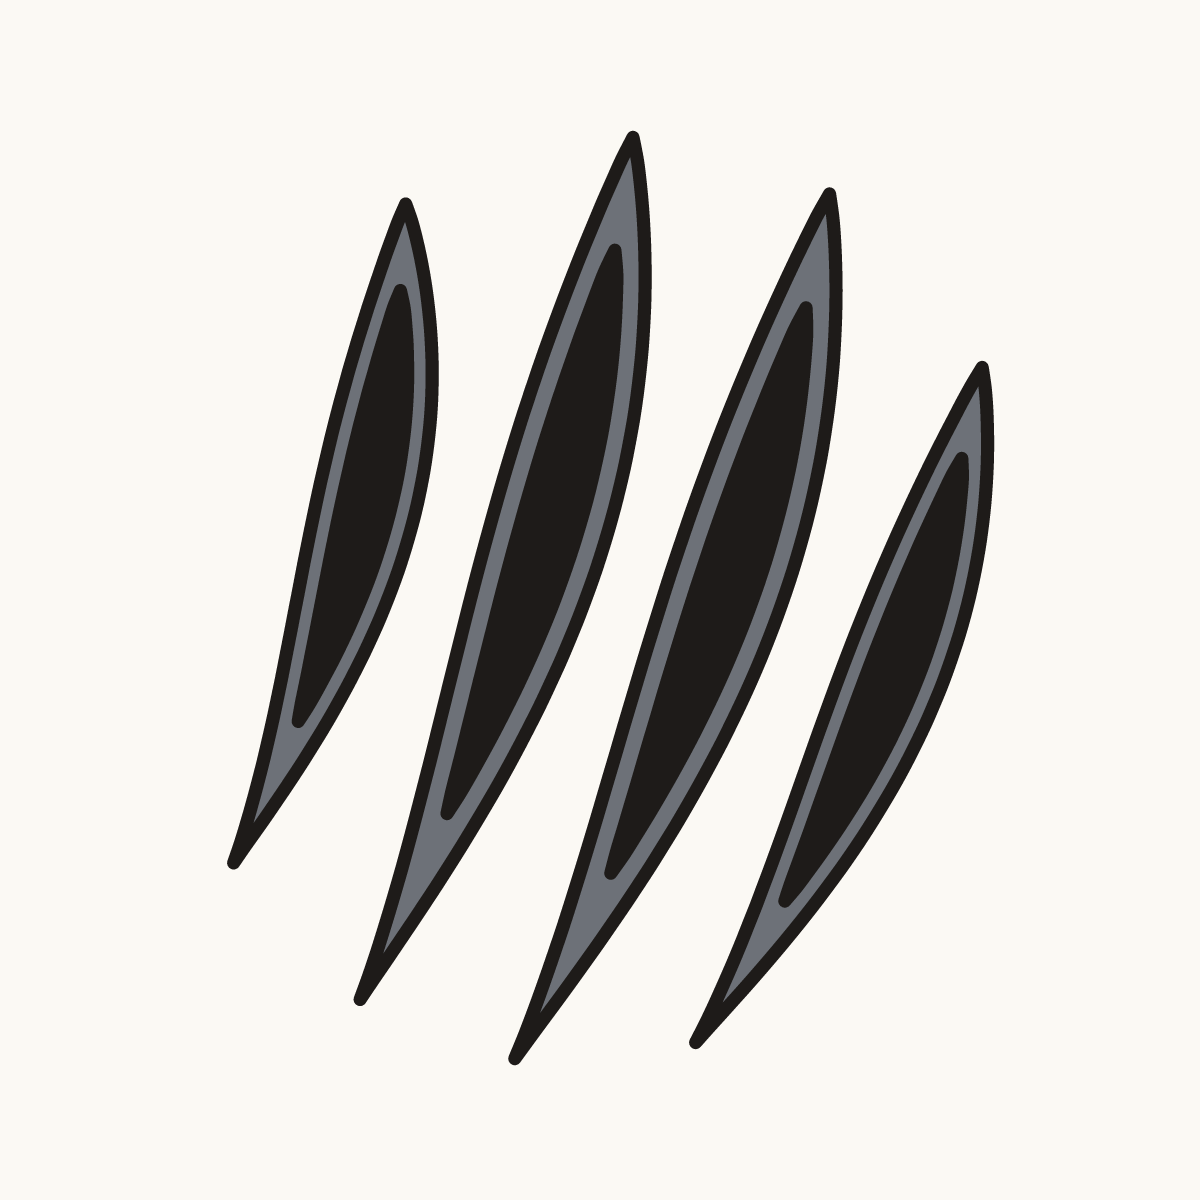
Your finished drawing
Follow the steps above and this is where you end up: a claw mark, drawn by you.
Every step in one picture