Watch it draw itself · tap to replay
How to Draw a Discus Thrower
Draw a discus thrower in 14 easy steps, about 11 minutes. Free, with a printable worksheet.
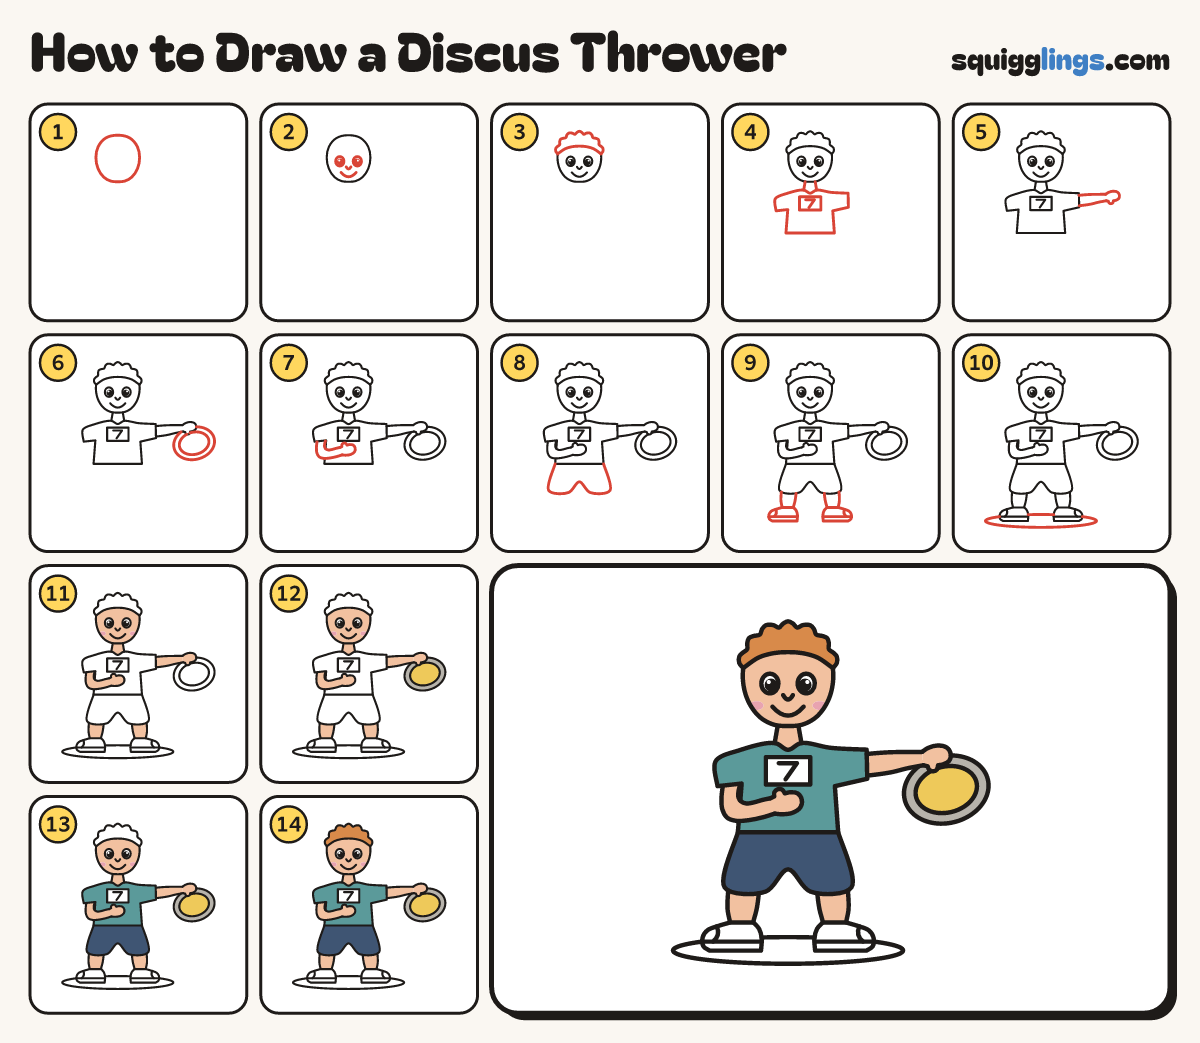
Each picture adds one red line. Draw that line, then scroll to the next picture. Rub out any dashed helper lines at the end. First up: the head.
Step 1: The head
Near the top, left of the middle, draw an egg for the head, a little narrower at the chin.
Tip Leave lots of room on the right for the long throwing arm.
Step 2: The face
Low in the head draw 2 round eyes with black dots, a tiny U nose and a big smile.
Step 3: Tufty hair
Start on the head's left side. Draw soft round tufts over the top, stopping on the right side.
Tip Rub out the head line above the hair.
Step 4: T-shirt and number
Draw 2 neck lines. From the left one draw a t-shirt, ending at the right one. Add a number box.
Tip The right sleeve points straight out to the side.
Step 5: Throwing arm
Start at the right sleeve: draw a long straight arm, thinner at the wrist. Stop at a mitten, thumb down.
Step 6: The discus
Under the mitten draw a big tilted oval plate, tucked behind the hand. Add a smaller oval inside.
Tip A discus is a heavy plate with a thick metal rim. The hand holds it from the top.
Step 7: Other arm
From the left sleeve draw a short arm down, bending across the tummy. Stop at a mitten hand.
Tip This arm swings across the body as the thrower winds up.
Step 8: Baggy shorts
Start at the t-shirt's bottom left. Draw wide shorts with a dip between the legs. Stop at the bottom right.
Step 9: Legs and sneakers
From each shorts leg draw 2 lines down to a thin ankle. Add a sneaker with a sole.
Tip Feet wide apart: a thrower needs a steady stance.
Step 10: The throwing circle
Round both sneakers draw a long flat oval for the throwing circle. Its back edge goes behind the sneakers.
Step 11: Peach skin, pink cheeks
Colour the cheeks pink. Colour the face, neck, arms, hands and legs peach around them. Leave the eyes white.
Step 12: Yellow and grey discus
Colour the middle of the discus yellow. Colour its thick rim grey.
Step 13: Teal shirt, navy shorts
Colour the t-shirt teal, leaving the number box white, and the shorts navy.
Step 14: Ginger hair
Colour the hair ginger. Leave the sneakers white. Your discus thrower is done.
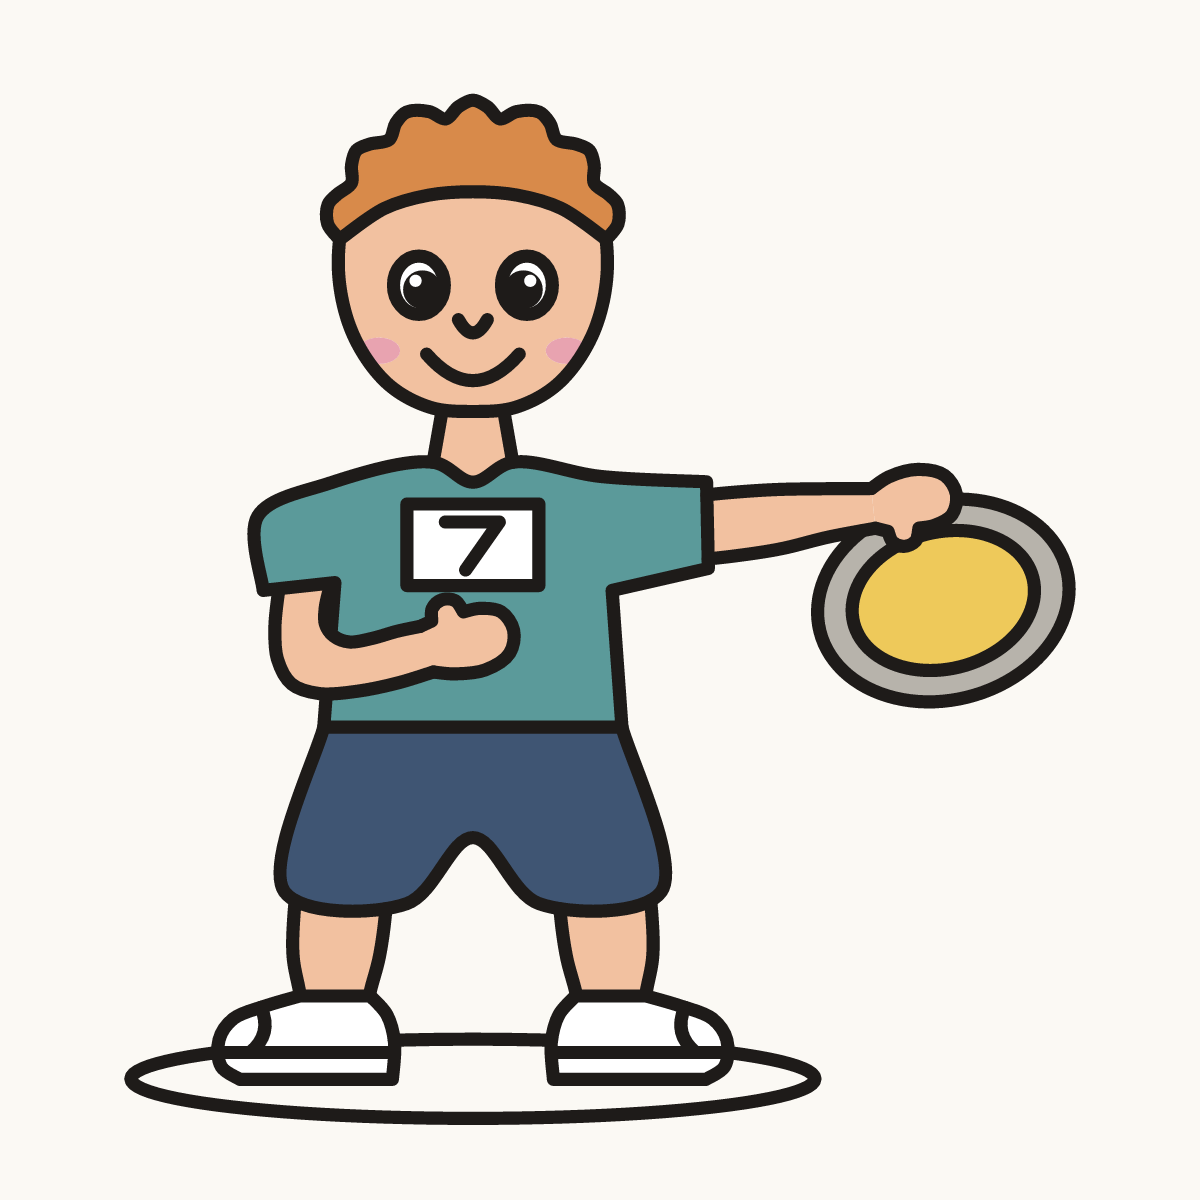
Your finished drawing
Follow the steps above and this is where you end up: a discus thrower, drawn by you.
Every step in one picture