Watch it draw itself · tap to replay
How to Draw a Sleeping Dinosaur
Draw a sleeping dinosaur in 11 easy steps, about 8 minutes. Free, with a printable worksheet.
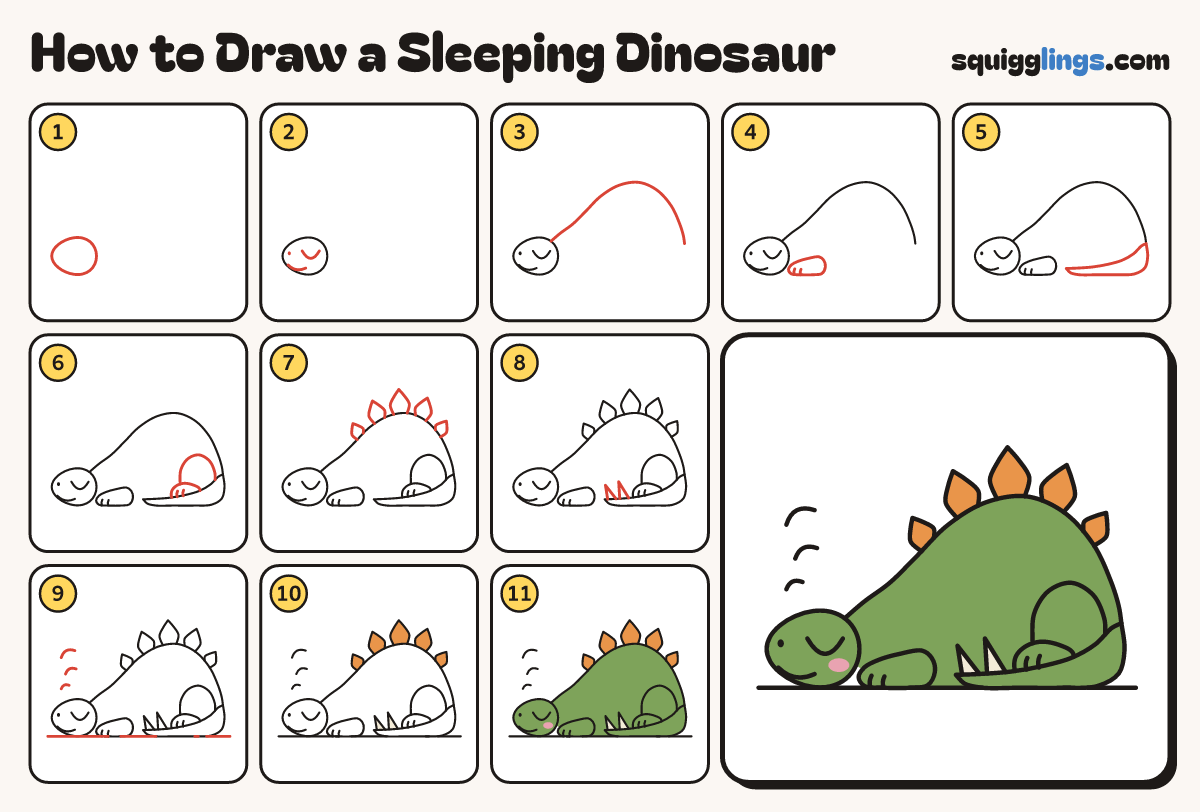
Each picture adds one red line. Draw that line, then scroll to the next picture. Rub out any dashed helper lines at the end. First up: egg head.
Step 1: Egg head
Low on the left, draw an egg lying on its side for the head.
Tip Leave lots of room on the right for the big body.
Step 2: Sleepy face
Draw a closed eye like a small smile. Add a nostril dot and a little smile.
Step 3: Big round back
From the top of the head, draw a big hill up and over, then down to the right.
Tip The body is much bigger than the head.
Step 4: Folded front leg
Beside the chin, draw a leg lying flat on the ground like a fat sausage. Add 2 toe lines.
Step 5: Curled tail
From the end of the back, draw a long tail curling along the ground to a point at the front.
Tip The tail gets thinner all the way to the tip.
Step 6: Tucked back leg
Start on the tail. Draw a round thigh hill and stop on the tail. Add a foot with 2 toes.
Step 7: Back plates
Along the back, draw 5 pointy kite plates. Each one starts and stops on the back line.
Tip Make the middle plate the biggest.
Step 8: Tail spikes
Near the tip of the tail, draw 2 thin spikes pointing up.
Step 9: Ground and sleepy lines
Draw a ground line. Above the head, draw 3 curved lines floating up, each a little bigger.
Step 10: Cream and orange
Colour the 2 tail spikes cream. Colour the 5 back plates orange.
Step 11: Green and pink
Colour a pink cheek. Then colour the head, body, legs and tail light green. Your sleeping dinosaur is done!
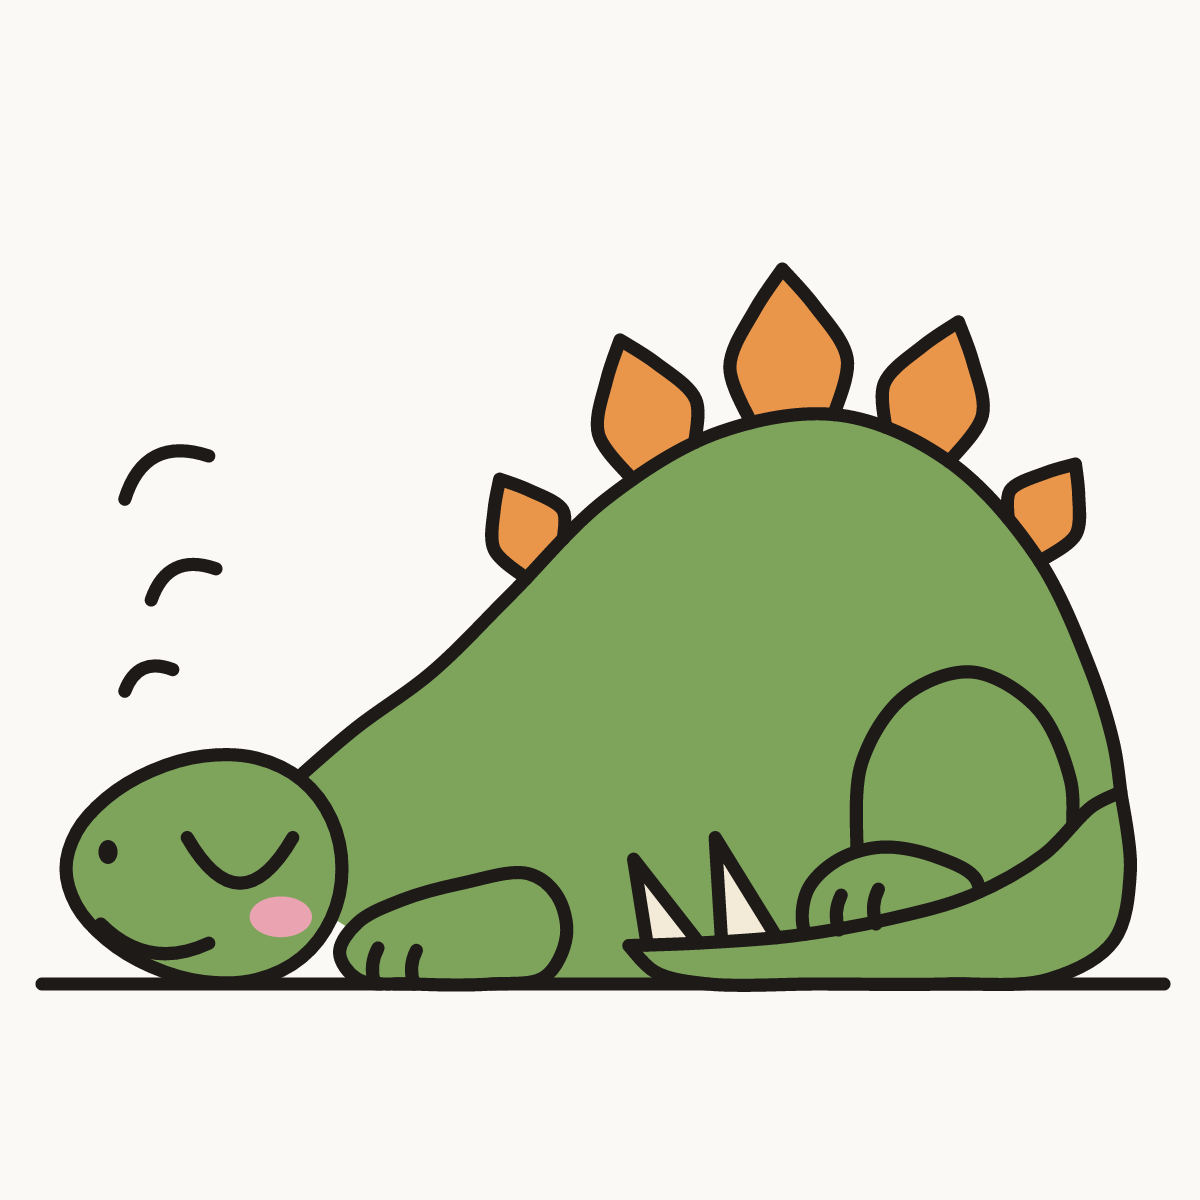
Your finished drawing
Follow the steps above and this is where you end up: a sleeping dinosaur, drawn by you.
Every step in one picture