Watch it draw itself · tap to replay
How to Draw a Danish Pastry
Draw a danish pastry in 12 easy steps, about 9 minutes. Free, with a printable worksheet.
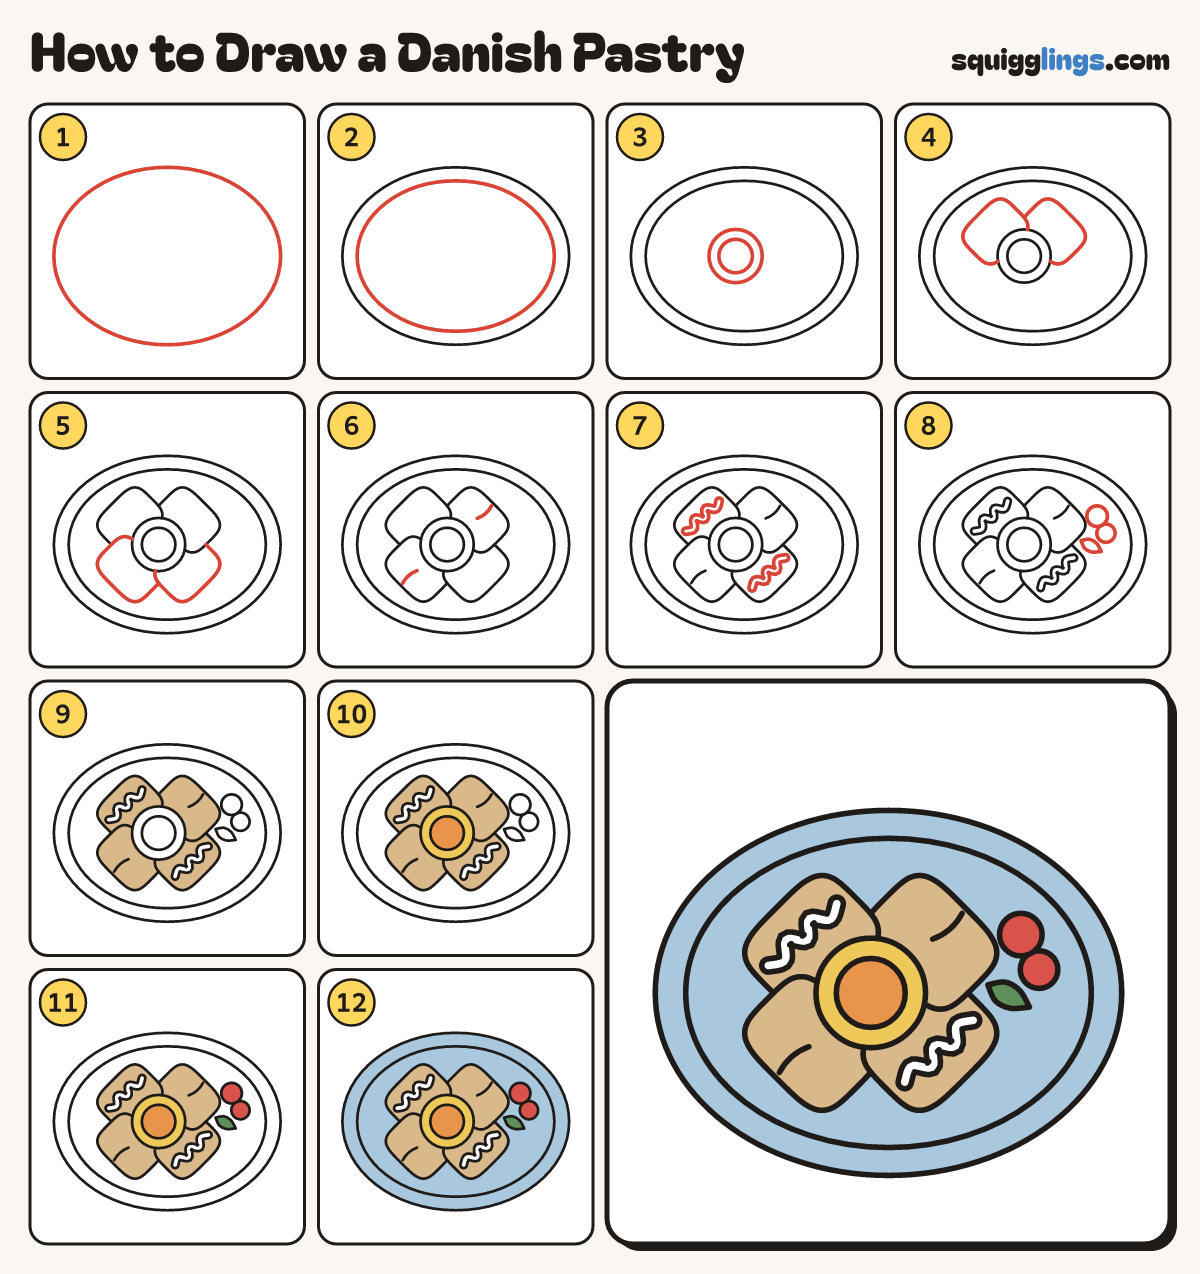
Each picture adds one red line. Draw that line, then scroll to the next picture. Rub out any dashed helper lines at the end. First up: a plate.
Step 1: A plate
In the middle, draw a big oval plate, nearly as wide as the page and a bit less tall.
Step 2: The rim
Draw a second oval a finger inside the plate, all the way round, for the rim.
Step 3: The fruit centre
Left of the plate's middle, draw a round as big as a plum, with a smaller round inside it.
Tip A Danish is flaky dough folded in round a sweet fruit centre.
Step 4: Two folded flaps
Draw a rounded block at the top left, tucked behind the round. Add another at top right, behind both.
Step 5: Two more flaps
Draw a block at bottom right and one at bottom left, each tucked behind its neighbours, like a pinwheel.
Step 6: Fold lines
On the top right and bottom left flaps, draw a short curve from the outer corner, stopping on the flap.
Step 7: Icing drizzles
Along the top left and bottom right flaps, draw a wavy ribbon of icing: 2 wiggly lines close together.
Step 8: Berries
Against the right flap, draw 2 round berries touching the pastry, with a pointed leaf below them.
Step 9: Tan pastry
Go over your lines, then colour the 4 flaps tan, around the icing. Leave the icing white.
Step 10: Yellow and orange
Colour the ring round the centre yellow and the apricot in the middle orange.
Step 11: Red berries, green leaf
Colour the 2 berries red and the leaf green.
Step 12: Sky plate
Colour the plate sky blue, around the pastry, the berries and the leaf.
Your finished drawing
Follow the steps above and this is where you end up: a danish pastry, drawn by you.
Every step in one picture