Watch it draw itself · tap to replay
How to Draw Crutches
Draw crutches in 11 easy steps, about 8 minutes. Free, with a printable worksheet.
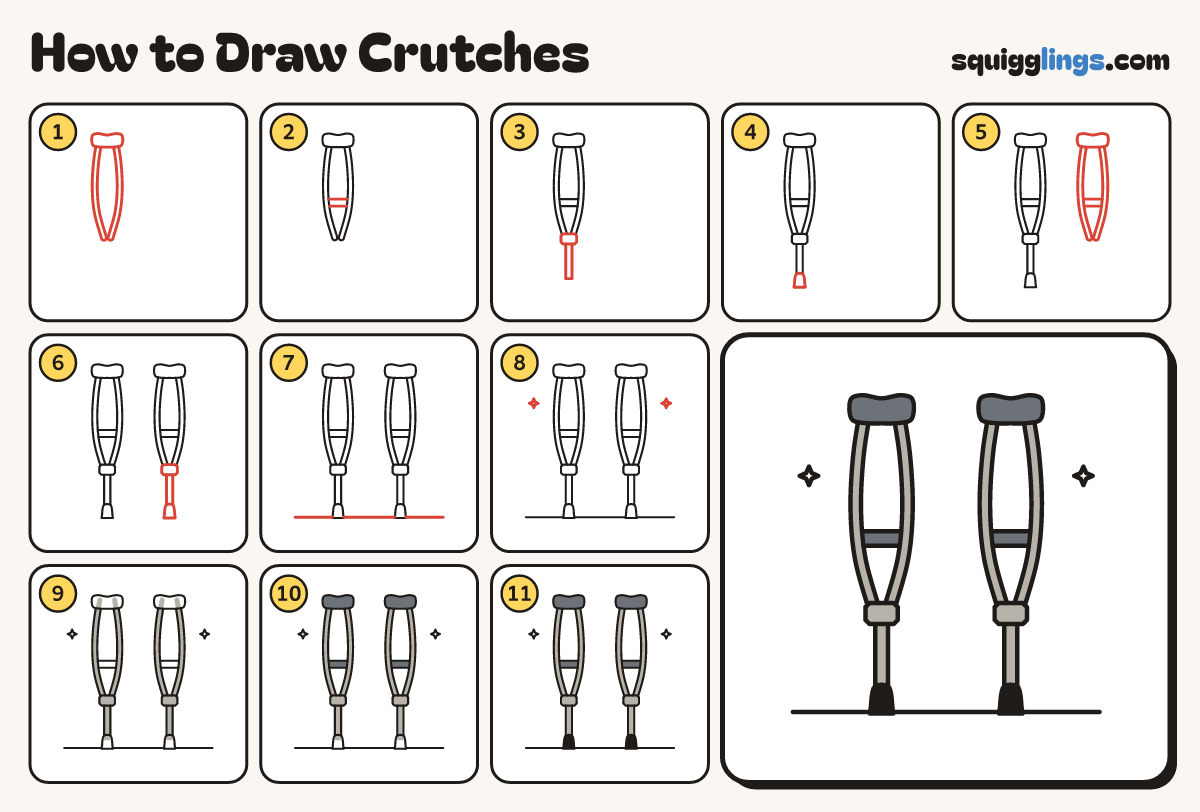
Each picture adds one red line. Draw that line, then scroll to the next picture. Rub out any dashed helper lines at the end. First up: left pad and rails.
Step 1: Left pad and rails
Near the top left, draw a soft bean pad. Under it, draw 2 thin rails bowing out and coming together.
Tip Make each rail a thin band with 2 lines, so there is room to colour it.
Step 2: Hand grip
Just below the middle of the rails, draw a short grip bar from one rail across to the other.
Step 3: Left leg
Where the rails come together, draw a small box. Under it, draw a straight leg down, almost to the bottom.
Step 4: Rubber tip
At the bottom of the leg, draw a little bell for the rubber tip, with a flat bottom.
Step 5: Right pad and rails
Draw the right crutch the same way: a bean pad, 2 bowing rails and a grip bar.
Step 6: Right leg and tip
Add the small box, the straight leg and the rubber tip under the right crutch.
Step 7: Floor line
Draw a floor line under the rubber tips. Start left of the crutches and stop past the right one.
Step 8: Two sparkles
Draw 2 little sparkles in the air, one on each side of the crutches.
Step 9: Light grey metal
Go over your lines. Colour the rails, the little boxes and the legs light grey.
Step 10: Dark grey pads
Colour the soft pads and the grip bars dark grey.
Step 11: Black tips
Colour the rubber tips black, and your crutches are ready to help.
Your finished drawing
Follow the steps above and this is where you end up: crutches, drawn by you.
Every step in one picture