Watch it draw itself · tap to replay
How to Draw a Construction Crane
Draw a construction crane in 11 easy steps, about 8 minutes. Free, with a printable worksheet.
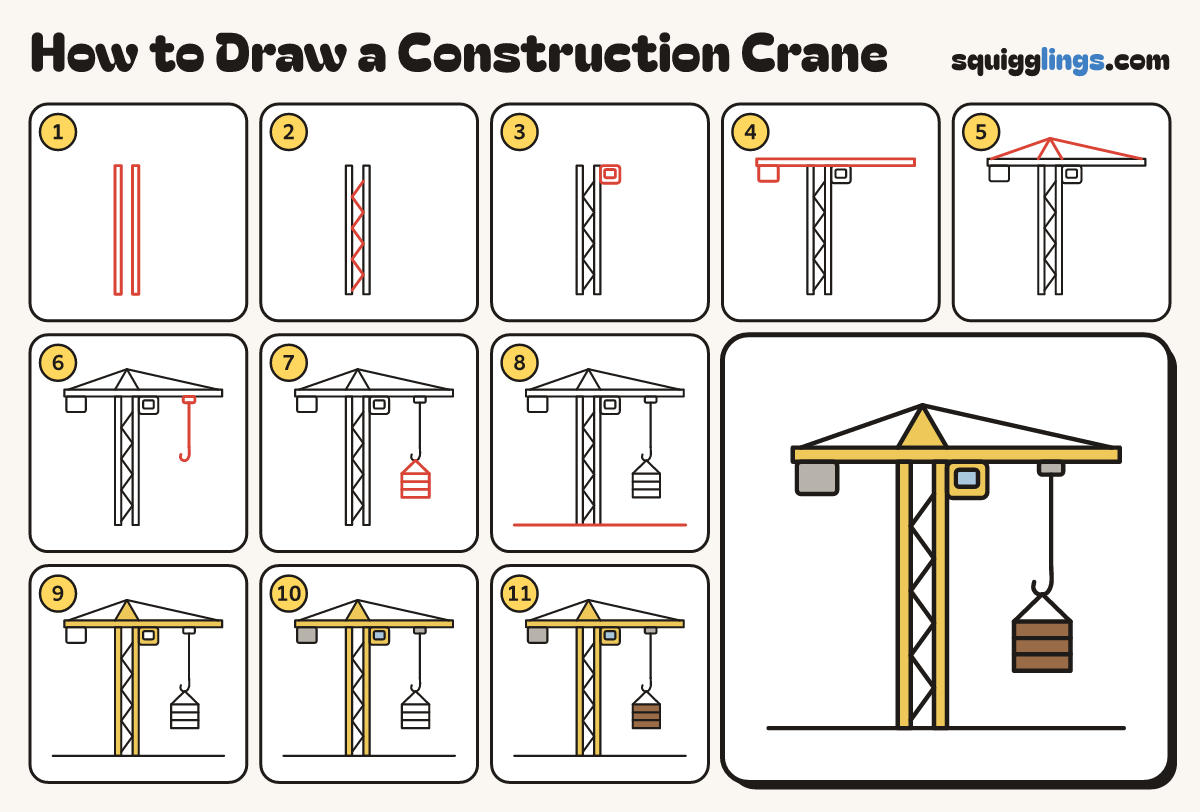
Each picture adds one red line. Draw that line, then scroll to the next picture. Rub out any dashed helper lines at the end. First up: tower rails.
Step 1: Tower rails
Left of the middle, draw a tall thin bar standing up. Draw a second one a hand to the right.
Tip Keep both rails straight and the same height.
Step 2: Zigzag braces
Start near the bottom of the left rail. Zigzag up between the rails, stopping near the top.
Tip Keep the zigs all the same size.
Step 3: The cab
On top of the right rail, draw a small box sticking out to the right. Add a little window.
Step 4: Arm and weight
Across the tower top, draw a long flat bar, short on the left. Hang a block under its left end.
Tip The heavy block stops the crane tipping over.
Step 5: Peak and ties
Draw a little peak on the bar over the tower. From its tip, rule a line to each end.
Step 6: Cable and hook
Under the long arm, draw a tiny box. From it, draw a straight cable down, ending in a J hook.
Step 7: Rope and crate
Below the hook, draw a box crate with 2 plank lines. Rule a rope from each top corner to the hook.
Step 8: The ground
Draw a ground line along the bottom of the paper, under both rails.
Step 9: Yellow crane
Colour the rails, cab, arm and peak yellow, around the window.
Step 10: Sky window, grey blocks
Colour the cab window sky blue. Colour the heavy block and the tiny box grey.
Step 11: Brown crate
Colour the crate brown. Go over the hook, cable and rope again so they stand out.
Your finished drawing
Follow the steps above and this is where you end up: a construction crane, drawn by you.
Every step in one picture