Watch it draw itself · tap to replay
How to Draw a Cotton Gin
Draw a cotton gin in 13 easy steps, about 10 minutes. Free, with a printable worksheet.
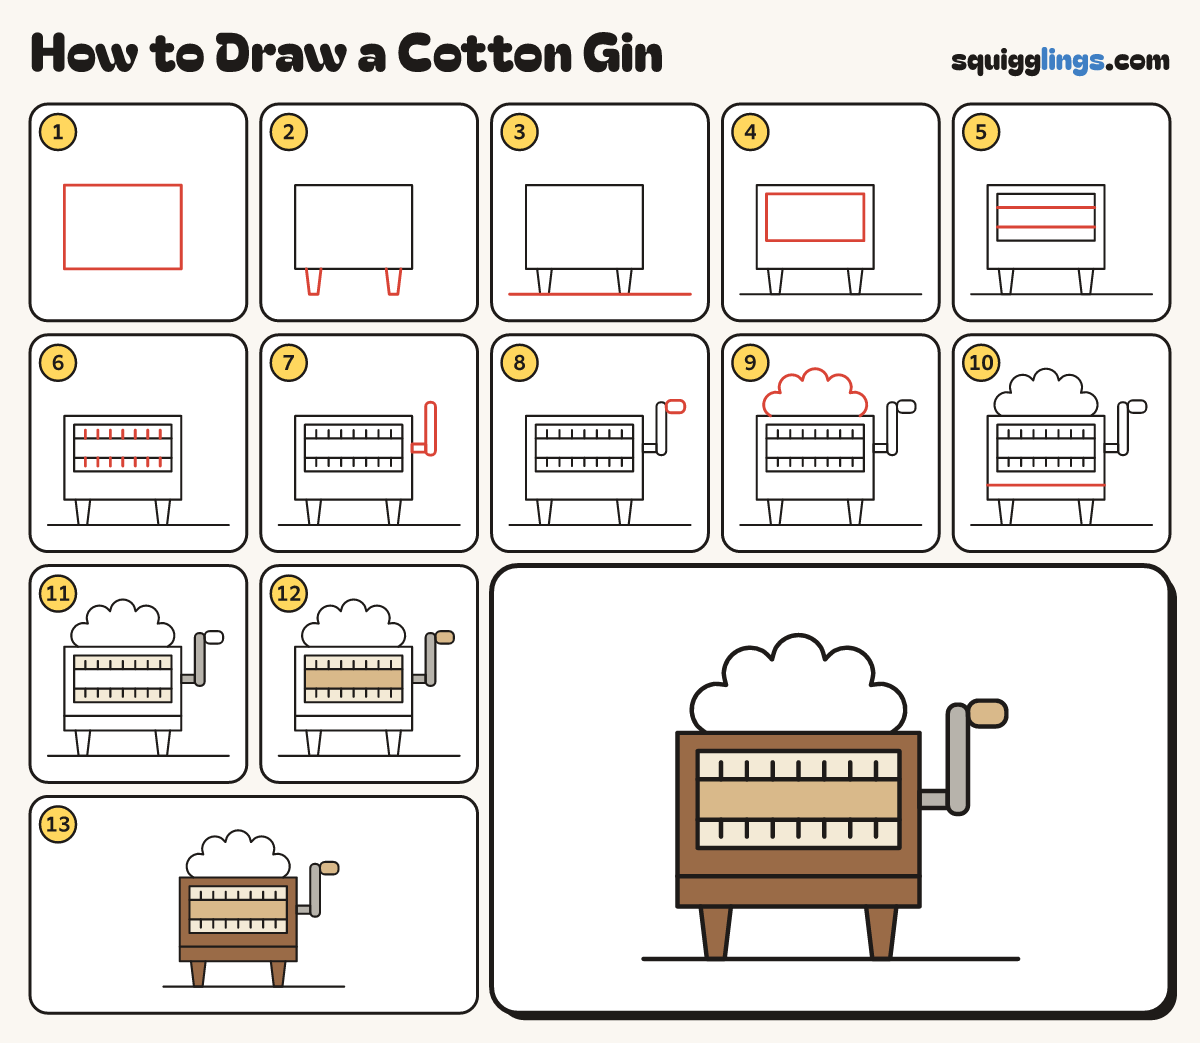
Each picture adds one red line. Draw that line, then scroll to the next picture. Rub out any dashed helper lines at the end. First up: the box.
Step 1: The box
A little left of the middle draw a big wide box, wider than it is tall.
Tip Leave room on the right for the crank and on top for the cotton.
Step 2: Two legs
Under the box draw 2 short legs, one near each end, narrower at the bottom.
Tip Make both legs the same length so the box stands level.
Step 3: Ground line
Draw the ground line from edge to edge, touching the bottom of both legs.
Step 4: The window
In the top half of the box draw a long window: a wide box with a gap all round.
Step 5: The roller
Start on the window's left side. Draw 2 lines straight across and stop on its right side, for a roller.
Tip Leave a gap above the roller and a gap below it.
Step 6: Wire teeth
Draw 7 short spikes sticking up from the roller and 7 sticking down, like the teeth of a comb.
Tip The teeth pull the fluffy cotton away from its seeds.
Step 7: The crank
Level with the roller, draw a short bar out of the box's right side. Add a tall bar going up.
Step 8: The handle
At the top of the tall bar draw a fat handle pointing right, with round ends.
Tip Turning this handle spins the roller inside the box.
Step 9: Fluffy cotton
Start on the box's top edge. Draw 5 big round bumps up and over, and stop on the top edge.
Tip Make the bumps fat and round, like a cloud.
Step 10: A plank line
Below the window draw a line across the box from side to side, for the wooden planks.
Step 11: Cream and grey
Colour the window gaps cream and the 2 crank bars grey. Leave the cotton white.
Step 12: Tan roller
Colour the roller and the handle tan, a light brown.
Step 13: Brown box
Colour the box and both legs brown, going around the window. Your cotton gin is ready to turn!
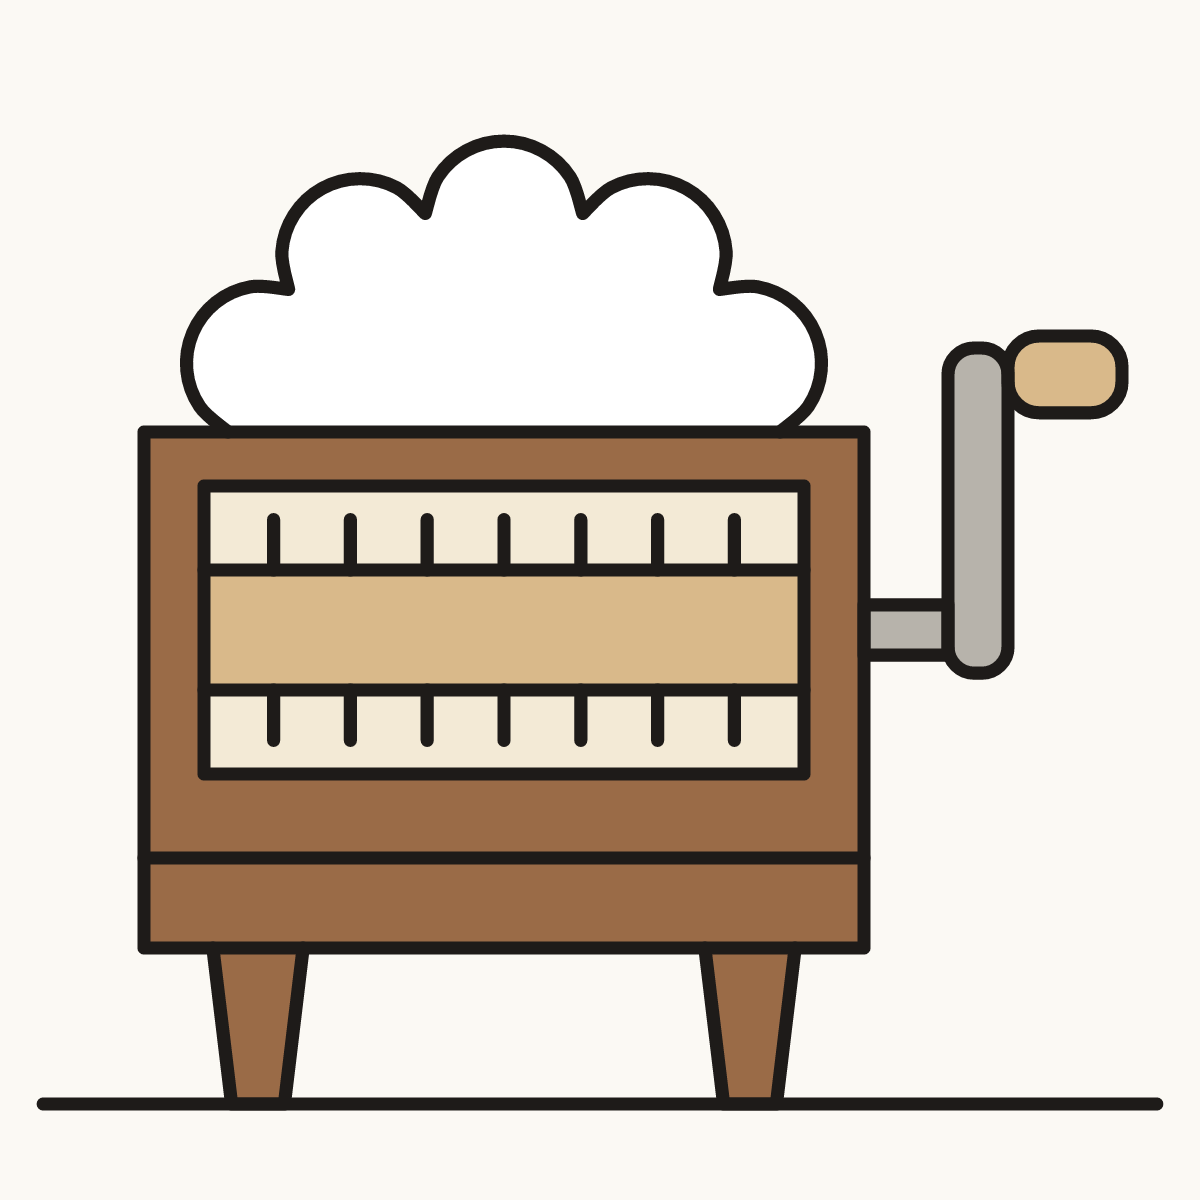
Your finished drawing
Follow the steps above and this is where you end up: a cotton gin, drawn by you.
Every step in one picture