Watch it draw itself · tap to replay
How to Draw a Cornish Pasty
Draw a cornish pasty in 11 easy steps, about 8 minutes. Free, with a printable worksheet.
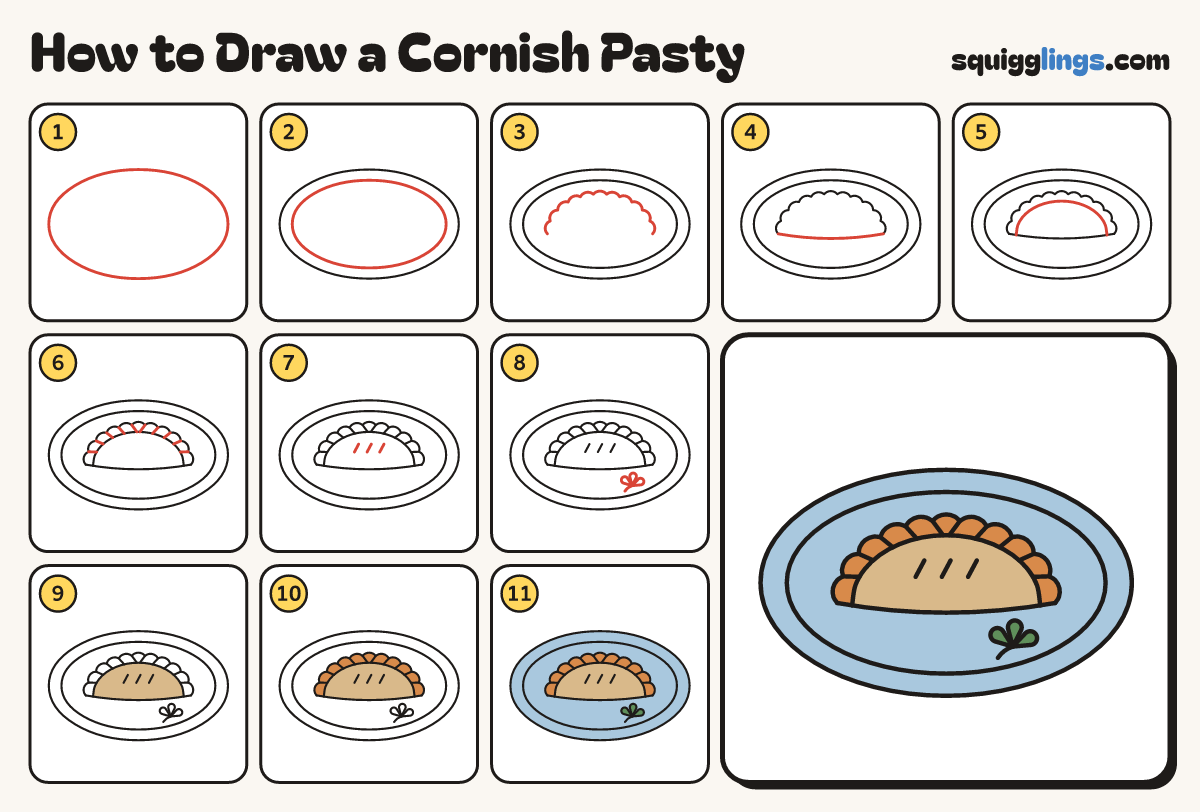
Each picture adds one red line. Draw that line, then scroll to the next picture. Rub out any dashed helper lines at the end. First up: a plate.
Step 1: A plate
In the middle of your paper draw a big wide oval plate, nearly as wide as the page.
Step 2: The rim
Draw a second oval a finger inside the plate, all the way round, for the rim.
Step 3: The crimped top
Start on the plate, left of the middle. Draw a big arch of 11 fat bumps, stopping on the right.
Tip A Cornish pasty is a D-shaped pie with a crimped, bumpy edge. Keep the bumps the same size.
Step 4: The bottom edge
Close the bottom with a gently bowed line, from the left end of the arch, stopping at the right end.
Step 5: The ridge
Inside the arch draw a second arch a finger in from the bumps. Start and stop on the bottom edge.
Step 6: Rope twists
From each dip between the bumps draw a short slanted line in to the ridge, like a rope.
Step 7: Steam slits
In the middle of the pasty draw 3 short slanted lines side by side to let the steam out.
Step 8: Parsley
In front of the pasty draw a short stem up to a point. From there fan out 3 pointed leaves.
Step 9: Tan pasty
Go over your lines. Colour the middle of the pasty tan.
Step 10: Golden crimp
Colour the bumpy crimped edge ginger, like golden baked pastry.
Step 11: Green and blue
Colour the parsley green and the plate sky blue, around the pasty. Your Cornish pasty is done!
Your finished drawing
Follow the steps above and this is where you end up: a cornish pasty, drawn by you.
Every step in one picture