Watch it draw itself · tap to replay
How to Draw a Cooked Fish
Draw a cooked fish in 12 easy steps, about 9 minutes. Free, with a printable worksheet.
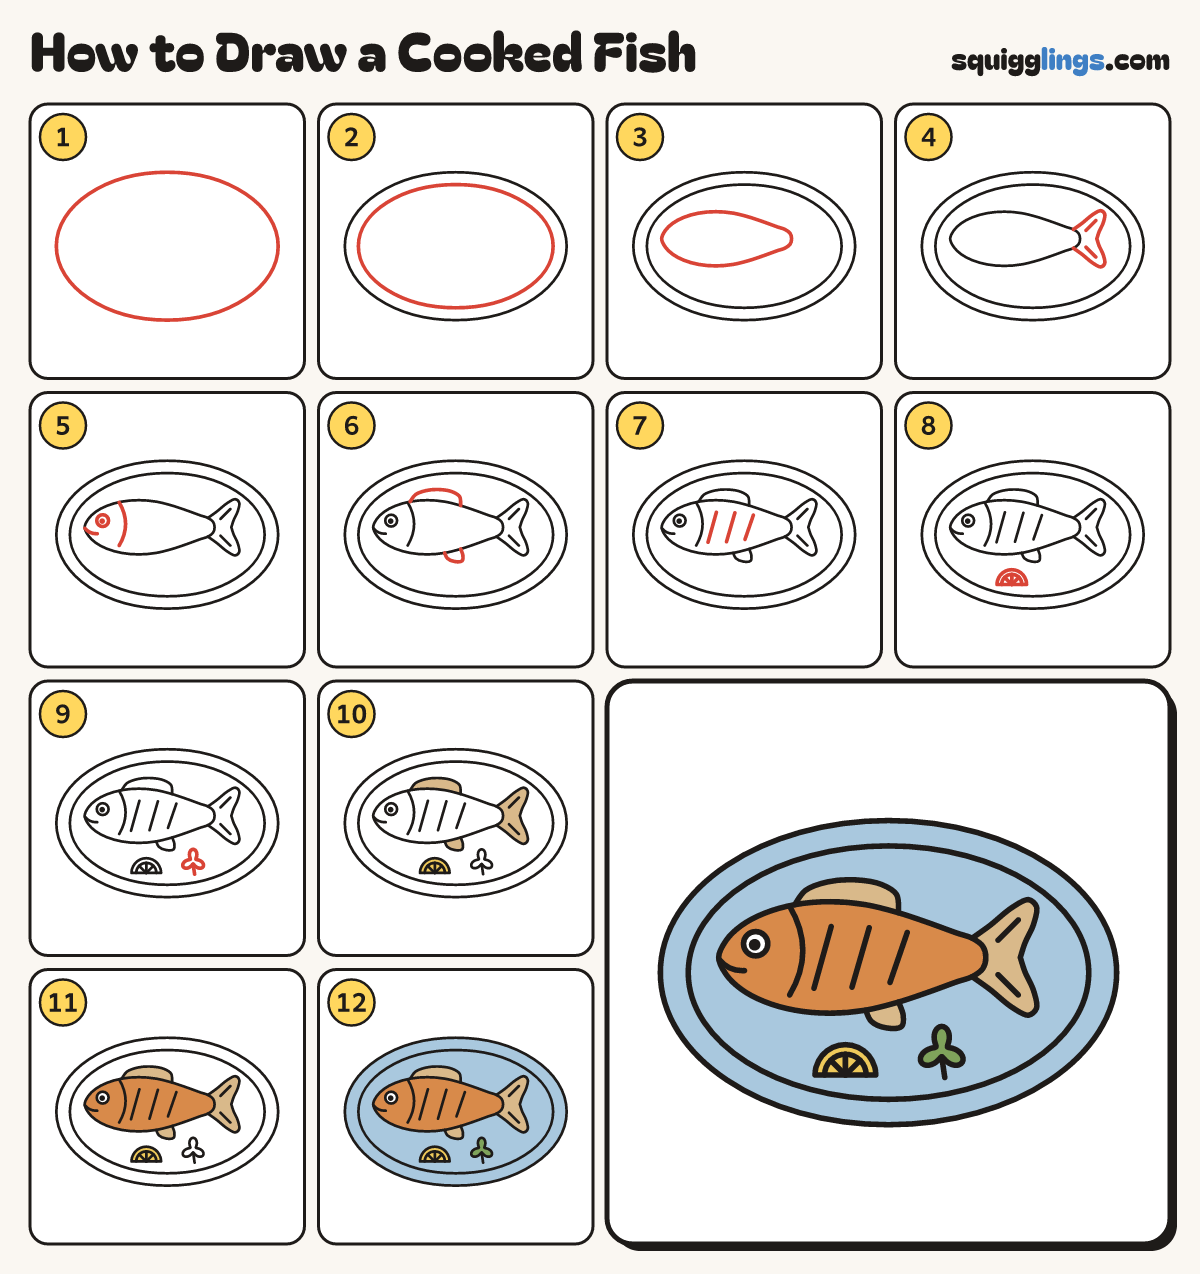
Each picture adds one red line. Draw that line, then scroll to the next picture. Rub out any dashed helper lines at the end. First up: a plate.
Step 1: A plate
In the middle of your paper draw a big oval plate, nearly as wide as the page.
Tip Make the oval wide and low, like a dish seen from above.
Step 2: The rim
Draw a second oval a finger inside the plate, all the way round, for the rim.
Step 3: The fish body
On the plate draw a long fat leaf shape: a pointed nose on the left, thin at the right.
Tip Make it fattest near the front, like a real fish.
Step 4: The tail
Start on top of the thin end. Draw 2 lobes meeting in a dent; stop underneath. Add 2 lines.
Step 5: Eye, smile and gill
Behind the nose draw a small round eye with a dot, a little smile and a curved gill line.
Tip The gill line starts on the back and stops just above the belly.
Step 6: Fins
Start and stop on the back: draw a long low fin. Draw a small fin under the belly.
Step 7: Grill marks
Across the body draw 3 short slanted lines, side by side. Keep them inside the fish.
Tip These lines show the fish has been cooked.
Step 8: A lemon wedge
Under the fish draw a half circle lying flat. Add a smaller one inside and 3 lines from the middle.
Step 9: A green leaf
Next to the lemon draw a leaf with 3 round bumps on a short stalk.
Step 10: Yellow lemon, tan fins
Colour the lemon wedge yellow. Colour the tail and the 2 fins tan.
Step 11: A golden fish
Colour the fish body golden brown. Leave the eye white.
Step 12: Green leaf, blue plate
Colour the leaf green. Colour the plate light blue, going around all the food.
Tip Go over your lines and your cooked fish is ready to serve!
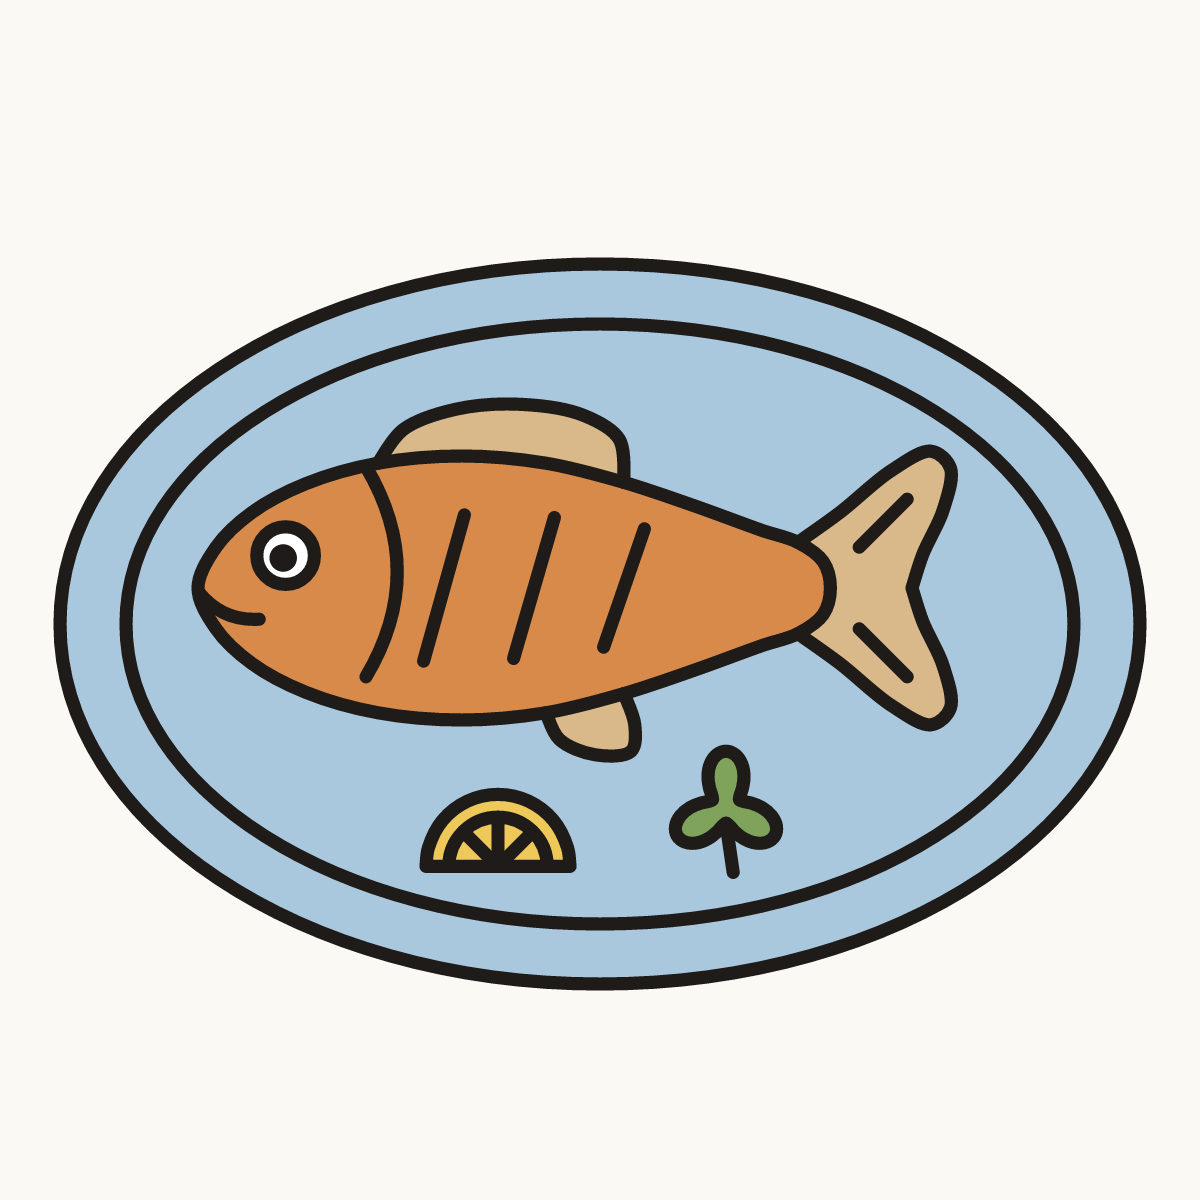
Your finished drawing
Follow the steps above and this is where you end up: a cooked fish, drawn by you.
Every step in one picture