Watch it draw itself · tap to replay
How to Draw Cleaning Supplies
Draw cleaning supplies in 14 easy steps, about 11 minutes. Free, with a printable worksheet.
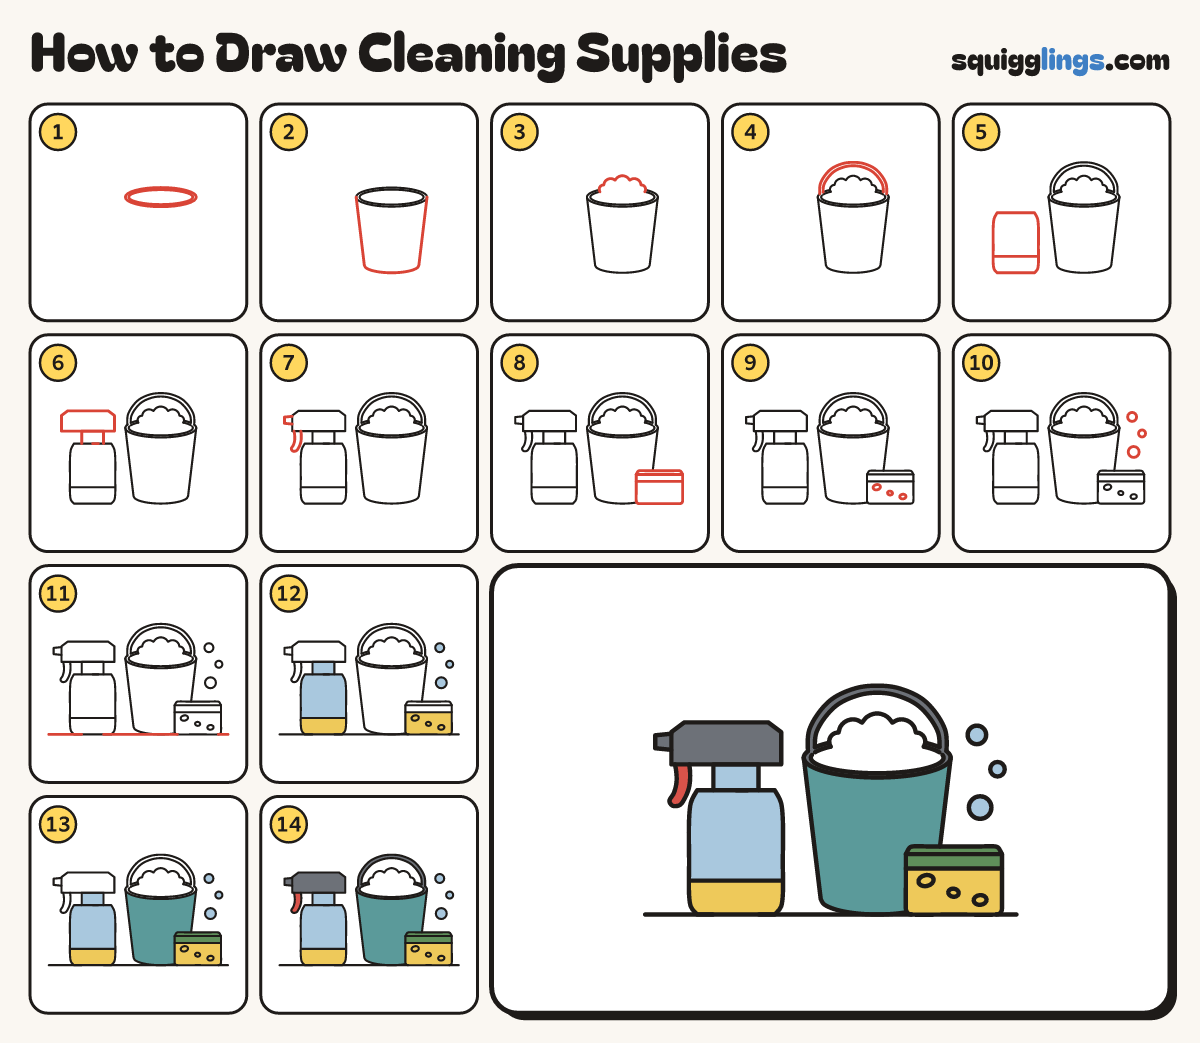
Each picture adds one red line. Draw that line, then scroll to the next picture. Rub out any dashed helper lines at the end. First up: the bucket rim.
Step 1: The bucket rim
Right of the middle draw a wide flat oval, with a smaller oval inside it for the rim.
Tip Leave room on the left for a bottle.
Step 2: The bucket
Start at the oval's left end. Draw a line down, leaning in, curve under, and stop at the right end.
Tip A tall tub, narrower at the bottom.
Step 3: Soap suds
Start on the back of the rim. Draw a heap of 5 round bumps and stop on the rim again.
Tip Make the middle bumps the highest.
Step 4: The handle
From the rim's left end draw a tall rainbow over to its right end, with a second rainbow just inside.
Step 5: The bottle
Left of the bucket draw a tall bottle with soft corners. Add a line across it near the bottom.
Step 6: The spray head
Above the bottle draw a short neck and a wide flat spray head with slanted top corners.
Tip The head is like a little hat, wider than the bottle.
Step 7: Nozzle and trigger
On the head's left end draw a small box nozzle. Under it hang a slim curved trigger.
Step 8: The sponge
Right of the bucket draw a low box with a slanted top. Draw 2 lines across, from side to side.
Tip The sponge sits in front of the bucket.
Step 9: Sponge holes
Under the lines draw 3 little oval holes in a slanting row, each a different size.
Step 10: Bubbles
Above the sponge draw 3 round bubbles of different sizes, floating up.
Tip Bubbles are never all the same size.
Step 11: The table
Draw a long table line under everything. Start near the left edge and stop near the right edge.
Step 12: Yellow and sky blue
Go over your lines. Colour the sponge and label yellow. Colour the bottle, its neck and the bubbles sky blue.
Step 13: Teal and green
Colour the bucket teal, around the sponge. Colour the top of the sponge green.
Step 14: Red and dark grey
Colour the trigger red. Colour the spray head, nozzle, rim and handle dark grey. Leave the suds white.
Your finished drawing
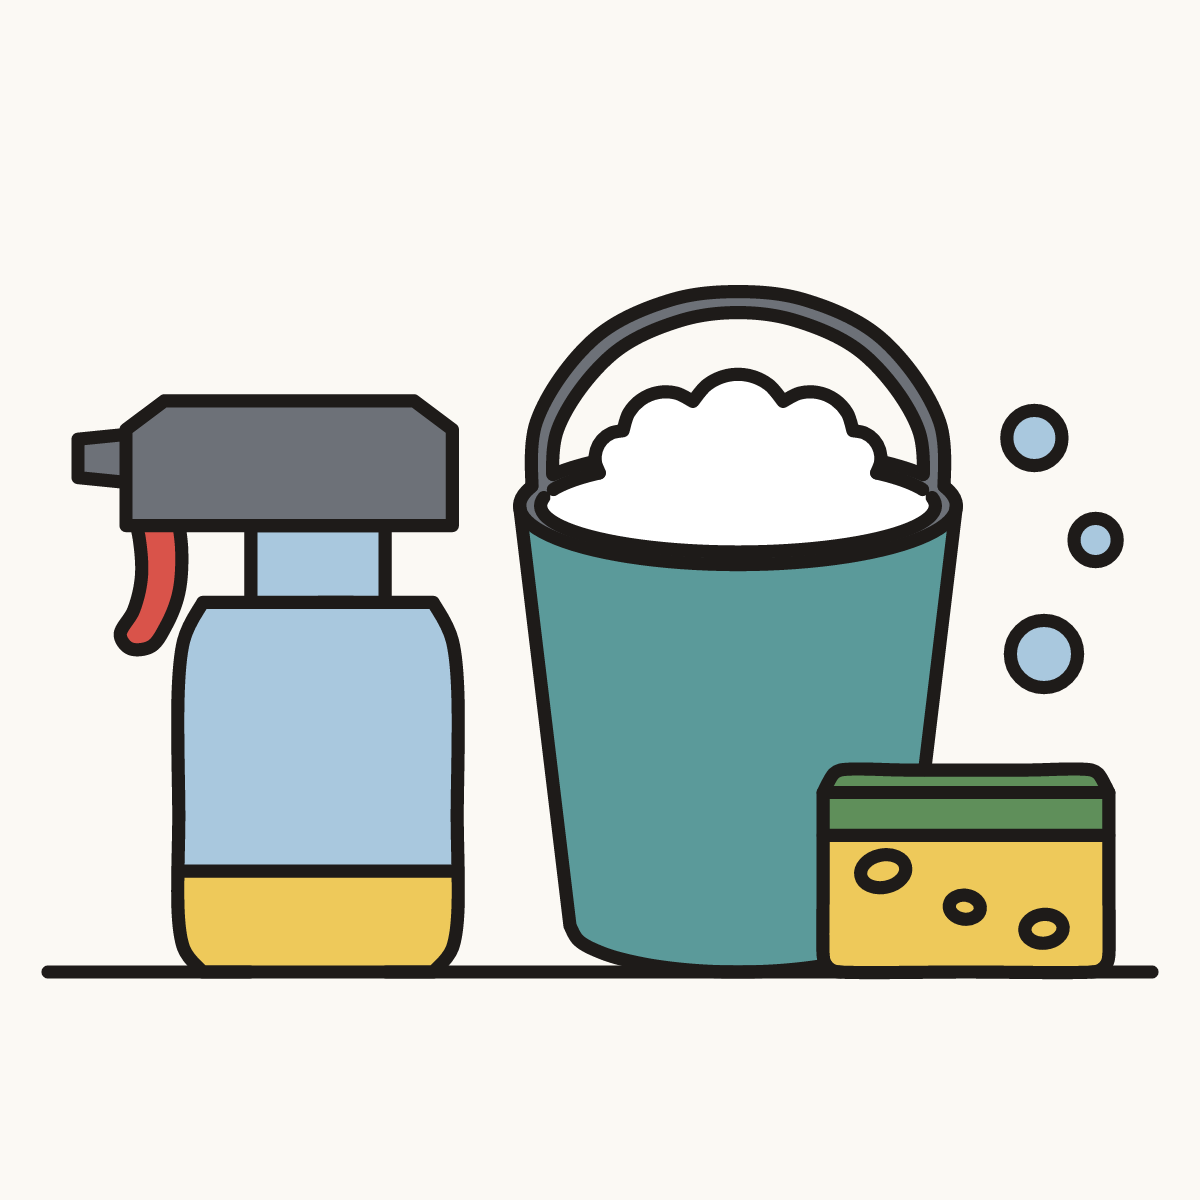
Follow the steps above and this is where you end up: cleaning supplies, drawn by you.
Every step in one picture