Watch it draw itself · tap to replay
How to Draw a City Skyline
Draw a city skyline in 12 easy steps, about 9 minutes. Free, with a printable worksheet.
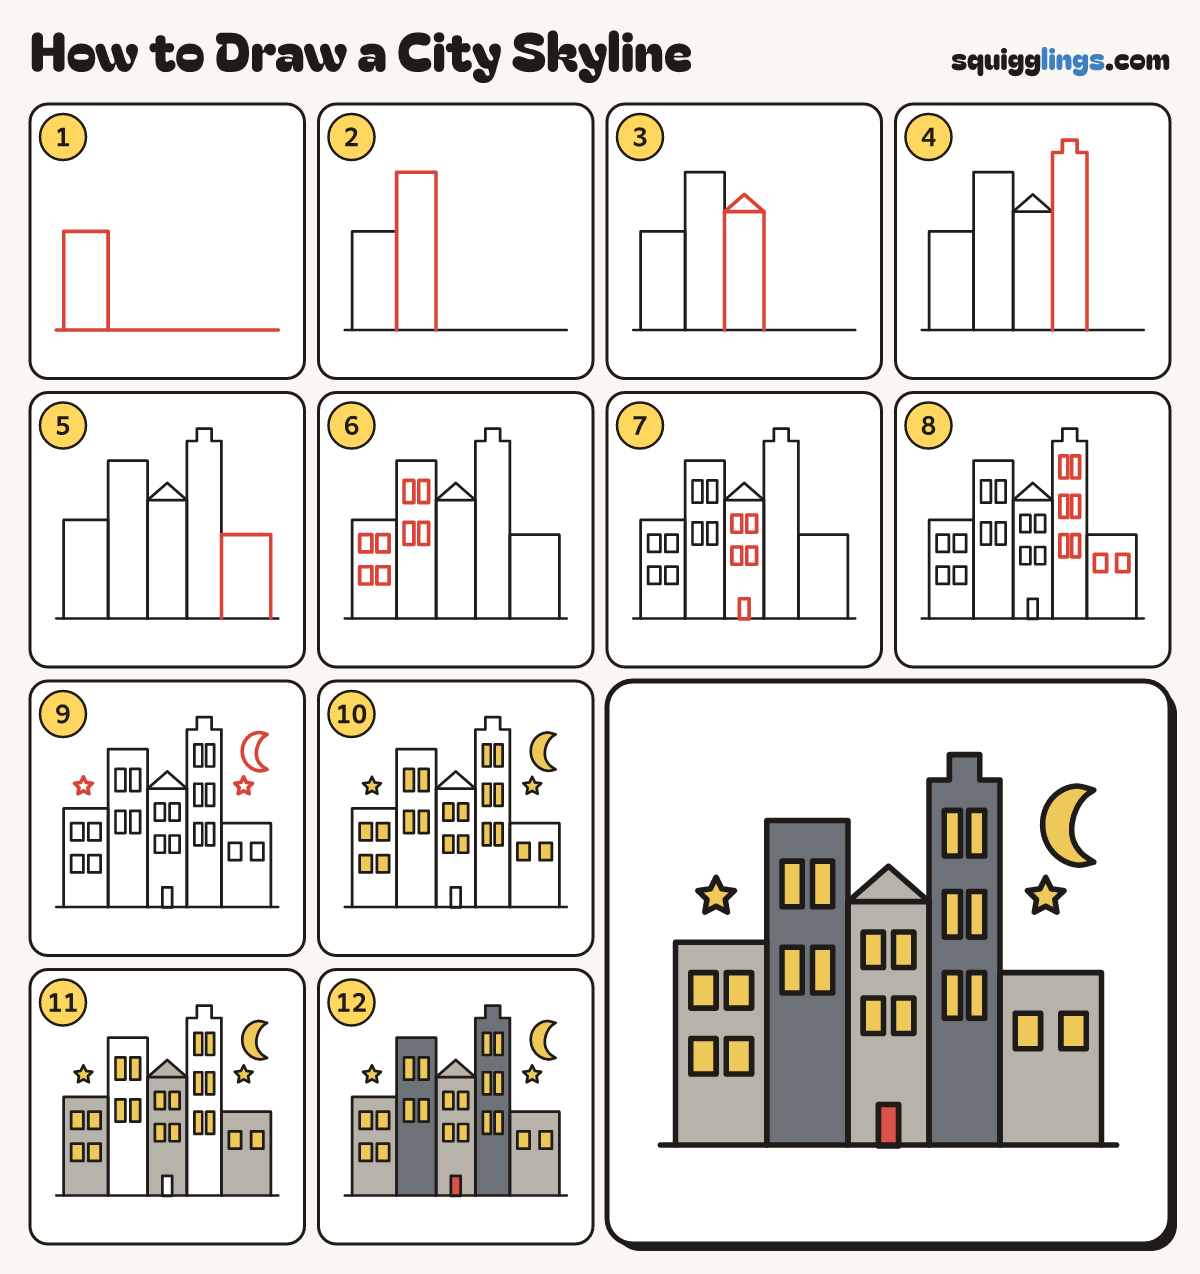
Each picture adds one red line. Draw that line, then scroll to the next picture. Rub out any dashed helper lines at the end. First up: ground and first block.
Step 1: Ground and first block
Draw a low ground line. Start on its left end. Draw a wide block up, across and down to it.
Step 2: A tall block
Beside it, start on the ground. Draw a taller, thinner block up, across, and down to the ground.
Step 3: A pointed block
Start at the tall block's foot. Draw a medium block up, across, down to the ground. Add a triangle roof.
Step 4: The tallest tower
Start on the ground. Draw the tallest tower: up, step in, bump, step out, and down to the ground.
Step 5: The last block
On the right, start on the ground. Draw a low wide block: up, across, and down to the ground.
Step 6: Windows on the left
Draw rows of tall windows on the 2 left blocks: 2 rows of 2 on each.
Step 7: Windows in the middle
Draw 2 rows of 2 windows on the pointed block. Add a door at its foot, up from the ground.
Step 8: Windows on the right
Draw 3 rows of 2 skinny windows up the tallest tower, and one row of 2 on the low block.
Step 9: Moon and stars
Top right, draw a fat C moon with pointy ends. Add a star under it and one far left.
Step 10: Yellow lights
Colour every window, the moon and both stars yellow.
Step 11: Grey blocks
Colour the 2 low blocks and the pointed block grey, around the windows and the door.
Step 12: Red door, slate towers
Colour the door red, and the 2 tall towers slate around the windows. Go over your lines and you're done!
Your finished drawing
Follow the steps above and this is where you end up: a city skyline, drawn by you.
Every step in one picture