Watch it draw itself · tap to replay
How to Draw a Christmas Polar Bear
Draw a Christmas polar bear in 14 easy steps, about 11 minutes. Free, with a printable worksheet.
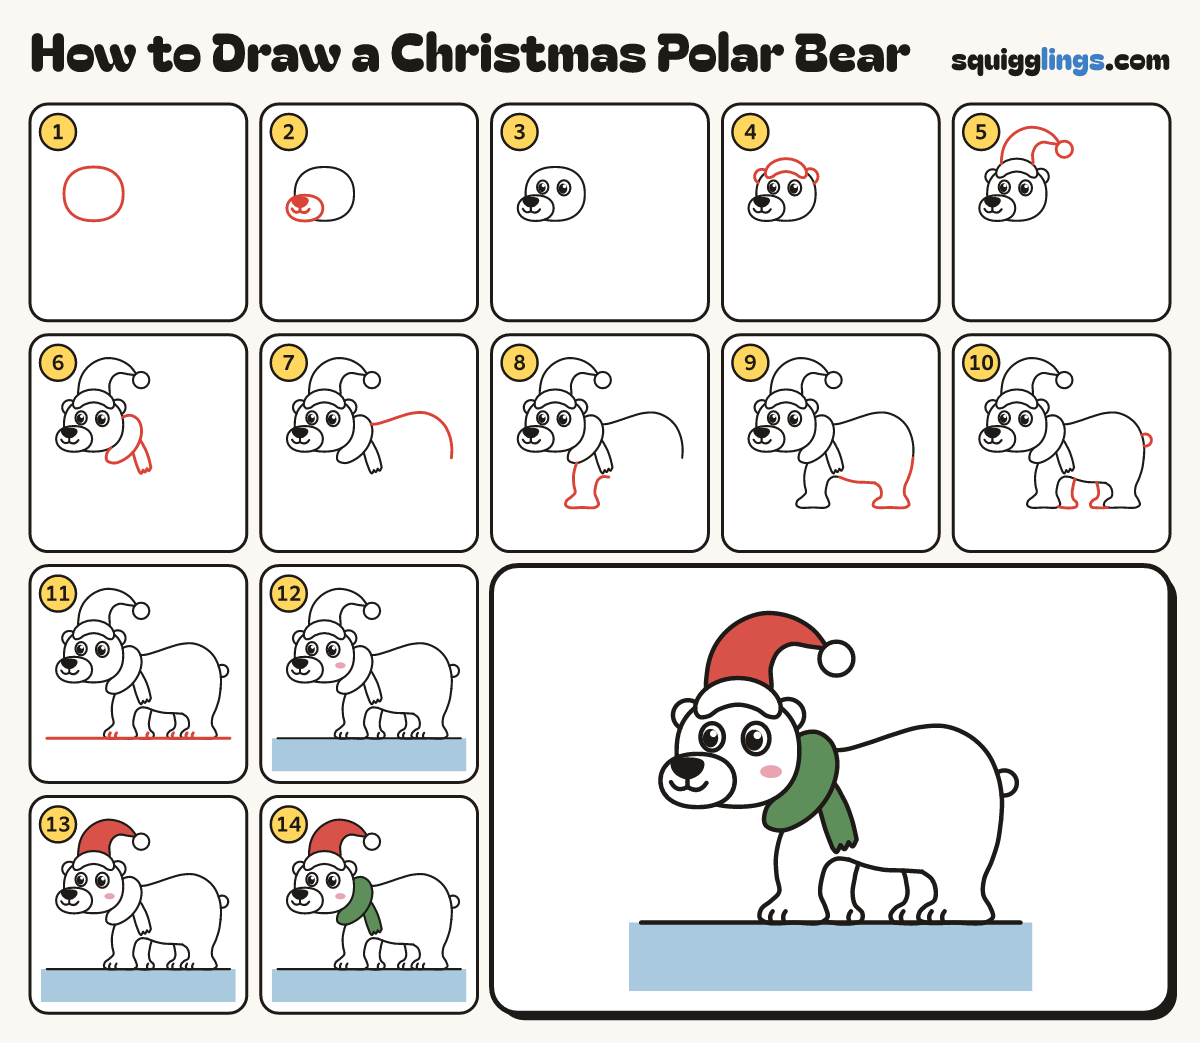
Each picture adds one red line. Draw that line, then scroll to the next picture. Rub out any dashed helper lines at the end. First up: big soft head.
Step 1: Big soft head
On the left draw a big soft head, wider than tall, like an egg on its side.
Tip Leave room above it for the hat.
Step 2: Wide snout and nose
Low on the left of the head draw a wide oval snout. Add a big black nose and a smile.
Tip A short wide snout and a big nose make it a bear.
Step 3: Two big eyes
Above the snout draw 2 oval eyes with black dots. Leave a tiny white shine in each.
Step 4: Fur band and ears
Across the top of the head draw a fat curved sausage. Add a small round ear at each end.
Tip A polar bear has little round ears.
Step 5: Hat and pom-pom
From the band draw a tall hill that flops over to the right. Put a round pom-pom on its tip.
Step 6: Warm scarf
Behind the head draw a fat curved scarf, from ear to chin. Hang a short end from it.
Tip The end gets wider at the bottom, with a bumpy edge.
Step 7: Neck and high back
Start at the scarf. Draw a long back that climbs to a high round bottom and curls down. Stop there.
Tip A polar bear's bottom is the highest part of its back.
Step 8: Chest and front leg
Start under the scarf. Draw the chest down into a thick leg and a big paw. Stop behind the leg.
Tip The leg gets thinner above the paw.
Step 9: Tummy and back leg
Start behind the front leg. Draw a round tummy, then a leg down to a paw. Stop at the back.
Step 10: Far legs and tail
Draw 2 more legs peeking out behind the near legs. Add a tiny round tail on the bottom.
Tip Only part of each far leg shows.
Step 11: Toes and snow
Draw 2 toe lines on each near paw, 1 on each far paw. Add a long snow line.
Step 12: Pale blue snow
Dab a pink cheek. Colour the snow pale blue, out to the edges. Leave the bear white.
Tip The fur band and the pom-pom stay white too.
Step 13: Red hat
Colour the hat red, between the fur band and the pom-pom.
Step 14: Green scarf
Colour the scarf green, both the curved part and the hanging end. Your polar bear is done!
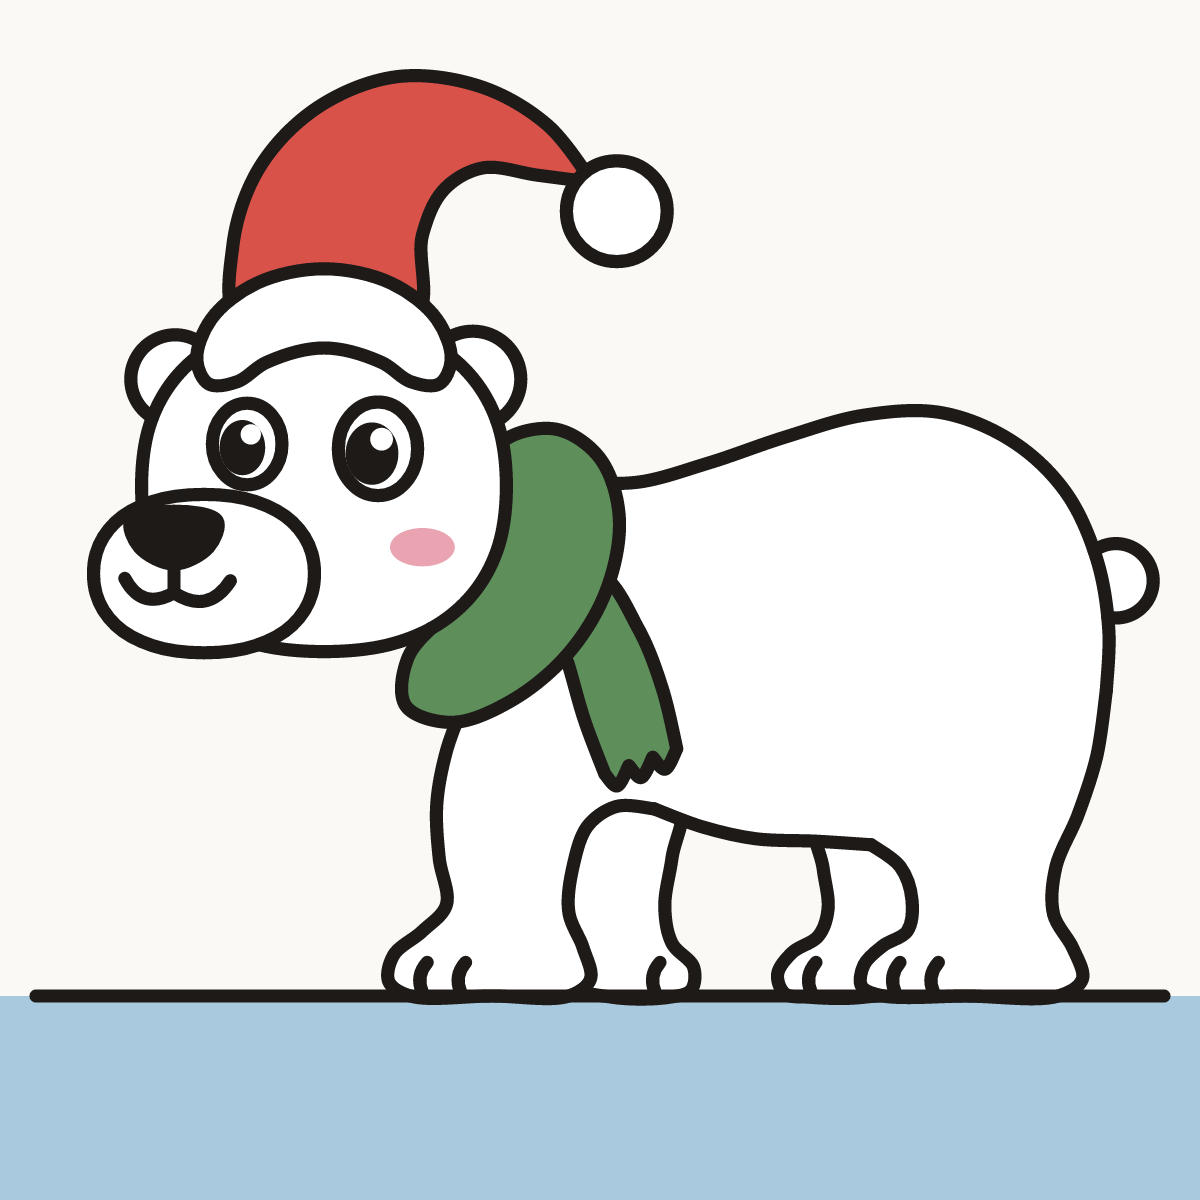
Your finished drawing
Follow the steps above and this is where you end up: a Christmas polar bear, drawn by you.
Every step in one picture