Watch it draw itself · tap to replay
How to Draw a Chestnut Leaf
Draw a chestnut leaf in 10 easy steps, about 8 minutes. Free, with a printable worksheet.
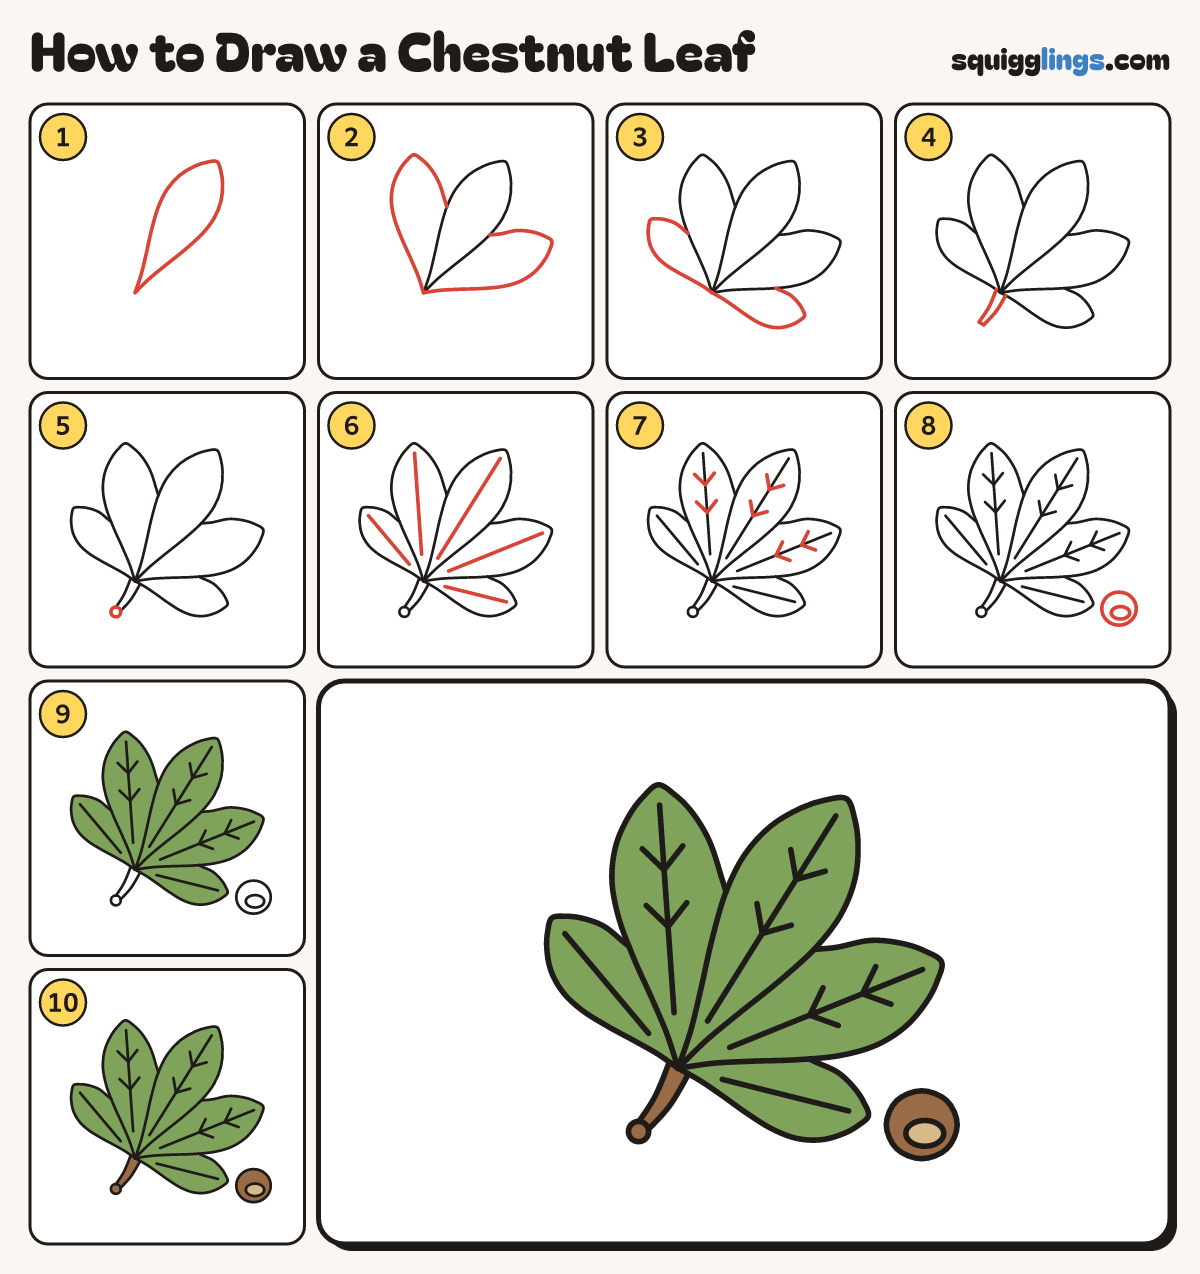
Each picture adds one red line. Draw that line, then scroll to the next picture. Rub out any dashed helper lines at the end. First up: middle leaflet.
Step 1: Middle leaflet
Pick a spot just below the middle. Draw a tall paddle leaflet up from it, round and fat on top.
Tip Tilt the whole leaf a little, as if it fell on a table.
Step 2: 2 more leaflets
From the same spot draw 2 shorter paddle leaflets, one leaning up-left and one up-right, tucked behind the middle one.
Step 3: Outside leaflets
From the spot draw 2 small leaflets pointing out left and right, nearly flat, like an open hand.
Step 4: The stem
Start on the spot. Draw a short thin stem slanting down to the left, then back up to the spot.
Step 5: Stem knob
On the end of the stem draw a tiny round knob, like a little bead.
Step 6: 5 veins
Draw 1 straight vein up each leaflet's middle, starting a little away from the spot and stopping before the tip.
Step 7: Side veins
On the 3 tall leaflets draw 2 short side veins each side of the middle vein, like fish bones.
Step 8: A conker
Past the tip of the small right leaflet, not touching it, draw a round conker with a flat oval inside.
Step 9: Green leaflets
Colour all 5 leaflets green, right to their rounded tips.
Step 10: Brown stem and conker
Colour the patch tan, the conker brown around it, then the stem and knob brown. Your leaf is done!
Your finished drawing
Follow the steps above and this is where you end up: a chestnut leaf, drawn by you.
Every step in one picture