Watch it draw itself · tap to replay
How to Draw a Checkered Flag
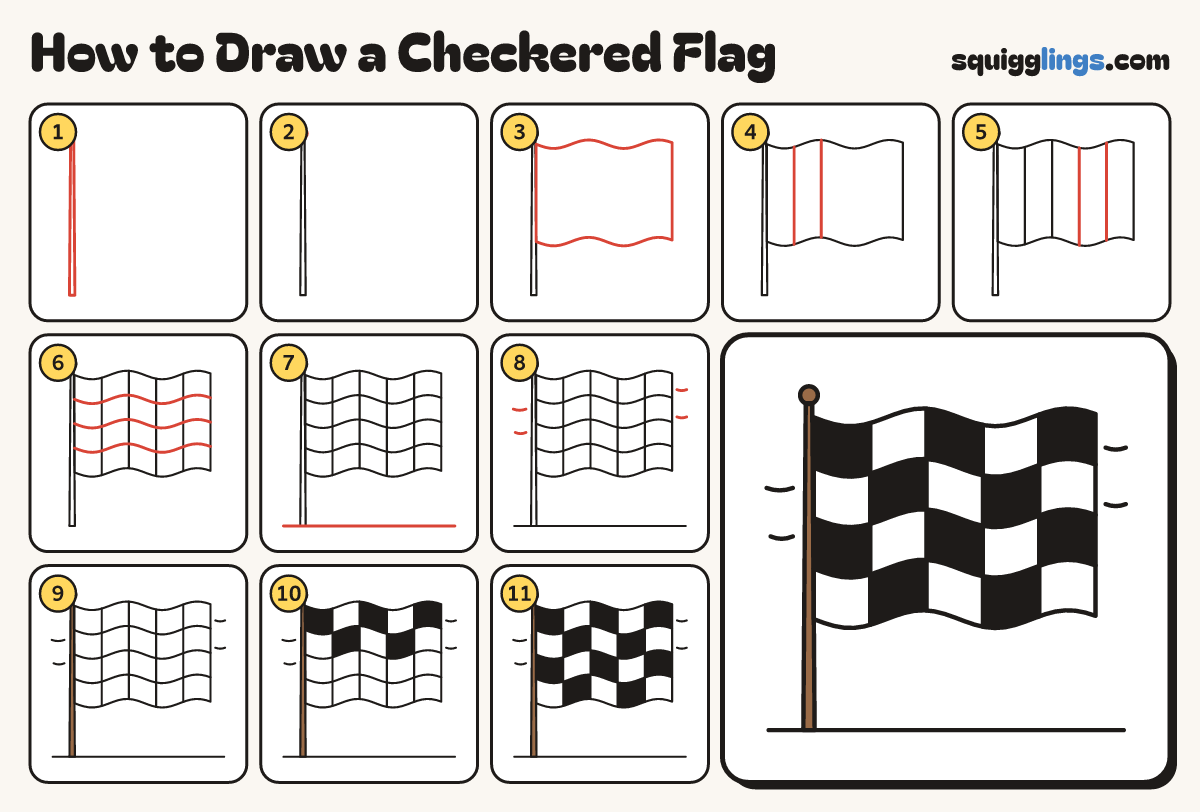
Draw a checkered flag in 11 easy steps, about 8 minutes. Free, with a printable worksheet.
Each picture adds one red line. Draw that line, then scroll to the next picture. Rub out any dashed helper lines at the end. First up: the pole.
Step 1: The pole
On the left of your paper draw a tall thin pole: start near the bottom, go up, across, and down.
Step 2: Ball on top
Put a round ball on the very top of the pole, like a cherry.
Step 3: The flag
Start on the pole near the top. Draw a wavy top edge out right, a straight side, and back.
Tip The bottom edge copies the top edge's waves.
Step 4: Two lines down
Start on the top edge a hand from the pole. Rule a straight line down to the bottom edge. Repeat.
Step 5: Two more lines
Rule 2 more straight lines from the top edge down to the bottom edge, the same distance apart.
Step 6: Three wavy lines
Split the flag into 4 equal rows. Start on the pole and draw 3 wavy lines to the right edge.
Tip Now you have 20 squares: 5 across and 4 down.
Step 7: The ground
Under the pole, draw a straight ground line from a little left of the pole to just past the flag.
Step 8: Wind lines
Draw a few short curved wind lines either side of the flag, like the wind is whooshing by.
Step 9: Brown pole
Go over your lines. Colour the pole and the ball on top brown.
Step 10: Black squares, top
In the top 2 rows colour every other square black, like a chess board.
Tip Black, white, black, white along the top row; the second row starts with white.
Step 11: Black squares, bottom
Colour the bottom 2 rows the same way. No two black squares ever sit side by side.
Your finished drawing
Follow the steps above and this is where you end up: a checkered flag, drawn by you.
Every step in one picture