Watch it draw itself · tap to replay
How to Draw a Centipede
Draw a centipede in 13 easy steps, about 10 minutes. Free, with a printable worksheet.
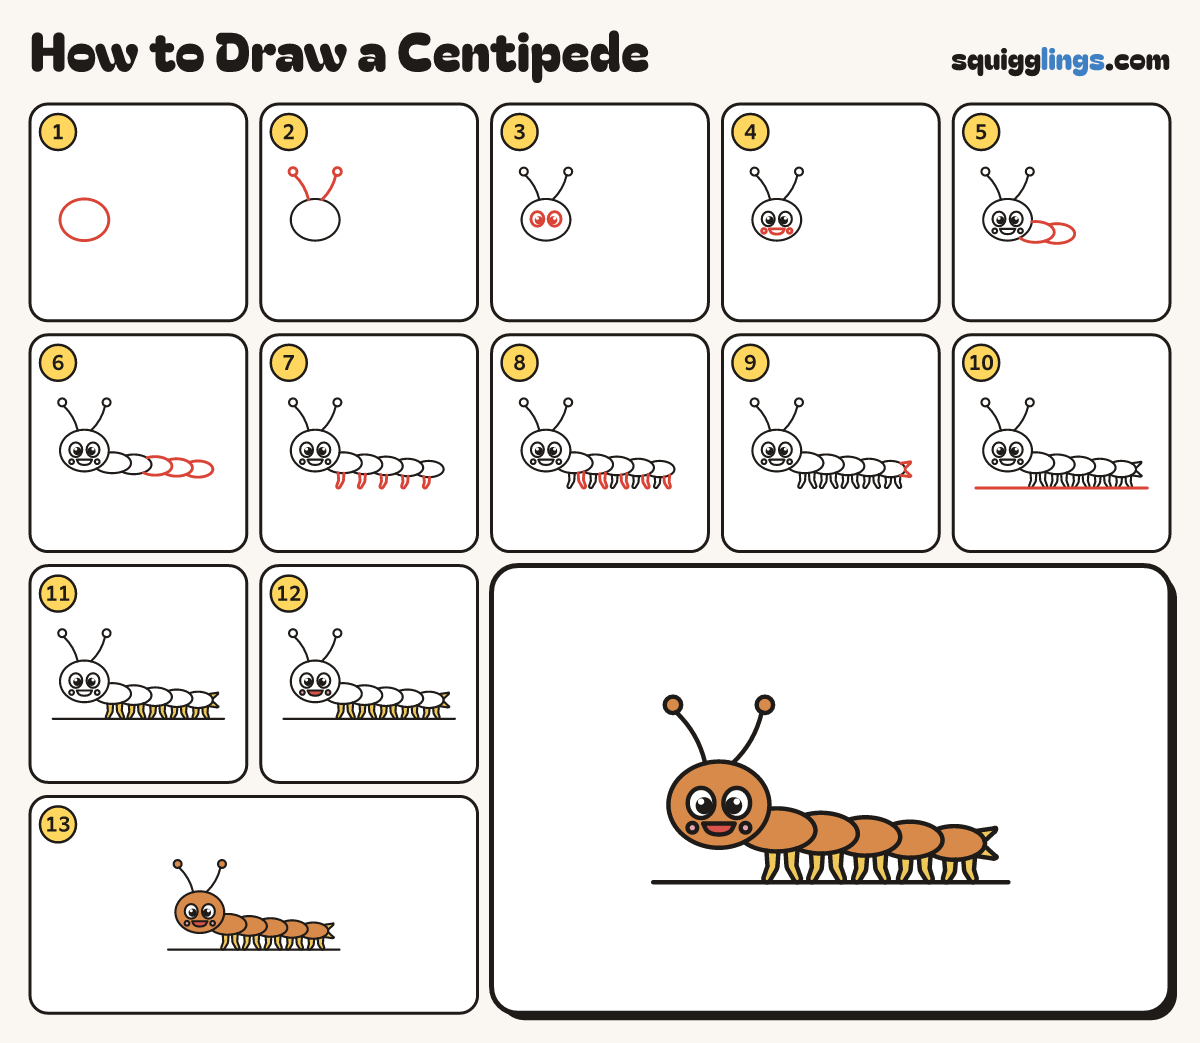
Each picture adds one red line. Draw that line, then scroll to the next picture. Rub out any dashed helper lines at the end. First up: the head.
Step 1: The head
On the left of your paper, draw a big round head. Leave room on the right for the long body.
Step 2: Two antennae
Start on the head. Draw 2 long curves up and out, then stop. Add a ball on each tip.
Step 3: Two big eyes
In the middle of the head, draw 2 big egg eyes. Put a big black dot in each.
Step 4: Smile and cheeks
Under the eyes, draw a wide smile: a flat line with a U under it. Add 2 round cheeks.
Step 5: First 2 plates
Behind the head, draw a flat oval plate peeking out. Then a smaller plate behind that one.
Tip Each plate hides a little behind the one in front.
Step 6: 3 more plates
Keep going: draw 3 more plates behind the last one. Each one is a little smaller and a little lower.
Step 7: Front legs
Under each plate, draw a leg straight down, then bend it forward to a round foot. The feet line up.
Step 8: Back legs
Next to each leg, draw a second leg straight down, then bend it back. Now every plate has 2 legs.
Tip Lots of legs is what makes it a centipede.
Step 9: Tail prongs
On the back of the last plate, draw 2 fat little carrots. One points up, one points down.
Step 10: The ground
Start near the left edge. Draw a straight line under all the feet and stop near the right edge.
Step 11: Yellow legs
Colour all 10 legs and the two tail prongs yellow.
Step 12: Pink cheeks, red mouth
Colour the round cheeks pink and the open mouth red.
Step 13: Ginger head and plates
Colour the head, antenna balls and all 5 plates ginger, around the eyes, cheeks and mouth. Go over your lines.
Tip Leave the eyes white.
Your finished drawing
Follow the steps above and this is where you end up: a centipede, drawn by you.
Every step in one picture