Watch it draw itself · tap to replay
How to Draw a Camera
Draw a camera in 11 easy steps, about 8 minutes. Free, with a printable worksheet.
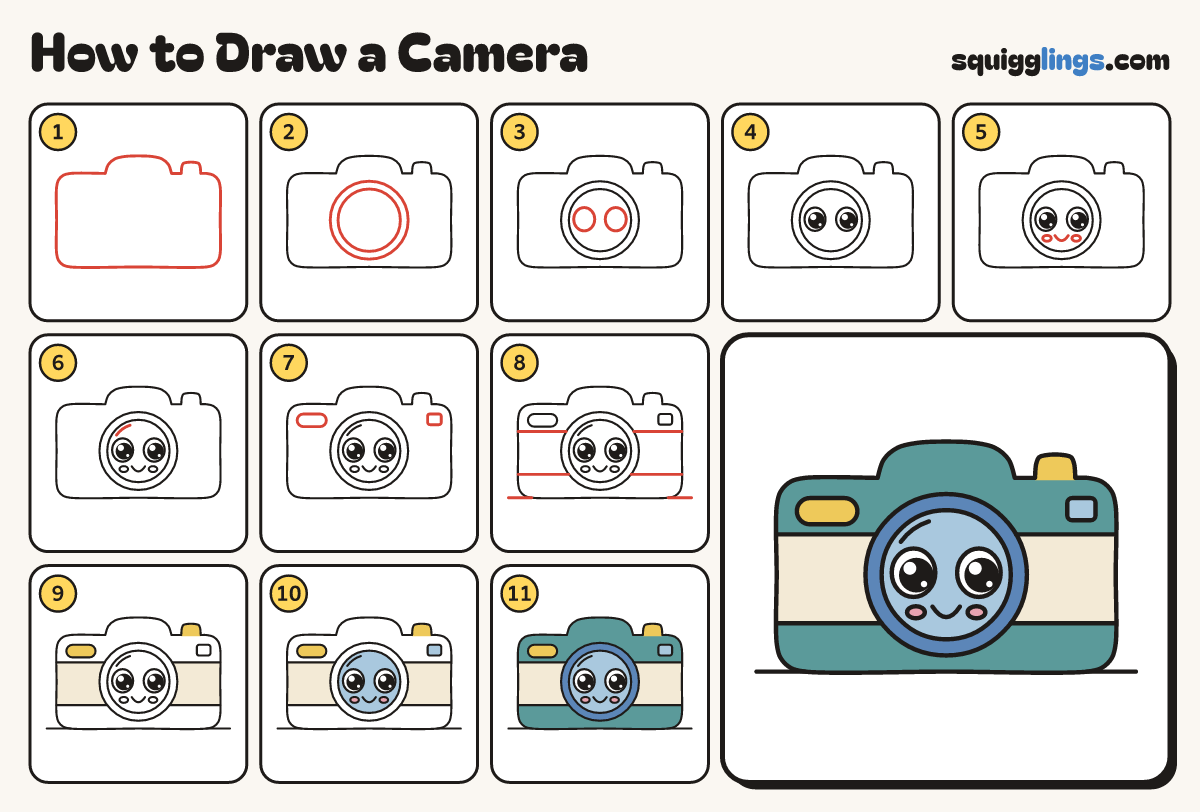
Each picture adds one red line. Draw that line, then scroll to the next picture. Rub out any dashed helper lines at the end. First up: camera box.
Step 1: Camera box
Draw a big soft box, twice as wide as tall. Give the top a wide flat hill and a block.
Step 2: The big lens
Under the hill, draw one big circle that almost fills the box. Draw a smaller circle inside it.
Step 3: Two big eyes
Inside the inner circle, draw 2 big egg eyes in the middle of the glass, half an eye apart.
Step 4: Pupils and shines
Colour a big black dot in each eye, nudged down-right. Leave a big white shine and a tiny one.
Step 5: Cheeks and smile
Draw a small oval cheek under each eye. Between the cheeks, draw a small U smile.
Step 6: Glass shine
In the top-left of the glass, draw a short curve hugging the inner circle, for a shine.
Step 7: Flash and window
Near the top-left corner, draw a long pill for the flash. Near the top-right corner, draw a small soft square.
Step 8: Stripe band and ground
Draw 2 straight lines from the left edge across to the right edge, skipping the lens. Add a ground line.
Step 9: Cream and yellow
Colour the stripe band cream, stopping at the lens. Colour the flash and button yellow.
Step 10: Pink cheeks, sky glass
Colour the cheeks pink. Colour the glass and window sky blue, around the cheeks. Leave the eyes white.
Step 11: Blue ring, teal body
Colour the lens ring blue. Colour the body and hill teal, around everything already coloured. Go over your lines.
Your finished drawing
Follow the steps above and this is where you end up: a camera, drawn by you.
Every step in one picture