Watch it draw itself · tap to replay
How to Draw a Bull Terrier
Draw a bull terrier in 13 easy steps, about 10 minutes. Free, with a printable worksheet.
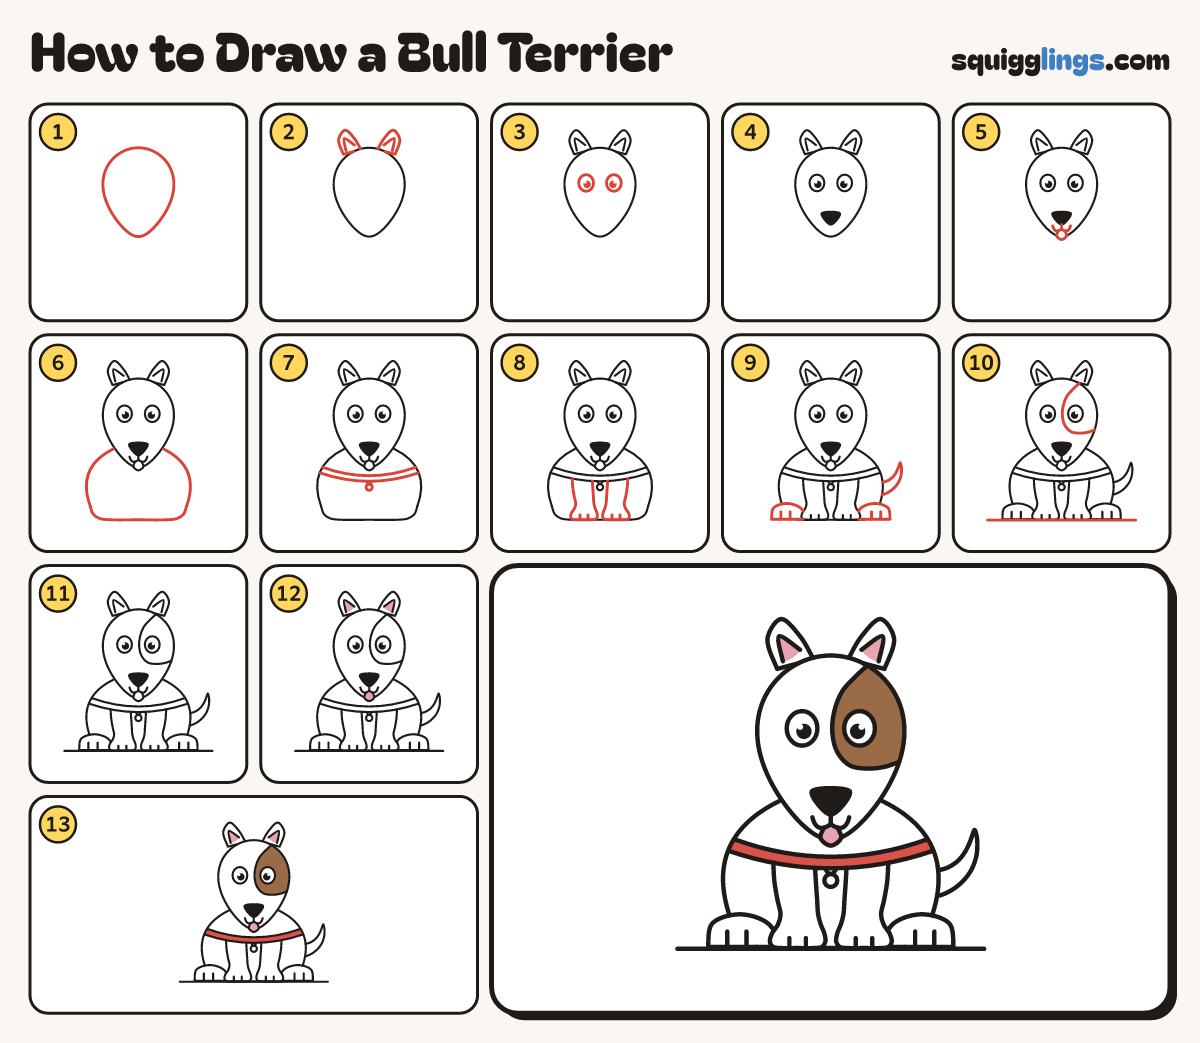
Each picture adds one red line. Draw that line, then scroll to the next picture. Rub out any dashed helper lines at the end. First up: the head.
Step 1: The head
Near the top of your paper draw a big egg standing on its narrow end, wide at the top.
Tip The egg head is THE bull terrier shape: no bump for the nose.
Step 2: Pointy ears
On top of the egg draw 2 small pointy ears standing straight up, close together. Add a triangle inside each.
Step 3: High eyes
Above the middle of the egg draw 2 big eggy eyes, one eye apart, each with a black dot.
Tip High eyes make the long face.
Step 4: Nose at the tip
At the narrow bottom of the egg draw a big rounded triangle nose and colour it black.
Step 5: Smile and tongue
From the nose draw a short line down to a little w smile. Hang a small tongue from the middle.
Step 6: The body
From low on each side of the egg draw a C down to the bottom, then a flat base line.
Tip A bull terrier is a little tank: wide and strong.
Step 7: Collar and tag
Under the chin draw 2 sagging curves from the left of the body over to the right. Add a tag.
Step 8: Front legs
From the collar draw 2 U legs down to fat round paws, thinner at the ankle. Add toe lines.
Step 9: Back paws and tail
Draw hill paws in the bottom corners. From the right draw a fat carrot tail curving up to a point.
Step 10: Eye patch and ground
From under the right ear, draw a curved patch line round the eye to the cheek. Add a ground line.
Step 11: White fur
Colour the fur white and leave the eyes white. Skip the patch, collar, tongue and ear insides.
Step 12: Pink ears and tongue
Colour the insides of the ears and the tongue pink.
Step 13: Brown patch, red collar
Colour the eye patch brown and the collar red.
Your finished drawing
Follow the steps above and this is where you end up: a bull terrier, drawn by you.
Every step in one picture