Watch it draw itself · tap to replay
How to Draw a Budgie
Draw a budgie in 13 easy steps, about 10 minutes. Free, with a printable worksheet.
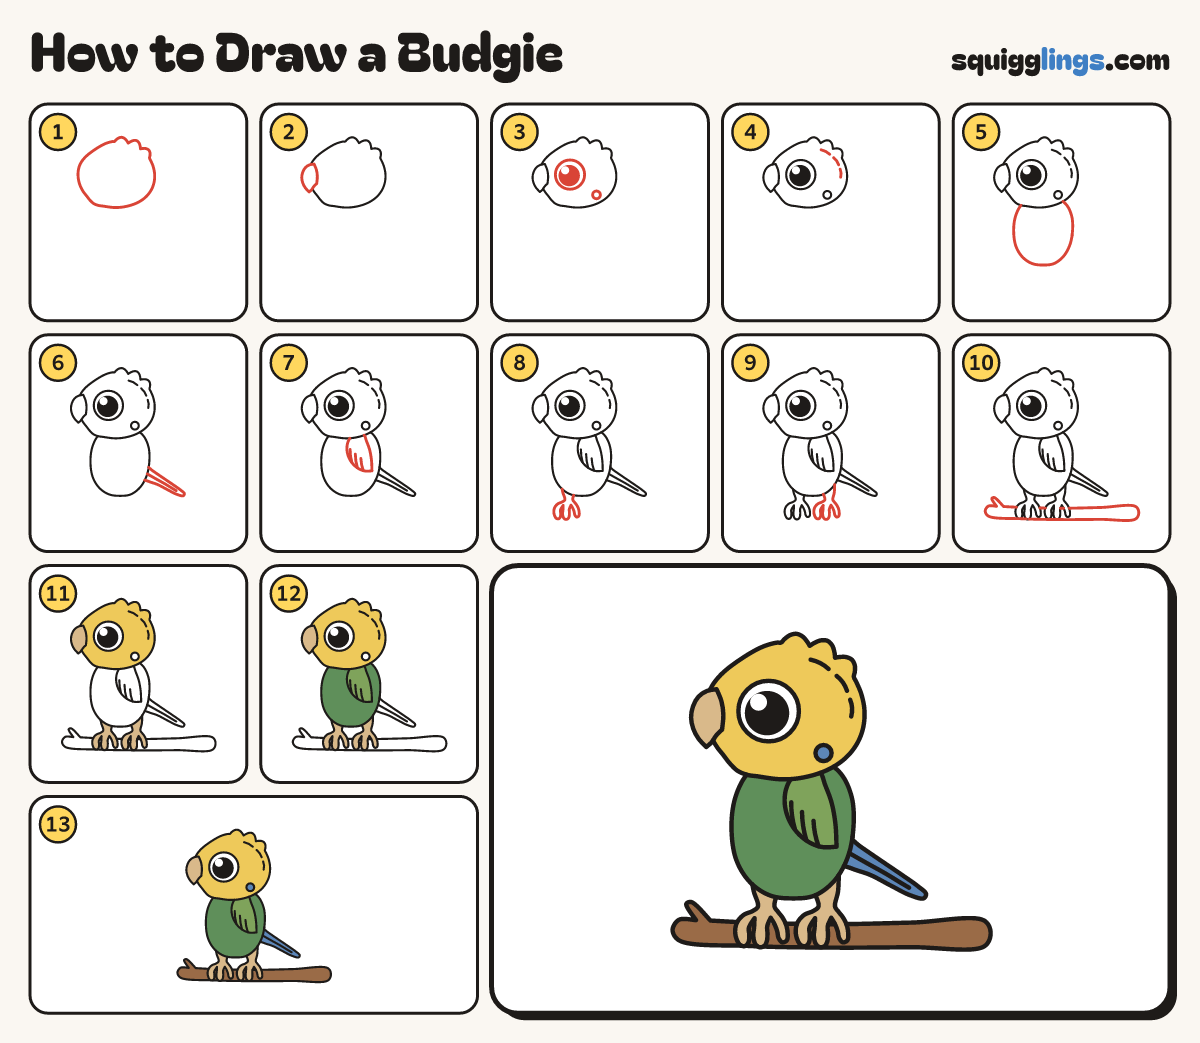
Each picture adds one red line. Draw that line, then scroll to the next picture. Rub out any dashed helper lines at the end. First up: round head.
Step 1: Round head
Near the top left, draw a big round head with 3 soft low puffs on top toward the back.
Step 2: Tiny hooked beak
On the front of the head, draw a small hook down to a sharp point, then back into the face.
Step 3: Eye and cheek spot
Behind the beak, draw a big round eye with a shine. Below and behind it, draw a round cheek spot.
Step 4: Head bars
On the back of the head, near the outline, draw 3 short curved bars, well behind the eye.
Step 5: Plump body
Start behind the head. Draw the back down to the rump, round a fat belly, up to the head.
Step 6: Long thin tail
Start on the rump. Draw a long thin tail down and back to a point, then back to the rump.
Step 7: Striped wing
Start under the head. Draw a teardrop wing along the side, pointing to the rump. Add 3 short streaks.
Step 8: Front leg and toes
Under the front of the tummy, draw a short skinny leg with 2 fat toes and a back toe.
Step 9: Back leg and toes
A thumb behind the first leg, draw a second leg and toes the same way.
Step 10: The branch
Start at the left, under the toes. Draw a long bendy branch to the right, with a little twig.
Step 11: Yellow head, tan beak
Colour the head yellow, leaving the eye and cheek spot white. Colour the beak, legs and toes tan.
Step 12: Green wing and body
Colour the wing light green. Colour the body green around the wing.
Step 13: Blue tail, brown branch
Colour the tail and the cheek spot blue. Colour the branch brown around the toes.
Your finished drawing
Follow the steps above and this is where you end up: a budgie, drawn by you.
Every step in one picture