Watch it draw itself · tap to replay
How to Draw Broccoli
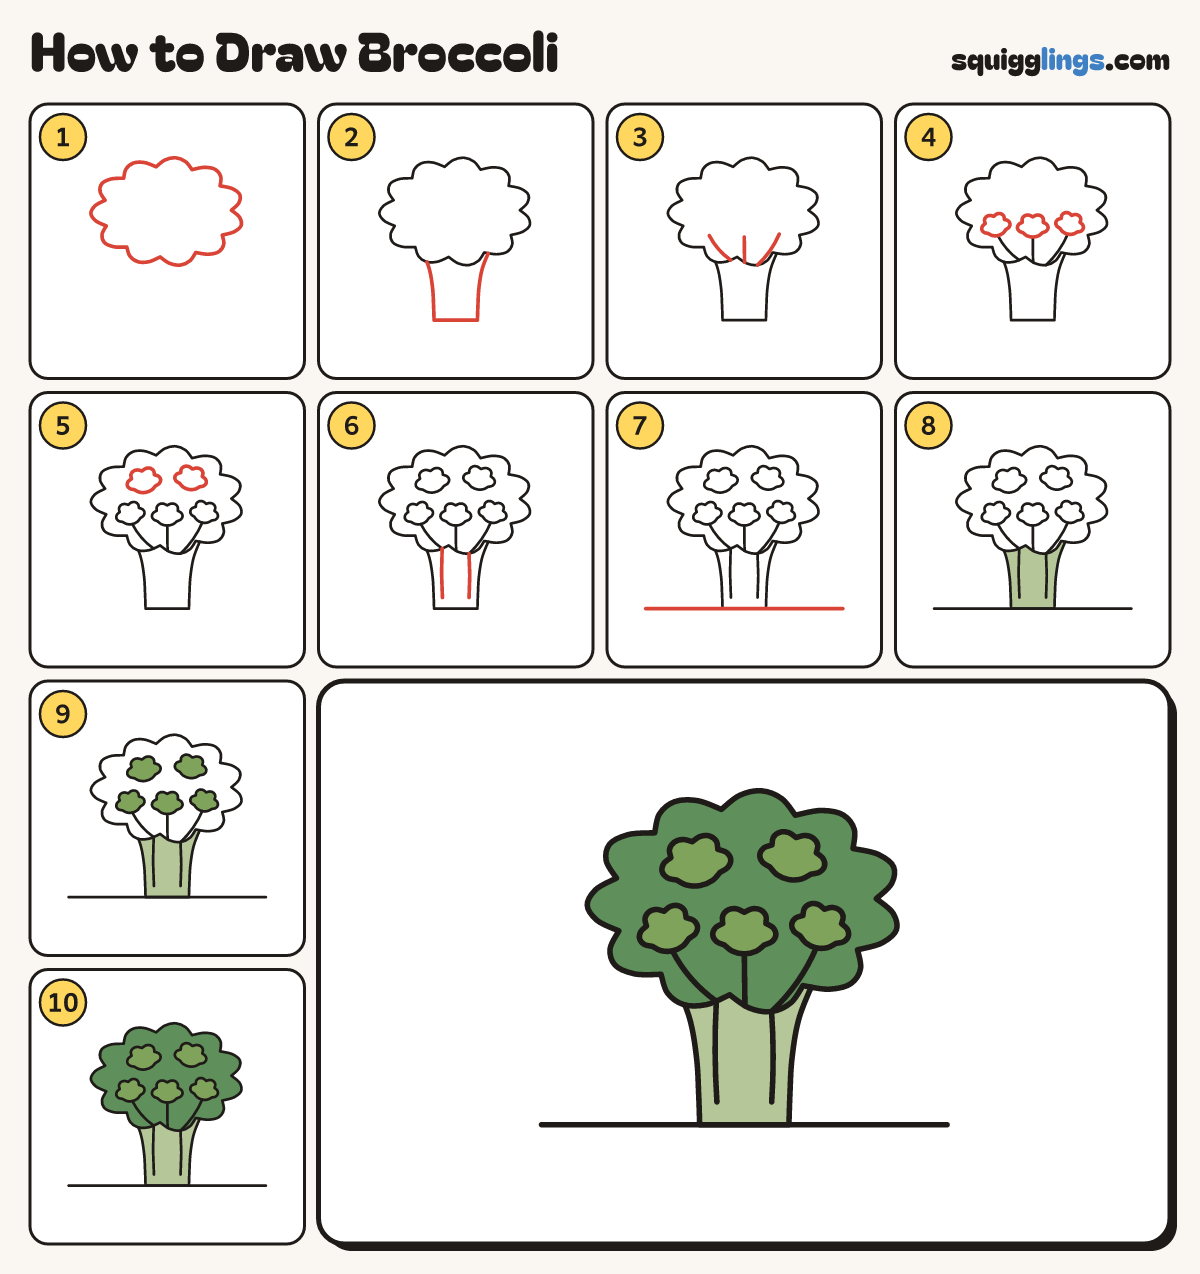
Draw broccoli in 10 easy steps, about 8 minutes. Free, with a printable worksheet.
Each picture adds one red line. Draw that line, then scroll to the next picture. Rub out any dashed helper lines at the end. First up: the top floret.
Step 1: The top floret
Near the top of your paper draw a big bumpy cloud, a little wider than tall.
Tip About 9 soft bumps, all nearly the same size.
Step 2: Side florets
Draw a smaller bumpy cloud on each side, a bit lower, peeking out from behind the big one.
Step 3: The stalk
From the left cloud draw a line curving in and down, a flat bottom, then up to the right cloud.
Tip The stalk is widest at the top, not at the bottom like a tree.
Step 4: Branch gaps
Under the clouds draw 2 narrow V shapes. Each starts on a side cloud and ends on the big one.
Step 5: Bumps on top
On the big cloud draw 3 short rows of tiny bumps: one up high, one in the middle, one low.
Step 6: Bumps on the sides
Draw 1 short row of tiny bumps on each side cloud.
Step 7: Stalk lines
From the point of each V, draw a line down the stalk. Stop before the bottom.
Step 8: The ground
Draw a ground line under the flat bottom of the stalk, from well left to well right.
Step 9: Light green stalk
Go over your lines, then colour the stalk and its 2 branches light green.
Step 10: Dark green florets
Colour the 3 bumpy florets dark green. Your broccoli is done!
Your finished drawing
Follow the steps above and this is where you end up: broccoli, drawn by you.
Every step in one picture