Watch it draw itself · tap to replay
How to Draw a Bird Wing
Draw a bird wing in 11 easy steps, about 8 minutes. Free, with a printable worksheet.
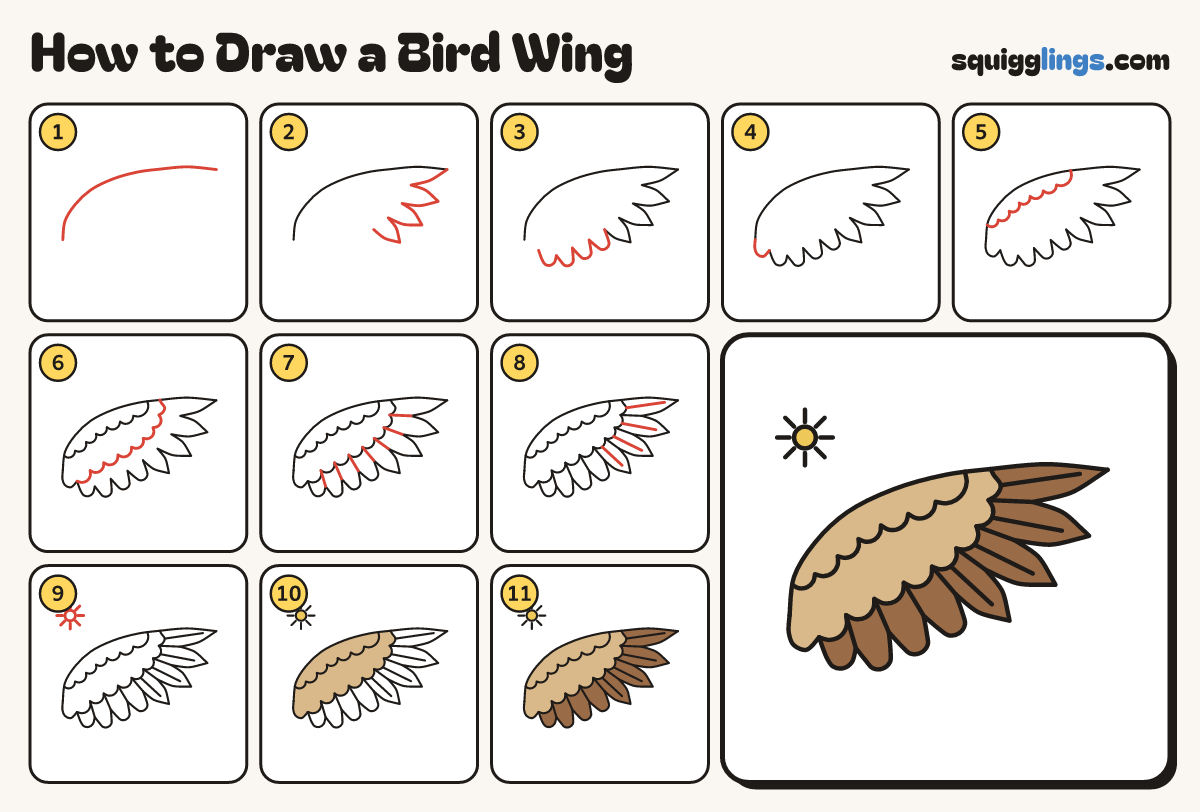
Each picture adds one red line. Draw that line, then scroll to the next picture. Rub out any dashed helper lines at the end. First up: top edge.
Step 1: Top edge
Start low on the left. Draw one long arch, ending high on the right at the wing tip.
Tip The low end is the shoulder.
Step 2: Pointed feathers
From the tip, draw 4 long pointed feathers fanning down, each shorter. Stop in the dip after the fourth.
Tip Each feather ends in a sharp point, like a leaf.
Step 3: Round feathers
Start in that dip. Draw 4 short round feathers stepping back left, stopping under the shoulder.
Step 4: The shoulder
Join the last feather up to the start of the arch with one round curve bowing out left.
Tip Now the wing is one closed shape.
Step 5: Small feathers
Start on the arch by the shoulder. Draw 7 little bumps under it, stopping on the arch past the middle.
Step 6: Another row
Start at the bottom of the shoulder. Draw 8 bigger bumps up to the arch, one over each feather.
Step 7: Feather lines
From each dip between the feathers, draw a straight line up to the bigger bumps.
Step 8: Middle lines
Draw a line from the bumps down the middle of each pointed feather, stopping before the tip.
Step 9: A small sun
In the top left corner, draw a small sun: a circle with 8 short rays.
Step 10: Tan top, yellow sun
Go over your lines. Colour the wing tan down to the bigger bumps, and the sun yellow.
Step 11: Brown feathers
Colour all 8 feathers brown, the pointed ones and the round ones, up to the bigger bumps.
Your finished drawing
Follow the steps above and this is where you end up: a bird wing, drawn by you.
Every step in one picture