Watch it draw itself · tap to replay
How to Draw a Beehive
Draw a beehive in 10 easy steps, about 8 minutes. Free, with a printable worksheet.
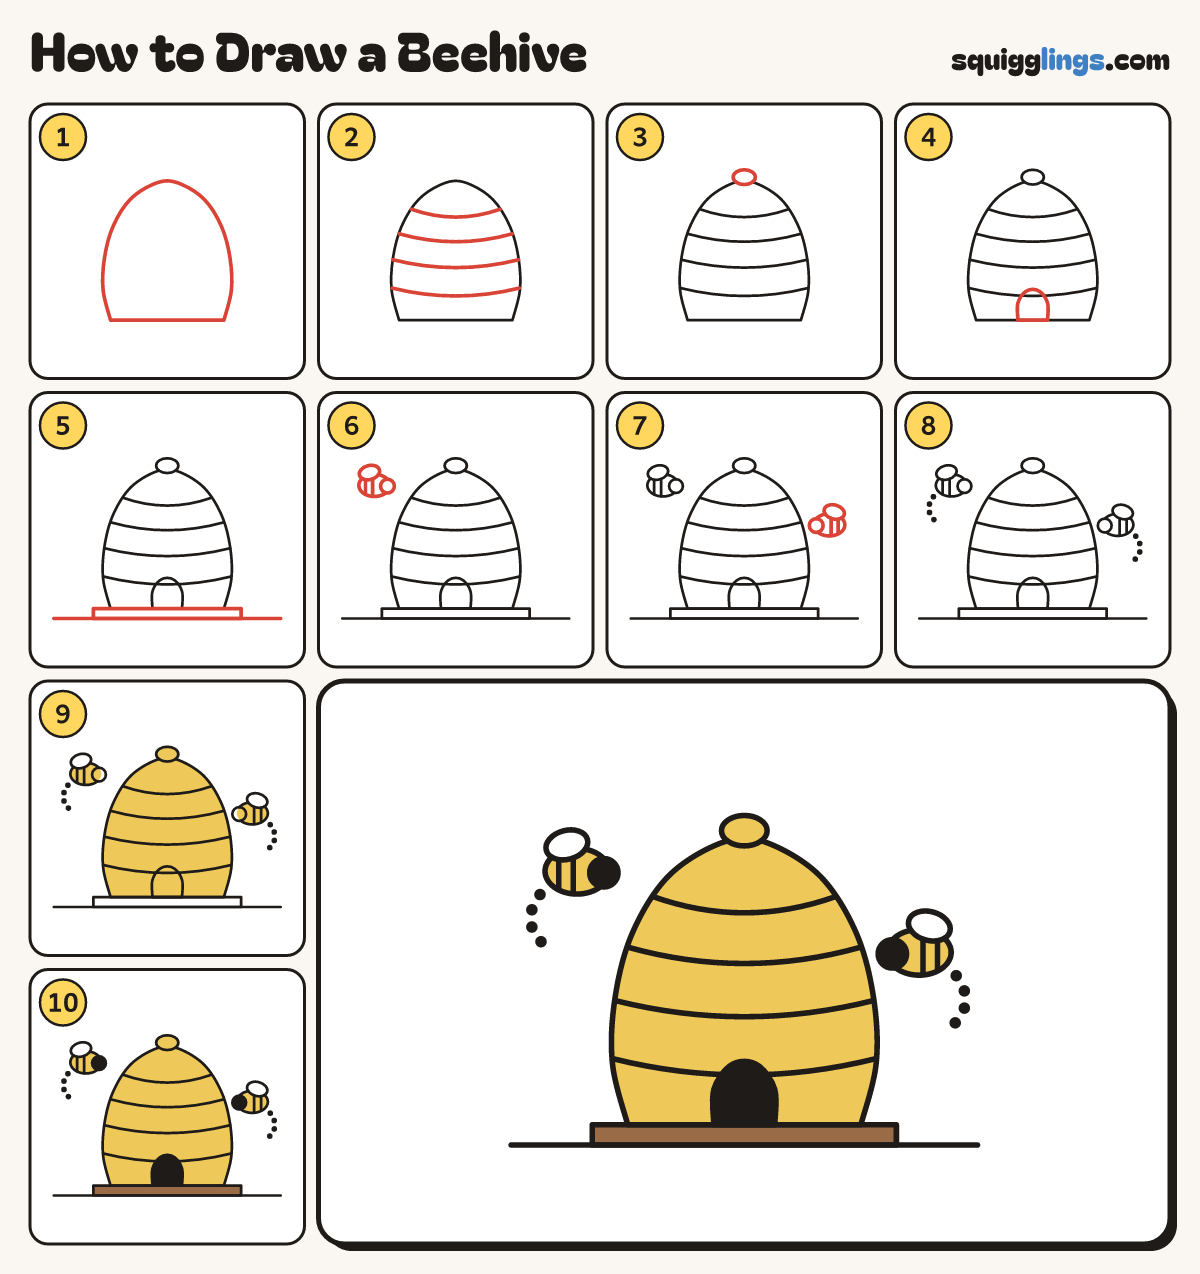
Each picture adds one red line. Draw that line, then scroll to the next picture. Rub out any dashed helper lines at the end. First up: the dome.
Step 1: The dome
In the middle of your paper, draw a tall dome like an upside-down bowl, with a flat bottom line.
Tip The dome is fattest a little below the middle, like a bell.
Step 2: Four bands
Draw 4 smiles across the dome, one under the other, from edge to edge, like rings of straw stacked up.
Step 3: A knob on top
On the very top, draw a small round knob, like a button sitting on the dome.
Step 4: The door
At the bottom middle, draw a small arched door: an upside-down U starting and stopping on the bottom line.
Step 5: Board and ground
Under the dome, draw a thin flat board a little wider than the dome. Add a ground line under it.
Step 6: A bee
Up left of the hive, draw a bee: an oval body, a smaller round head, 2 stripes and a wing.
Step 7: Another bee
To the right of the hive, a little lower, draw another bee the same size, facing the other way.
Step 8: Dotted flight paths
Behind each bee, draw a curved trail of 4 small dots, swooping away from its tail.
Step 9: Yellow hive and bees
Go over your lines, then colour the dome, the knob and the bee bodies yellow. Leave the wings white.
Step 10: Brown board, black door
Colour the board brown. Then colour the door and the bees' heads black.
Your finished drawing
Follow the steps above and this is where you end up: a beehive, drawn by you.
Every step in one picture