Watch it draw itself · tap to replay
How to Draw a Badger
Draw a badger in 12 easy steps, about 9 minutes. Free, with a printable worksheet.
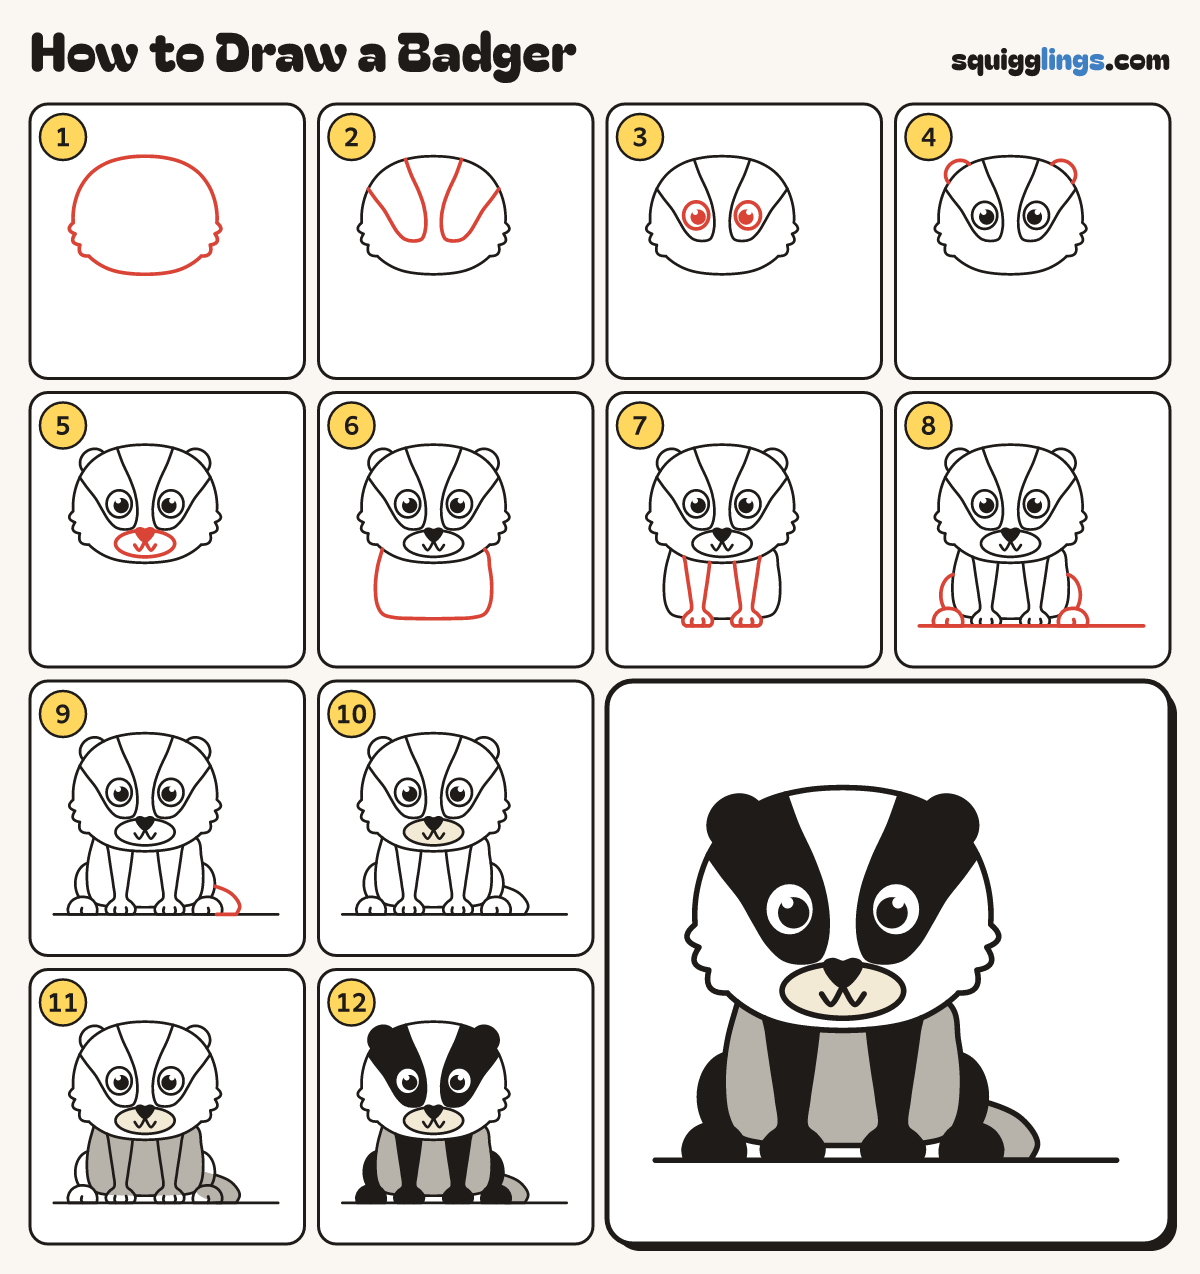
Each picture adds one red line. Draw that line, then scroll to the next picture. Rub out any dashed helper lines at the end. First up: big soft head.
Step 1: Big soft head
Near the top, draw a big egg head, wider than tall, with 3 soft fur bumps low on each cheek.
Tip Make it more than half the whole badger. Leave room right for a tail.
Step 2: Two face stripes
On each top corner, start on the head line. Draw a wide stripe down to a round end and back.
Tip Make each stripe wide enough for an eye to fit inside.
Step 3: Big eyes
Inside each stripe, draw a big egg eye with a rim of stripe all round. Add a black dot.
Step 4: Small round ears
On each top corner of the head, where the stripe ends, draw a small half-circle ear poking out.
Step 5: Snout, nose and smile
Under the stripes, draw a wide sideways oval snout. Add a black heart nose on top and a W smile.
Step 6: Round body
Start on the left cheek above the chin. Draw a big C down and round, up to the right cheek.
Tip The body is a rounded tub hanging off the cheeks, narrower than the head.
Step 7: Front legs
Under the chin, draw 2 legs down, thinner at the ankle, each into a round paw with a flat bottom.
Tip Add 2 toe lines on each paw.
Step 8: Back legs peeking out
Beside each front paw, draw a bun back paw with a plump C leg above it. Add a ground line.
Step 9: Short stubby tail
Low on the right of the body, start on the body. Draw a short stubby tail, stopping on the ground.
Step 10: Cream snout
Go over your lines. Colour the snout cream, and leave the face and eyes white.
Step 11: Grey body and tail
Colour the body and the tail grey, but not the legs.
Step 12: Black stripes and legs
Colour the stripes black around the eyes, then the ears and all 4 legs black too.
Your finished drawing
Follow the steps above and this is where you end up: a badger, drawn by you.
Every step in one picture