Watch it draw itself · tap to replay
How to Draw the Atomium
Draw the Atomium in 10 easy steps, about 8 minutes. Free, with a printable worksheet.
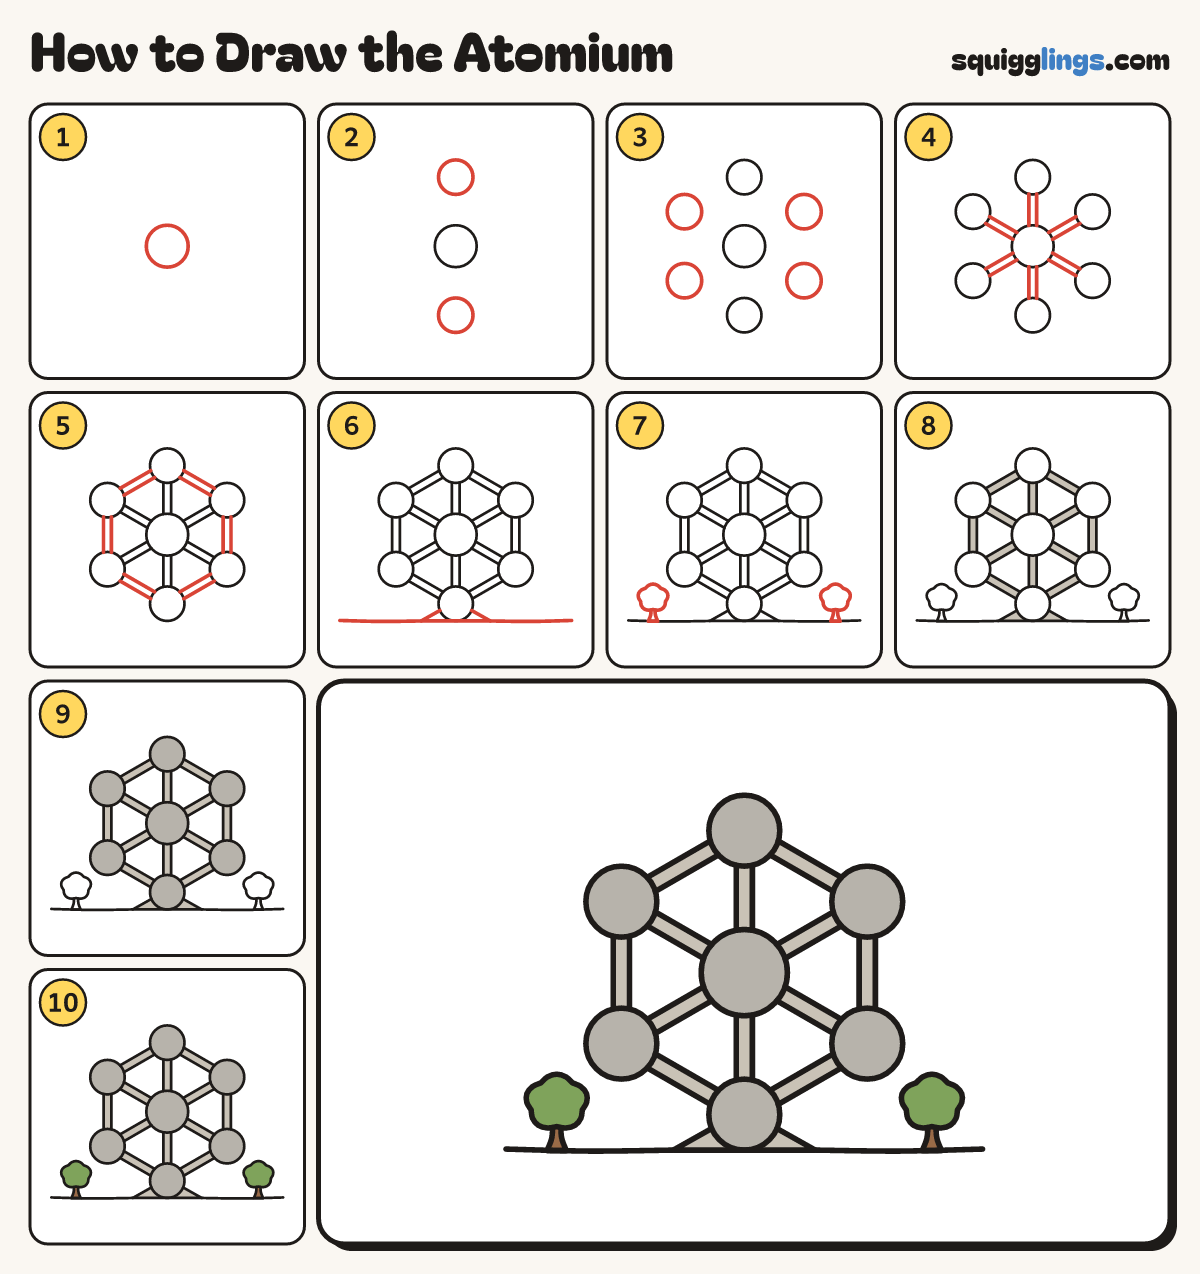
Each picture adds one red line. Draw that line, then scroll to the next picture. Rub out any dashed helper lines at the end. First up: the middle ball.
Step 1: The middle ball
In the middle of your paper draw a big round ball.
Step 2: Top and bottom balls
Draw a slightly smaller ball straight above it near the top, and another straight below it on the ground.
Tip The real Atomium has 9 giant steel balls, but from the front you see 7. You can walk inside!
Step 3: Four side balls
Draw 4 more balls the same size round the middle one, 2 up at the sides and 2 down.
Step 4: Spoke tubes
Join the middle ball to each outer ball with a fat straight tube, tucked behind the balls.
Step 5: Ring tubes
Join each outer ball to its neighbour with a fat tube, all the way round, making a ring of tubes.
Step 6: The base
Under the bottom ball draw a low wide triangle. Draw the ground line from the triangle out to each edge.
Step 7: Two trees
At each side draw a bumpy round tree top, then a trunk down to the ground, wider at the bottom.
Step 8: Stone tubes and base
Colour all the tubes and the base stone grey, pressing softly.
Step 9: Silver balls
Colour all seven balls a darker grey, like shining steel.
Step 10: Green trees
Colour the tree tops green and the trunks brown. Go over your lines and your Atomium is done!
Your finished drawing
Follow the steps above and this is where you end up: the Atomium, drawn by you.
Every step in one picture