Watch it draw itself · tap to replay
How to Draw a Circus Tent
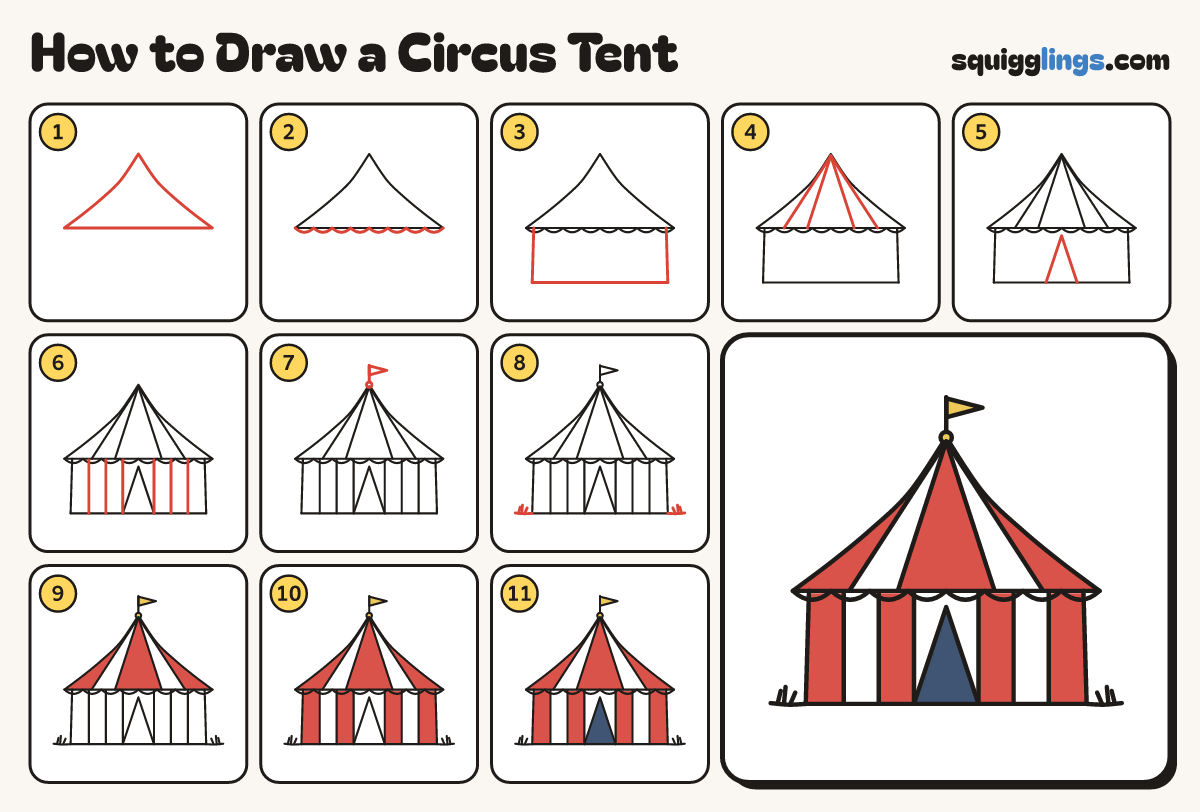
Draw a circus tent in 11 easy steps, about 8 minutes. Free, with a printable worksheet.
Each picture adds one red line. Draw that line, then scroll to the next picture. Rub out any dashed helper lines at the end. First up: big pointed roof.
Step 1: Big pointed roof
Above the middle, draw a tall pointed roof: a point at the top, swooping out to a wide flat bottom.
Step 2: The bumpy edge
Start at one end of the roof bottom. Draw a row of bumps hanging down, over to the other end.
Step 3: The walls
From just inside each end of the roof, draw a wall straight down, stopping low down. Join them.
Step 4: Roof stripes
From just under the roof point, draw 4 lines fanning down to the edge, 2 on each side.
Step 5: The doorway
Start on the bottom line, left of the middle. Slant up to a point under the roof, and back down.
Step 6: Wall stripes
On each side of the doorway, draw 3 lines from the bumpy edge down to the bottom line.
Tip Space them evenly. The last line on each side touches a corner of the doorway.
Step 7: Flag on top
Draw a little ball on the roof point. From it, draw a pole up, stopping just above. Add a flag.
Step 8: The ground
From each bottom corner, draw the ground line out a little way. Add 3 grass blades just inside each end.
Step 9: Yellow flag, red roof
Colour the flag and the little ball yellow, then the middle roof stripe and the 2 outside stripes red.
Step 10: Red wall stripes
Colour every other wall stripe red, starting from each outside corner, so both stripes by the door are red.
Step 11: Navy door
Colour the doorway dark navy blue. Go over your lines and your circus tent is done!
Your finished drawing
Follow the steps above and this is where you end up: a circus tent, drawn by you.
Every step in one picture