Watch it draw itself · tap to replay
How to Draw an Atlas Moth
Draw an Atlas moth in 11 easy steps, about 8 minutes. Free, with a printable worksheet.
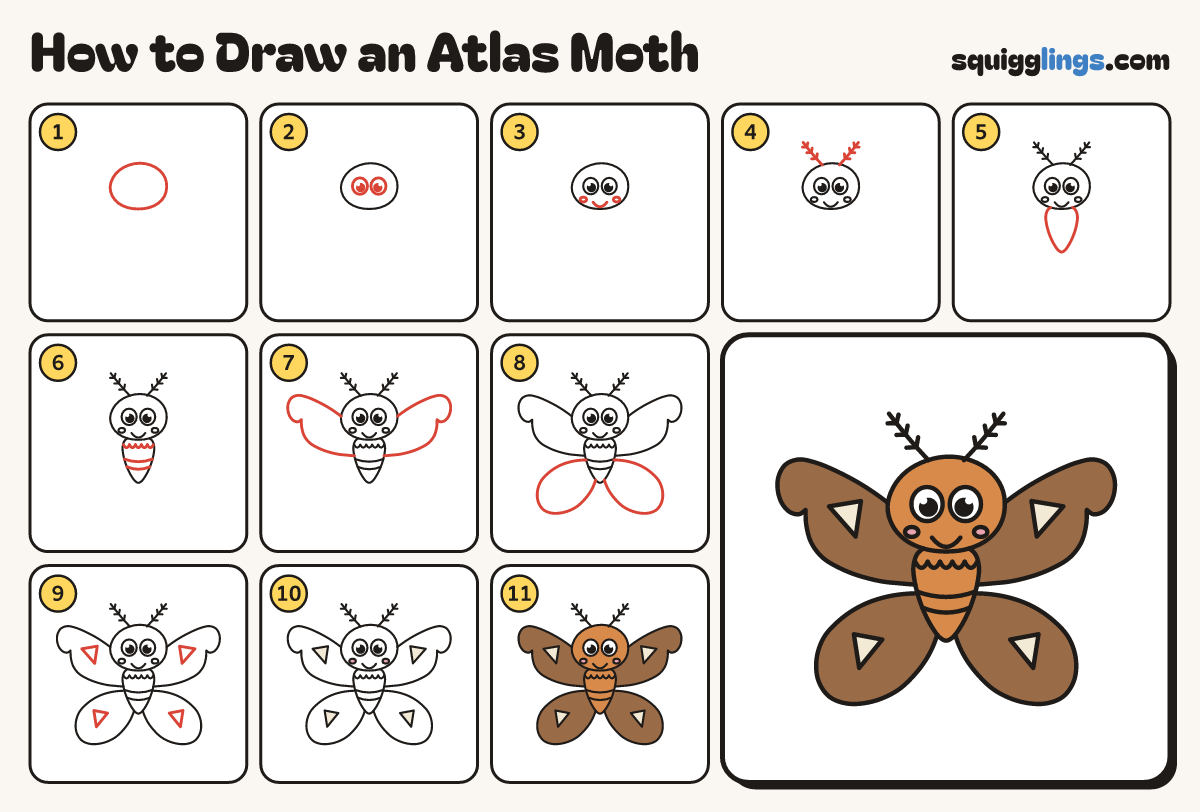
Each picture adds one red line. Draw that line, then scroll to the next picture. Rub out any dashed helper lines at the end. First up: the head.
Step 1: The head
Draw a big egg head in the middle, a bit high, wider than tall. Leave room each side for wings.
Step 2: Two big eyes
Halfway down the head draw 2 big eggy eyes. Add a black dot and white shine in each.
Step 3: Smile and cheeks
Draw a wide U smile from eye to eye. Add a small round cheek under each eye.
Step 4: Feather antennae
Start on the head, draw 2 lines up and out. Stop high above the eyes. Add 3 V ticks each.
Tip Moth antennae look like little feathers.
Step 5: A fat fuzzy body
Under the head draw a plump teardrop body, round at the top and ending in a soft point.
Tip A moth's body is fatter and fuzzier than a butterfly's.
Step 6: Fuzzy collar and stripes
Across the top of the body, side to side, draw 5 soft bumps hanging down. Add 2 smile curves below.
Step 7: Huge top wings
From the chest sweep a huge wing up and out. Hook the tip down, then come back to the tummy.
Tip The round tip curls down like a hook. Leave paper past the tip.
Step 8: Wide bottom wings
Under each top wing draw a big rounded wing, bigger than a hand, from the tummy and back to it.
Step 9: Triangle windows
In each top wing draw a small triangle pointing out. Draw a smaller one in each bottom wing.
Tip The triangles are clear windows in the wings.
Step 10: Pink cheeks, cream windows
Go over your lines. Colour the cheeks pink and the triangle windows cream. Leave the eyes white.
Step 11: Ginger body, brown wings
Colour the head and body ginger, around the cheeks. Colour all 4 wings brown, around the windows.
Your finished drawing
Follow the steps above and this is where you end up: an Atlas moth, drawn by you.
Every step in one picture