Watch it draw itself · tap to replay
How to Draw an Apple Slice
Draw an apple slice in 10 easy steps, about 8 minutes. Free, with a printable worksheet.
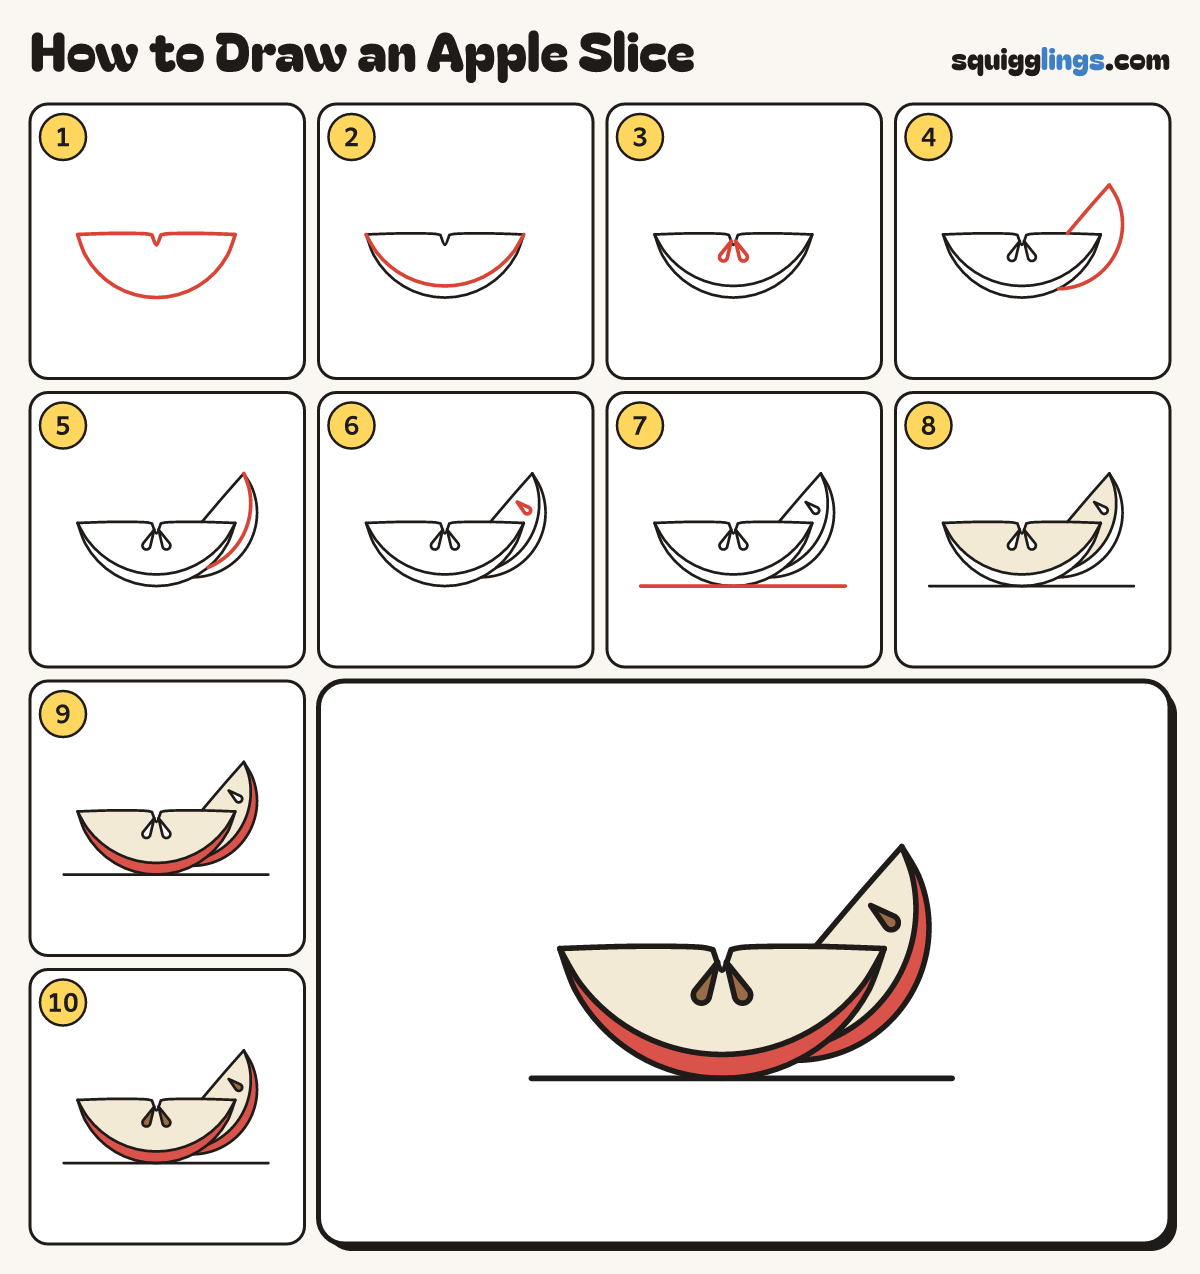
Each picture adds one red line. Draw that line, then scroll to the next picture. Rub out any dashed helper lines at the end. First up: the slice.
Step 1: The slice
Draw a wedge lying on its back: a flat top with a tiny V notch, and a shallow curve underneath.
Tip Like a smile lying on its back.
Step 2: The skin
From the left tip draw a curve inside the round one, thickest at the bottom, stopping at the right tip.
Step 3: Two seeds
Under the notch draw 2 little teardrop seeds, pointing up and leaning apart.
Step 4: A slice behind
Behind the slice, on the right, draw a smaller wedge tilted up. Only draw what you can see.
Step 5: Its skin
Start at the back slice's top tip. Draw its skin line inside the round edge; stop at the front slice.
Step 6: Its seed
Inside the back slice draw 1 little teardrop seed, pointing to its flat edge.
Step 7: The ground
Draw a ground line under the slices, just touching the front slice, from well left to well right.
Step 8: Cream flesh
Go over your lines, then colour the cut faces of both slices cream, around the seeds.
Step 9: Red skin
Colour the skin strip of both slices red.
Step 10: Brown seeds
Colour the seeds brown.
Your finished drawing
Follow the steps above and this is where you end up: an apple slice, drawn by you.
Every step in one picture