Watch it draw itself · tap to replay
How to Draw an Apple Core
Draw an apple core in 10 easy steps, about 8 minutes. Free, with a printable worksheet.
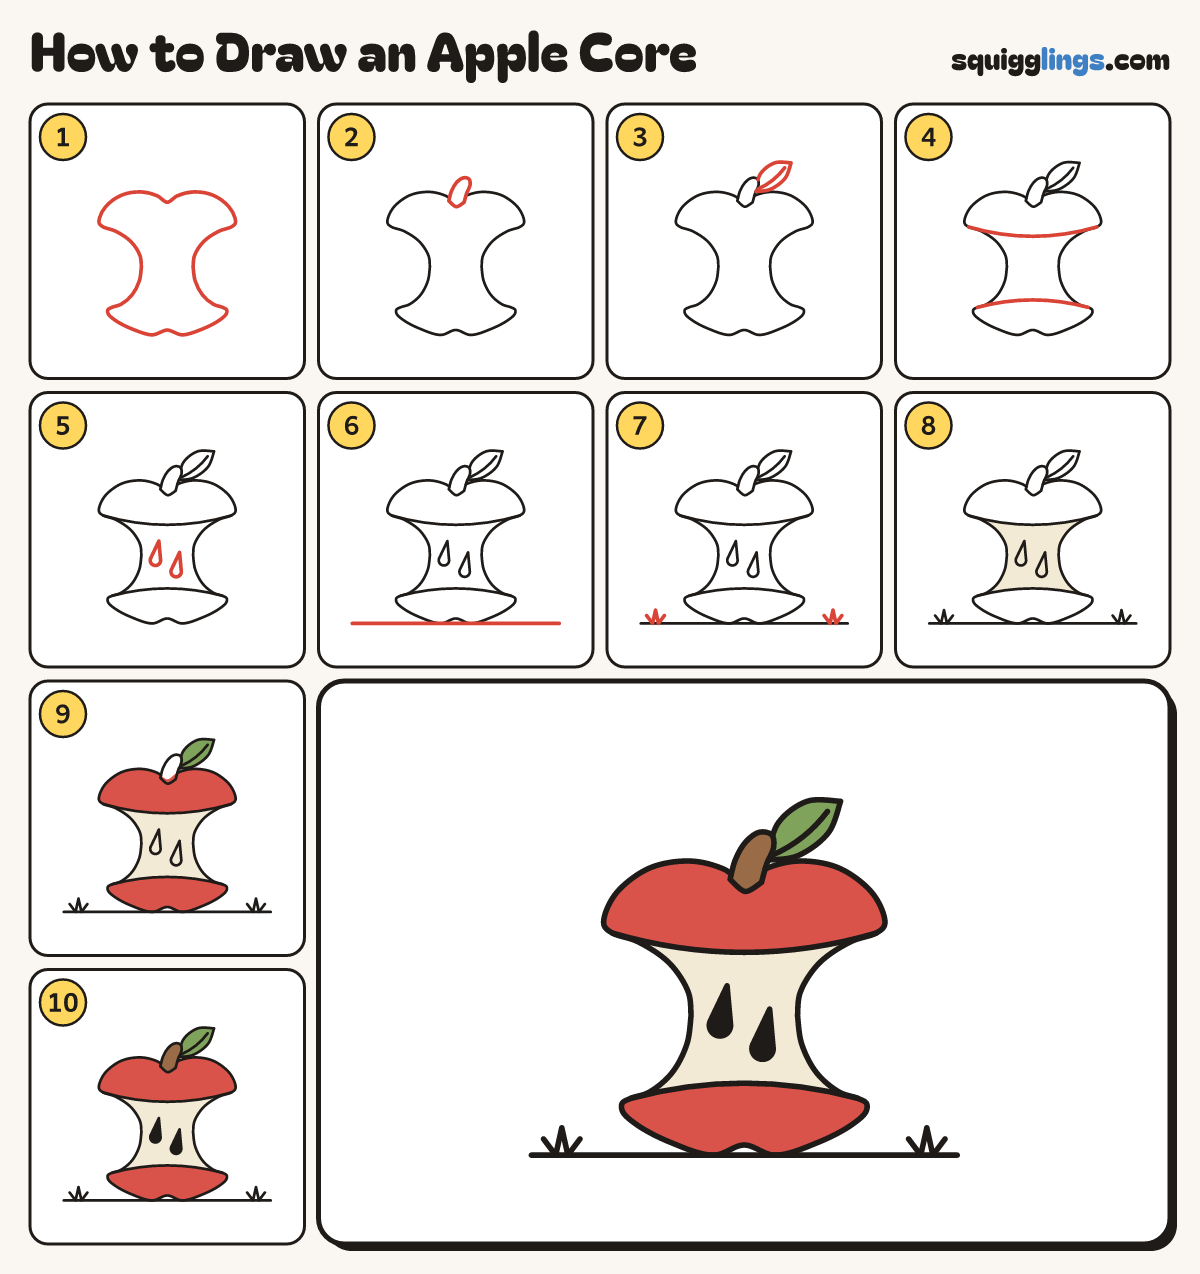
Each picture adds one red line. Draw that line, then scroll to the next picture. Rub out any dashed helper lines at the end. First up: the core.
Step 1: The core
Start at a dip on top. Draw a round shoulder, a big bite and a round bottom on each side.
Tip Keep the corners round where the top and the bottom meet a bite.
Step 2: The stem
From the dip, draw a short stem leaning right, fat at the bottom and thin at the top.
Step 3: The leaf
From the stem, draw a pointy leaf leaning up to the right. Add a line down its middle.
Step 4: Skin lines
Under the top, draw a smile from bite across to bite. Draw a hill near the bottom the same way.
Step 5: Two seeds
In the middle of the waist, draw 2 little teardrops, points up and leaning right, the left one higher.
Step 6: The ground
Draw a long ground line under the core, just touching the bottom bumps.
Step 7: Grass tufts
At each end of the ground, draw a little tuft of 3 pointy grass blades.
Step 8: Cream middle
Colour the eaten middle cream, going around the seeds.
Step 9: Red skin, green leaf
Colour the top and bottom caps red, between the outline and the skin lines. Colour the leaf green.
Step 10: Brown stem, black seeds
Colour the stem brown and the seeds black. Go over your lines and your apple core is done!
Your finished drawing
Follow the steps above and this is where you end up: an apple core, drawn by you.
Every step in one picture