Watch it draw itself · tap to replay
How to Draw an Anchor
Draw an anchor in 11 easy steps, about 8 minutes. Free, with a printable worksheet.
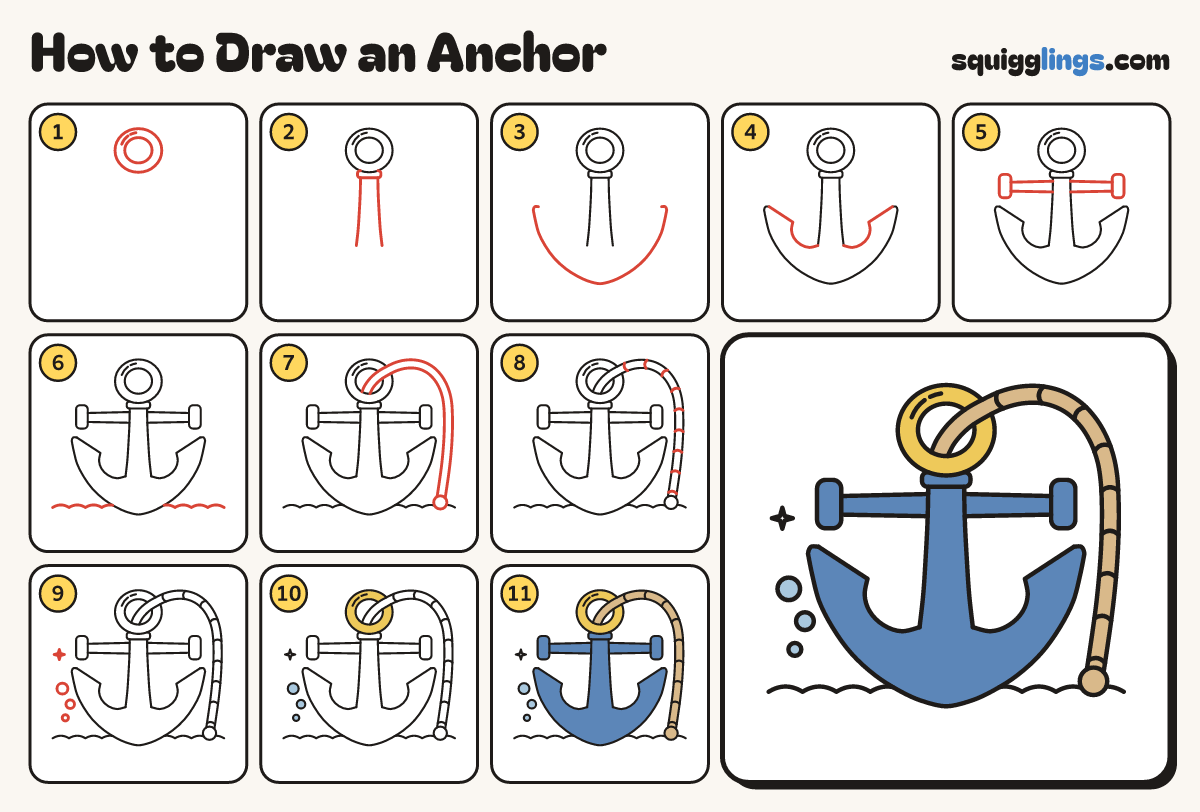
Each picture adds one red line. Draw that line, then scroll to the next picture. Rub out any dashed helper lines at the end. First up: the ring.
Step 1: The ring
Near the top, draw a plum-sized oval with a big oval hole. Add 2 shine lines at its top left.
Step 2: Collar and stem
Under the ring draw a short collar. From it draw 2 long lines straight down, and stop 2 rings lower.
Tip Leave the bottom open.
Step 3: The big U
Start far left, halfway down the stem. Draw a big U under the stem and stop far right.
Tip The U dips to a soft point right under the stem.
Step 4: Arrow points
On each side, curve from the stem bottom out to a point, then straight up to the U tip.
Step 5: The crossbar
Under the collar draw a bar out from each side of the stem, ending in a tall knob.
Step 6: Sea floor
Draw a wavy sand line from each edge in to the anchor's point, so it looks sunk in.
Step 7: The rope
Start low in the hole. Draw a rope up over the ring, humping down to a knot on the sand.
Tip The rope is 2 lines a finger apart. Rub out the ring lines under it.
Step 8: Rope twists
Draw 9 short curves across the rope from the ring down to the knot, all bowing the same way.
Step 9: Bubbles and sparkle
Draw 3 bubbles floating up on the left, smallest at the bottom. Add a tiny sparkle beside the left knob.
Step 10: Yellow ring, sky bubbles
Colour the ring yellow, leaving the rope and hole white. Colour the 3 bubbles sky blue.
Step 11: Tan rope, blue anchor
Colour the rope and knot tan. Colour the stem, collar, U, points, crossbar and knobs blue. Go over your lines.
Your finished drawing
Follow the steps above and this is where you end up: an anchor, drawn by you.
Every step in one picture