Watch it draw itself · tap to replay
How to Draw an Air Plant
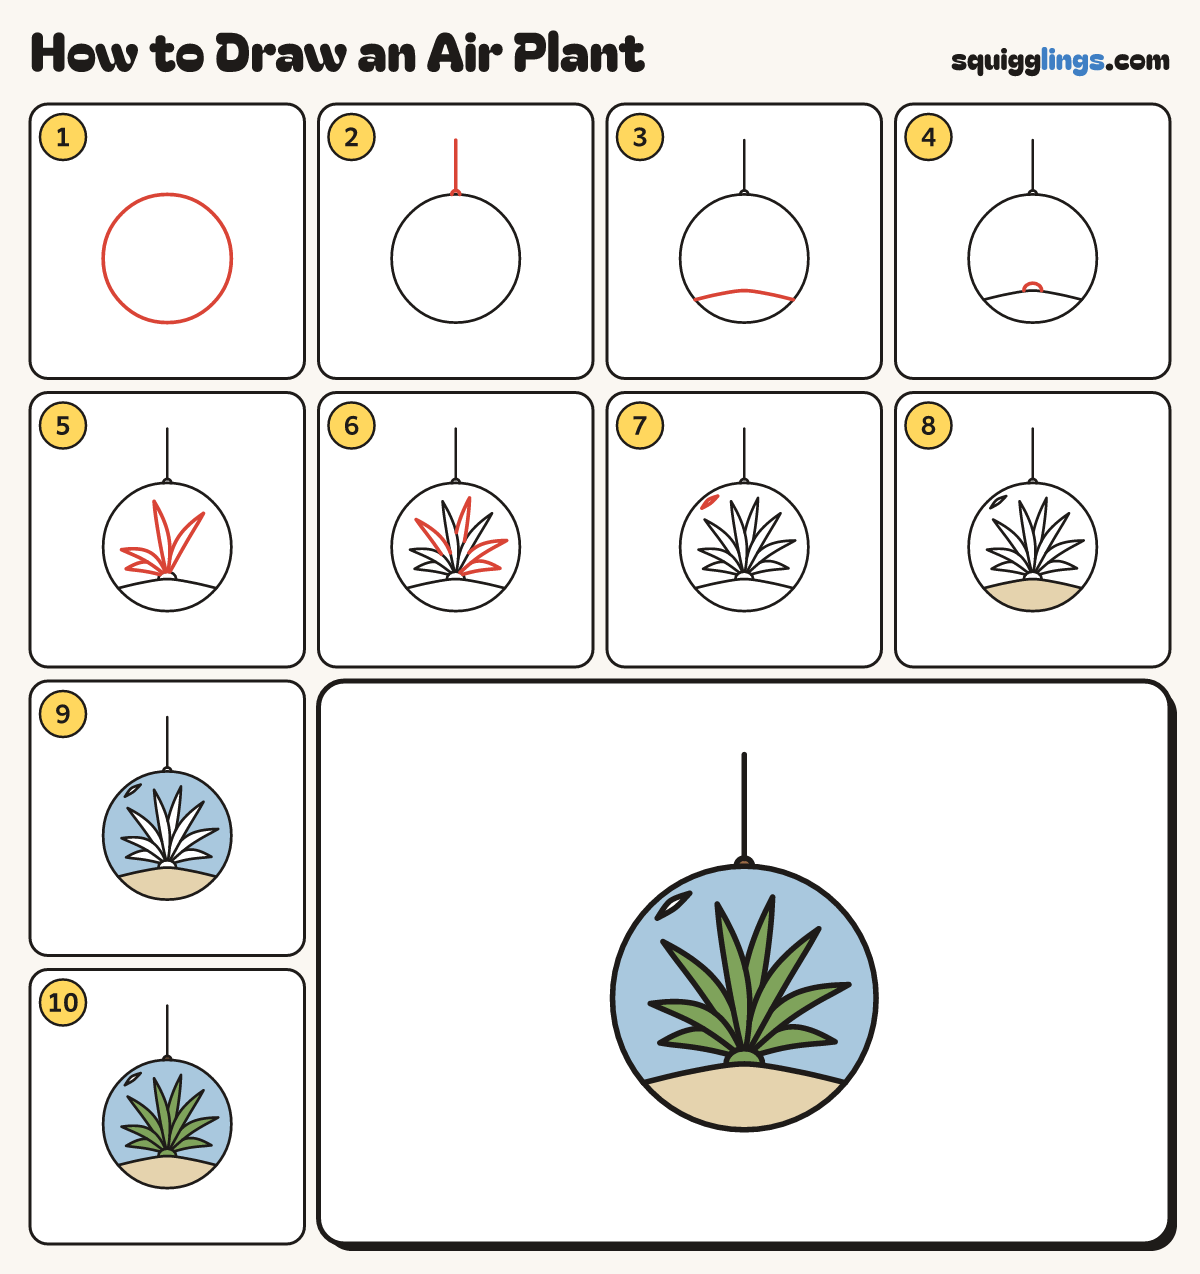
Draw an air plant in 10 easy steps, about 8 minutes. Free, with a printable worksheet.
Each picture adds one red line. Draw that line, then scroll to the next picture. Rub out any dashed helper lines at the end. First up: the globe.
Step 1: The globe
In the middle draw a big circle, as big as your fist, for the glass globe.
Tip Air plants need no soil: they drink from the air.
Step 2: String and knot
From the globe's top draw a string up nearly to the top, with a tiny round knot at the globe.
Step 3: The sand
Near the bottom of the globe draw a low sand hill, starting and stopping on the globe's edge.
Step 4: A little bulb
Start on the sand hill, draw a small half-circle bump for the plant's bulb, and stop on the sand.
Step 5: 4 blades
From the bulb draw 4 thin curving leaves fanning up like spiky grass, each with a fine point.
Step 6: 4 more blades
Draw 4 more thin leaves in the gaps, tucked behind the first ones, 2 of them low on the right.
Step 7: A shine
Inside the top left of the globe draw a thin curved sliver following the edge, for the glass shine.
Step 8: Sandy bottom
Go over your lines, then colour the sand a light sand-yellow.
Step 9: Glass tint
Colour the glass light sky blue around the plant and the sand. Leave the shine white.
Step 10: Green leaves
Colour the bulb and the leaves green and the knot brown. Your air plant is done!
Your finished drawing
Follow the steps above and this is where you end up: an air plant, drawn by you.
Every step in one picture