Watch it draw itself · tap to replay
How to Draw an Advent Calendar
Draw an Advent calendar in 13 easy steps, about 10 minutes. Free, with a printable worksheet.
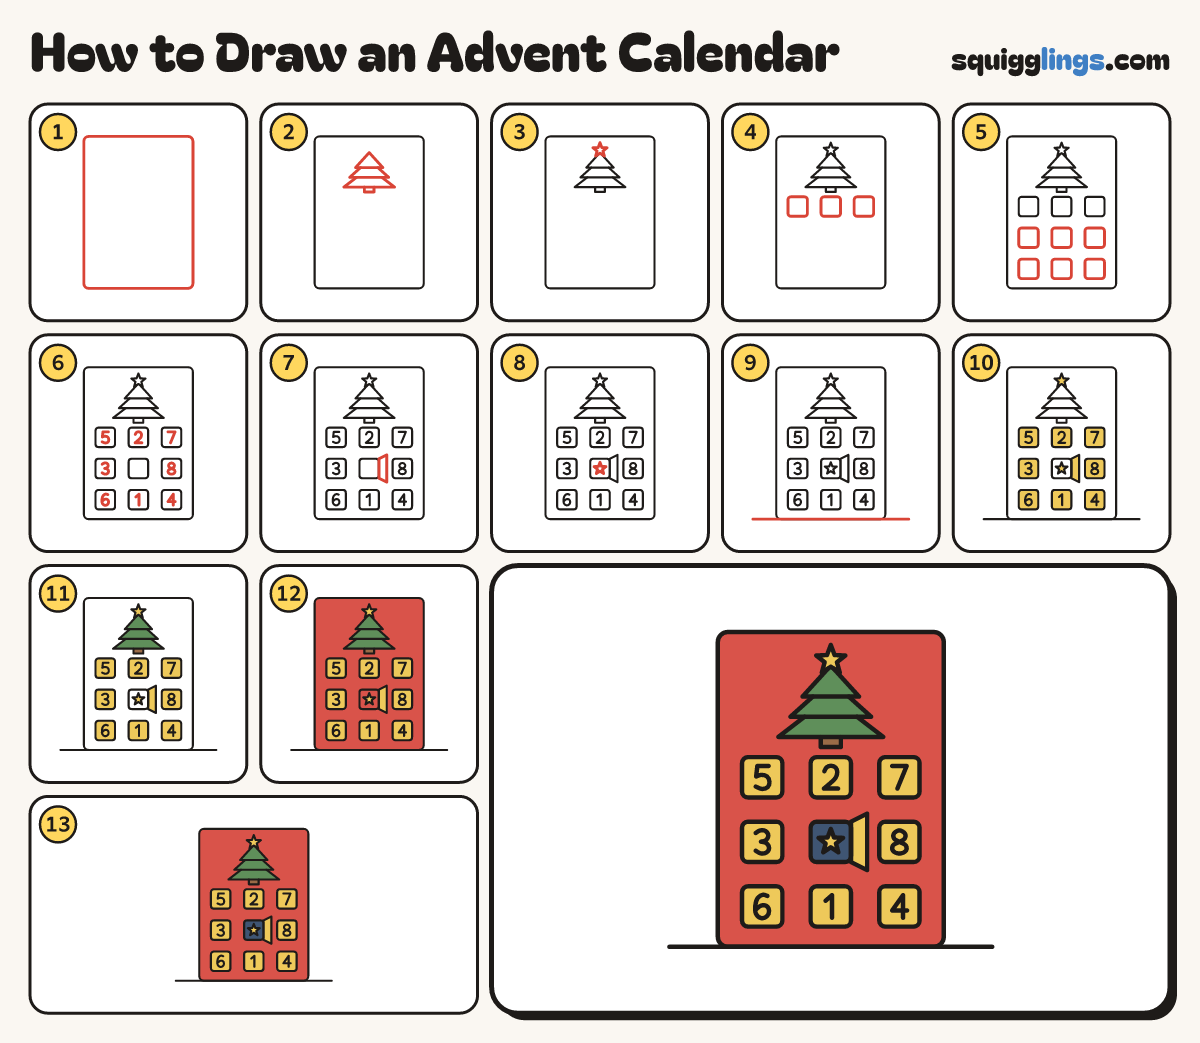
Each picture adds one red line. Draw that line, then scroll to the next picture. Rub out any dashed helper lines at the end. First up: tall board.
Step 1: Tall board
In the middle of your paper draw a tall box with soft corners, taller than it is wide.
Step 2: Christmas tree
Near the top of the board draw 3 triangles, each wider one tucked under the last, and a box trunk.
Step 3: Star on top
On the very tip of the tree draw a 5-point star.
Step 4: Top row of doors
Under the tree draw a row of 3 little square doors, a finger apart.
Step 5: Two more rows
Under that row draw 2 more rows of 3 doors, in neat columns.
Step 6: Numbers
Write a big number on every door except the middle one, like 5, 2 and 7.
Step 7: Open door
On the right side of the middle door draw a flap swung open, taller at its far edge.
Step 8: Surprise star
Inside the open doorway draw a little 5-point star.
Step 9: Ground line
Start left of the board and draw a straight ground line along its bottom, stopping past the right side.
Step 10: Yellow doors
Colour the 8 closed doors, the open flap and the 2 stars yellow.
Step 11: Green tree
Colour the tree green around the star, and its trunk brown.
Step 12: Red board
Colour the board red around the tree and all the doors.
Step 13: Dark doorway
Go over your lines, then colour the open doorway dark blue around the little star.
Your finished drawing
Follow the steps above and this is where you end up: an Advent calendar, drawn by you.
Every step in one picture